
# Quickstart
Sign up for a free Pipedream account (no credit card required) (opens new window) and complete this quickstart guide to learn the basic patterns for workflow development:
# Create a new workflow
First, create a new workflow by clicking New from https://pipedream.com/workflows (opens new window):

# Add an HTTP / Webhook trigger
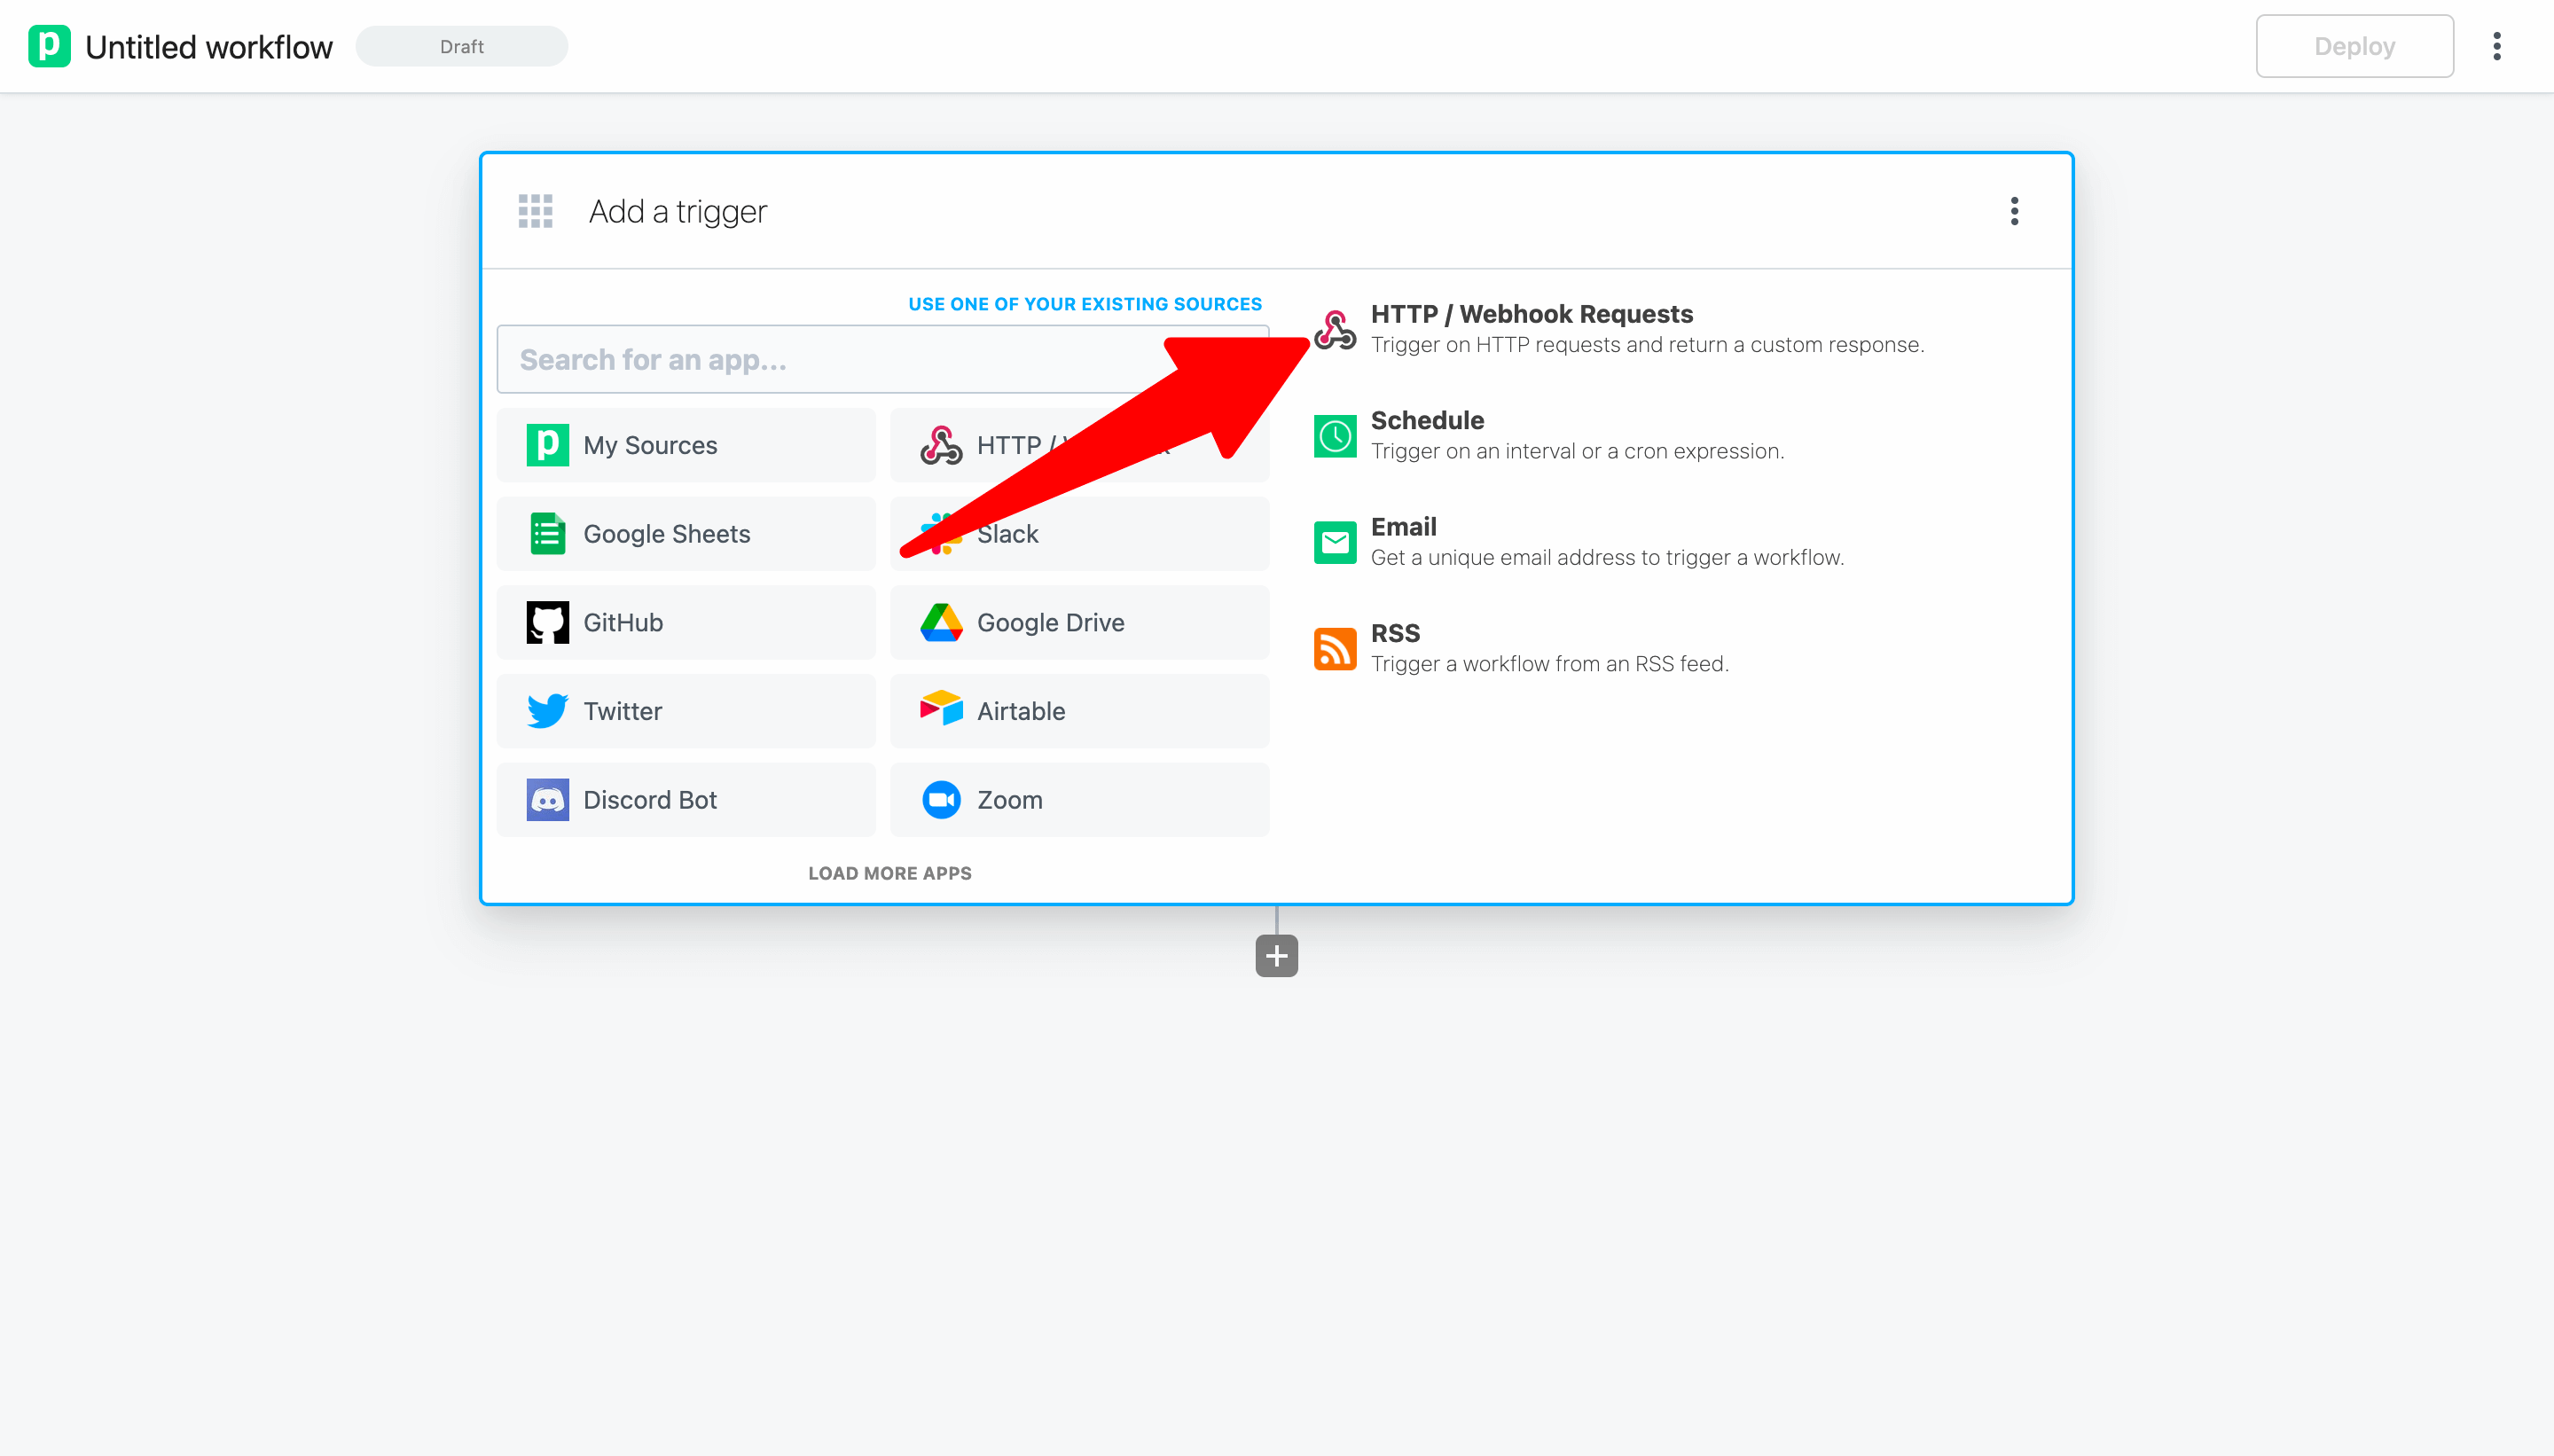
Pipedream will launch the workflow builder. For this example, select the HTTP / Webhook Requests trigger.
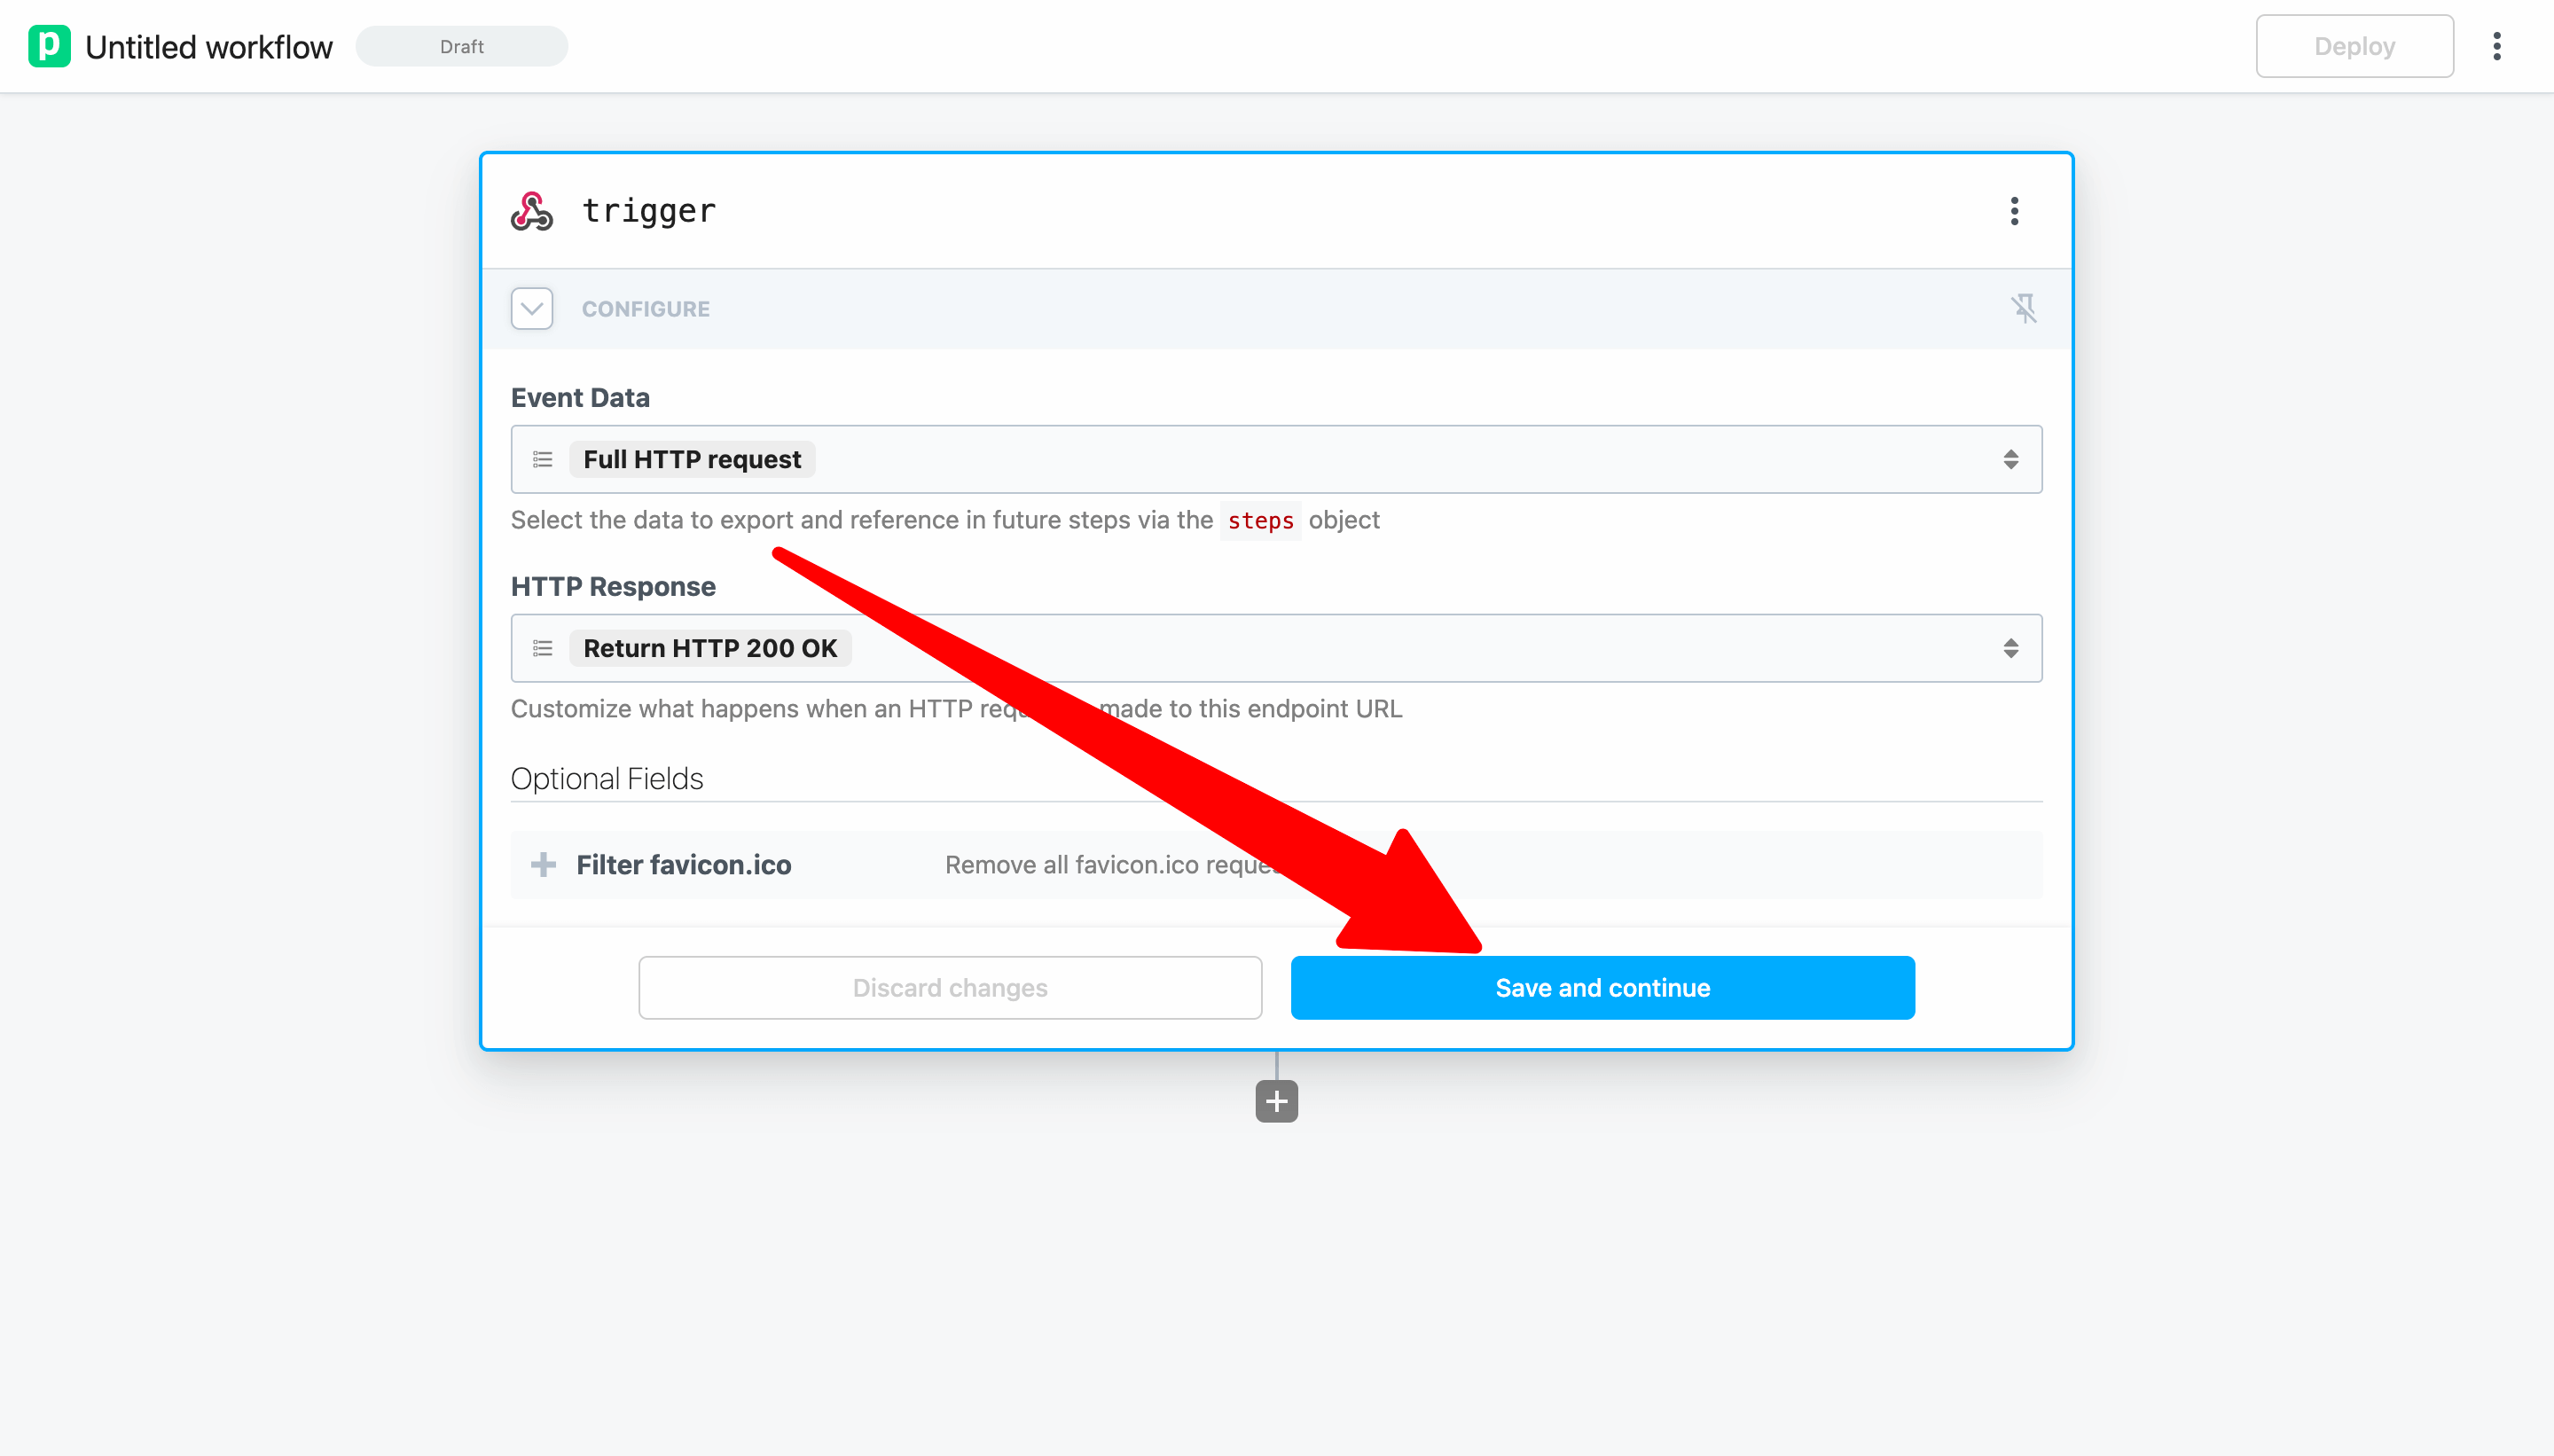
Click Save and continue to accept the default settings.
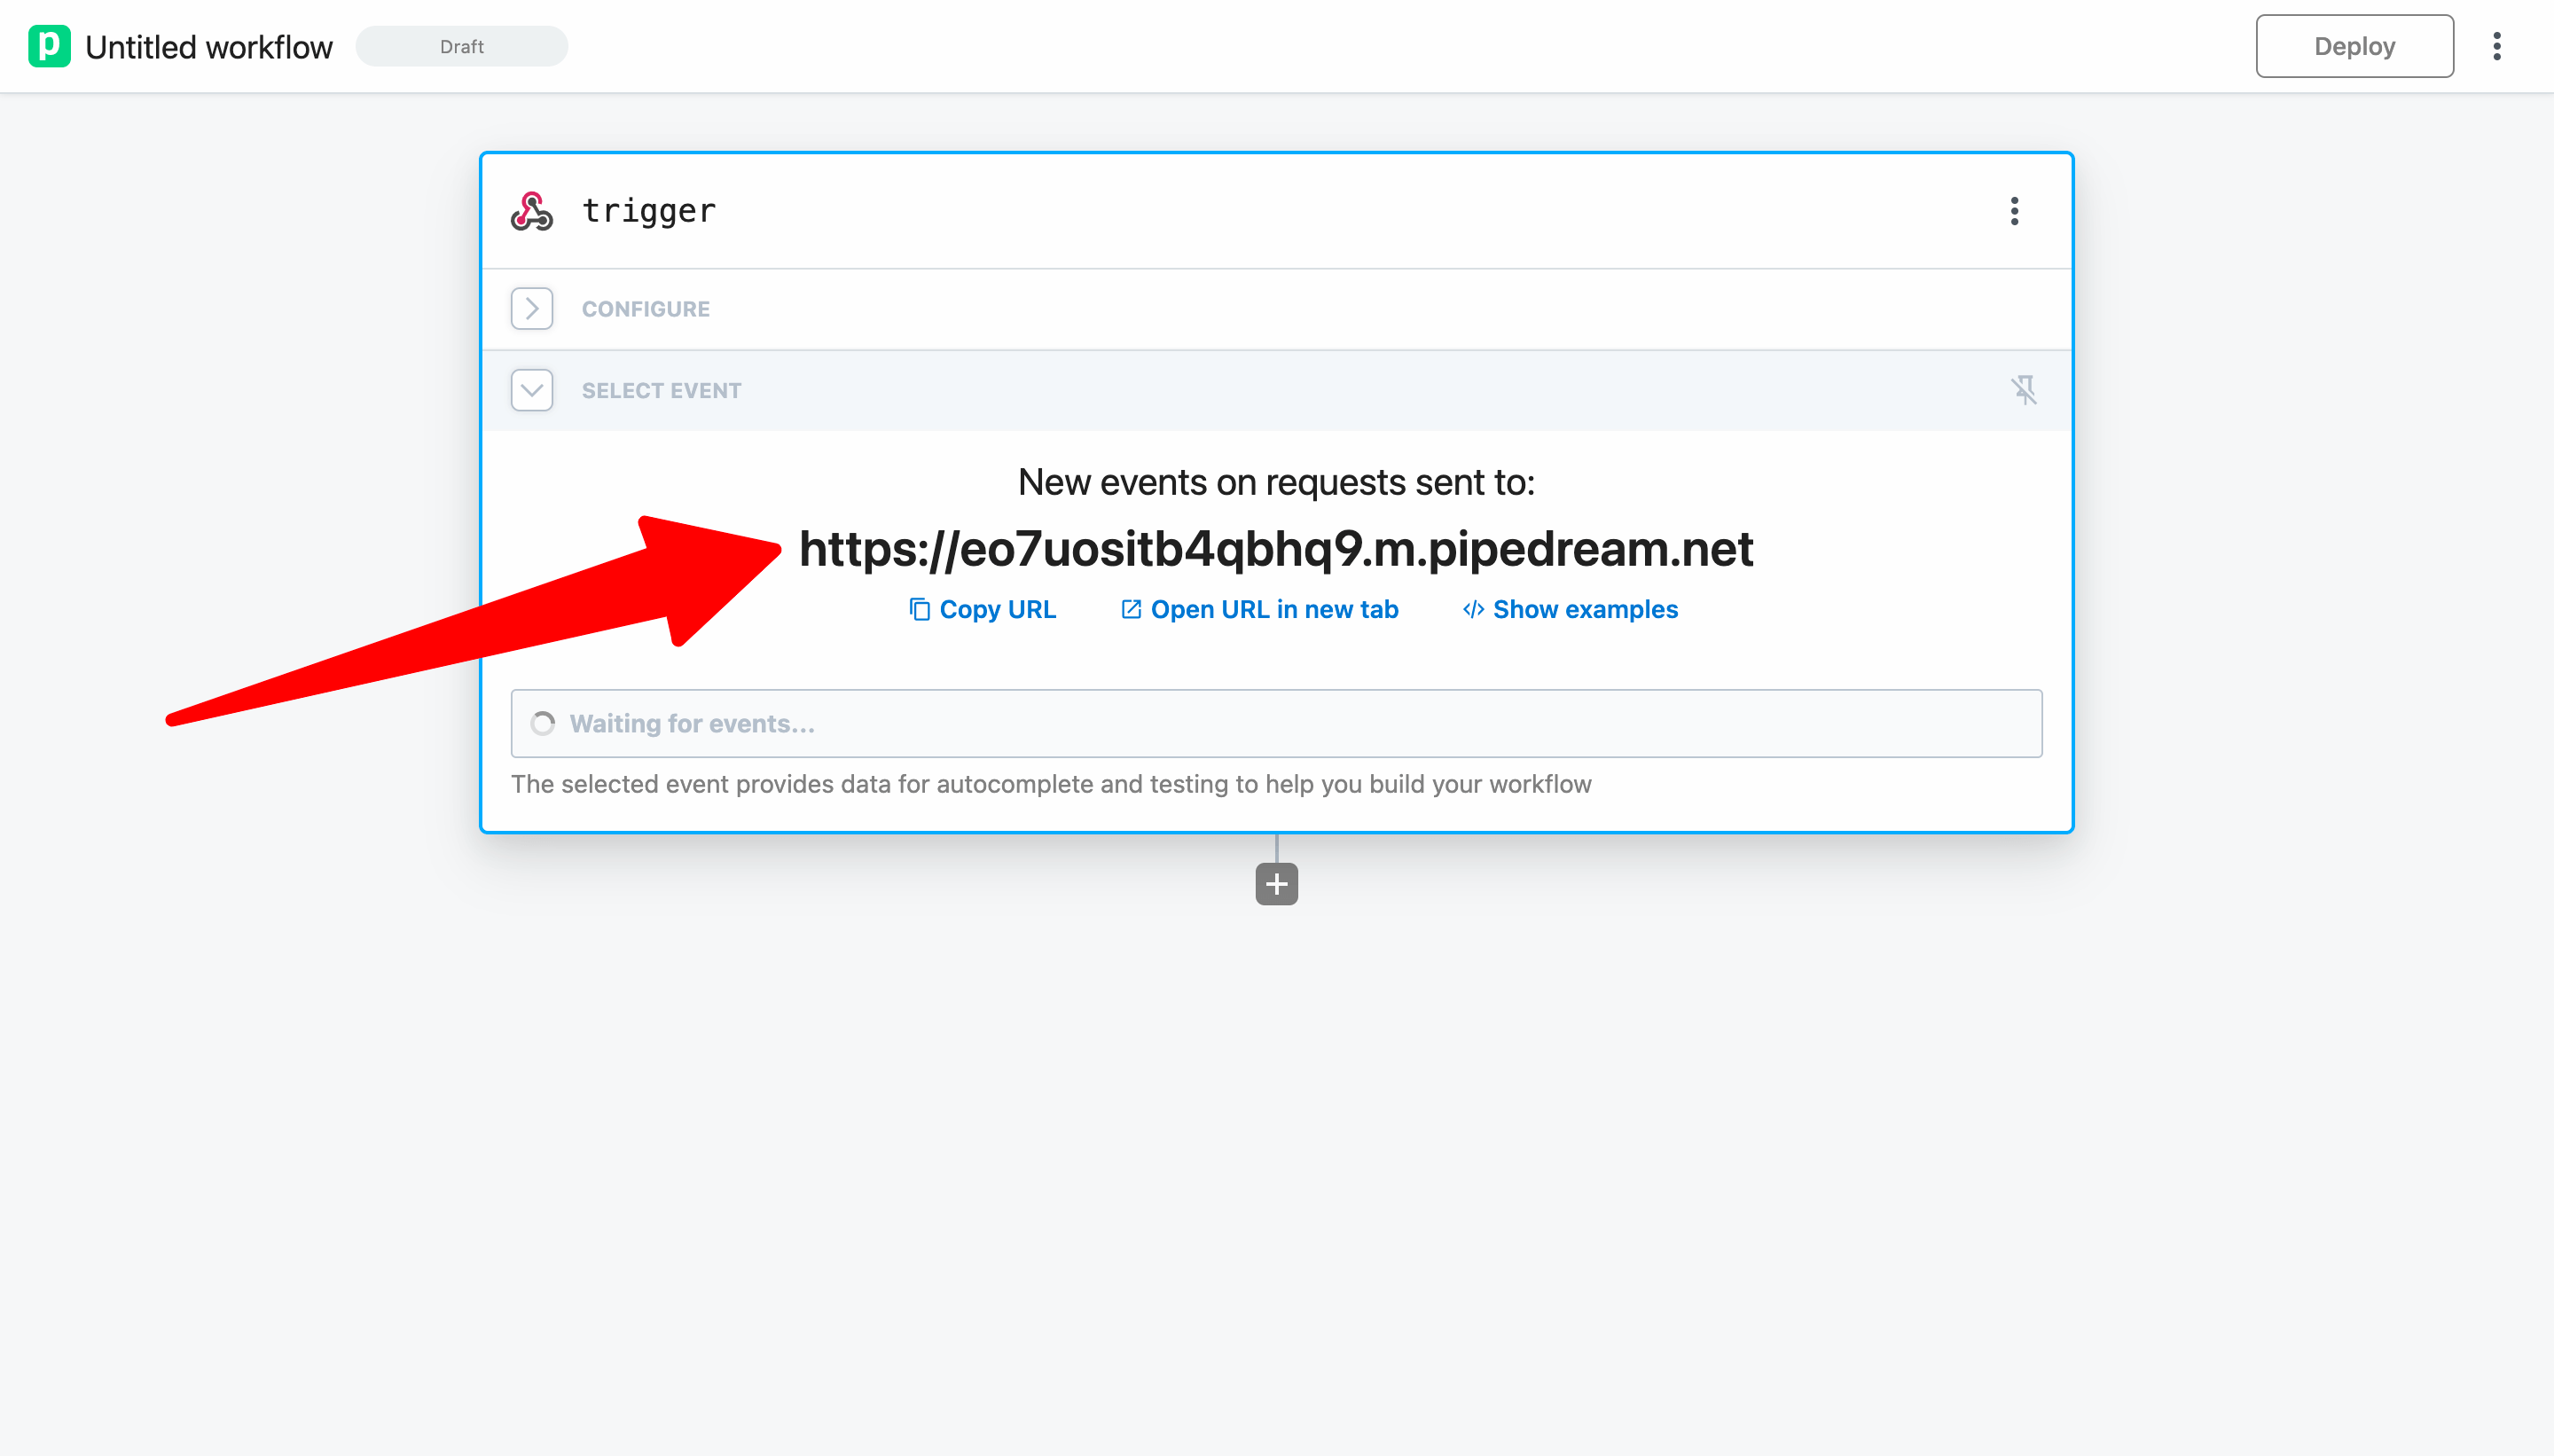
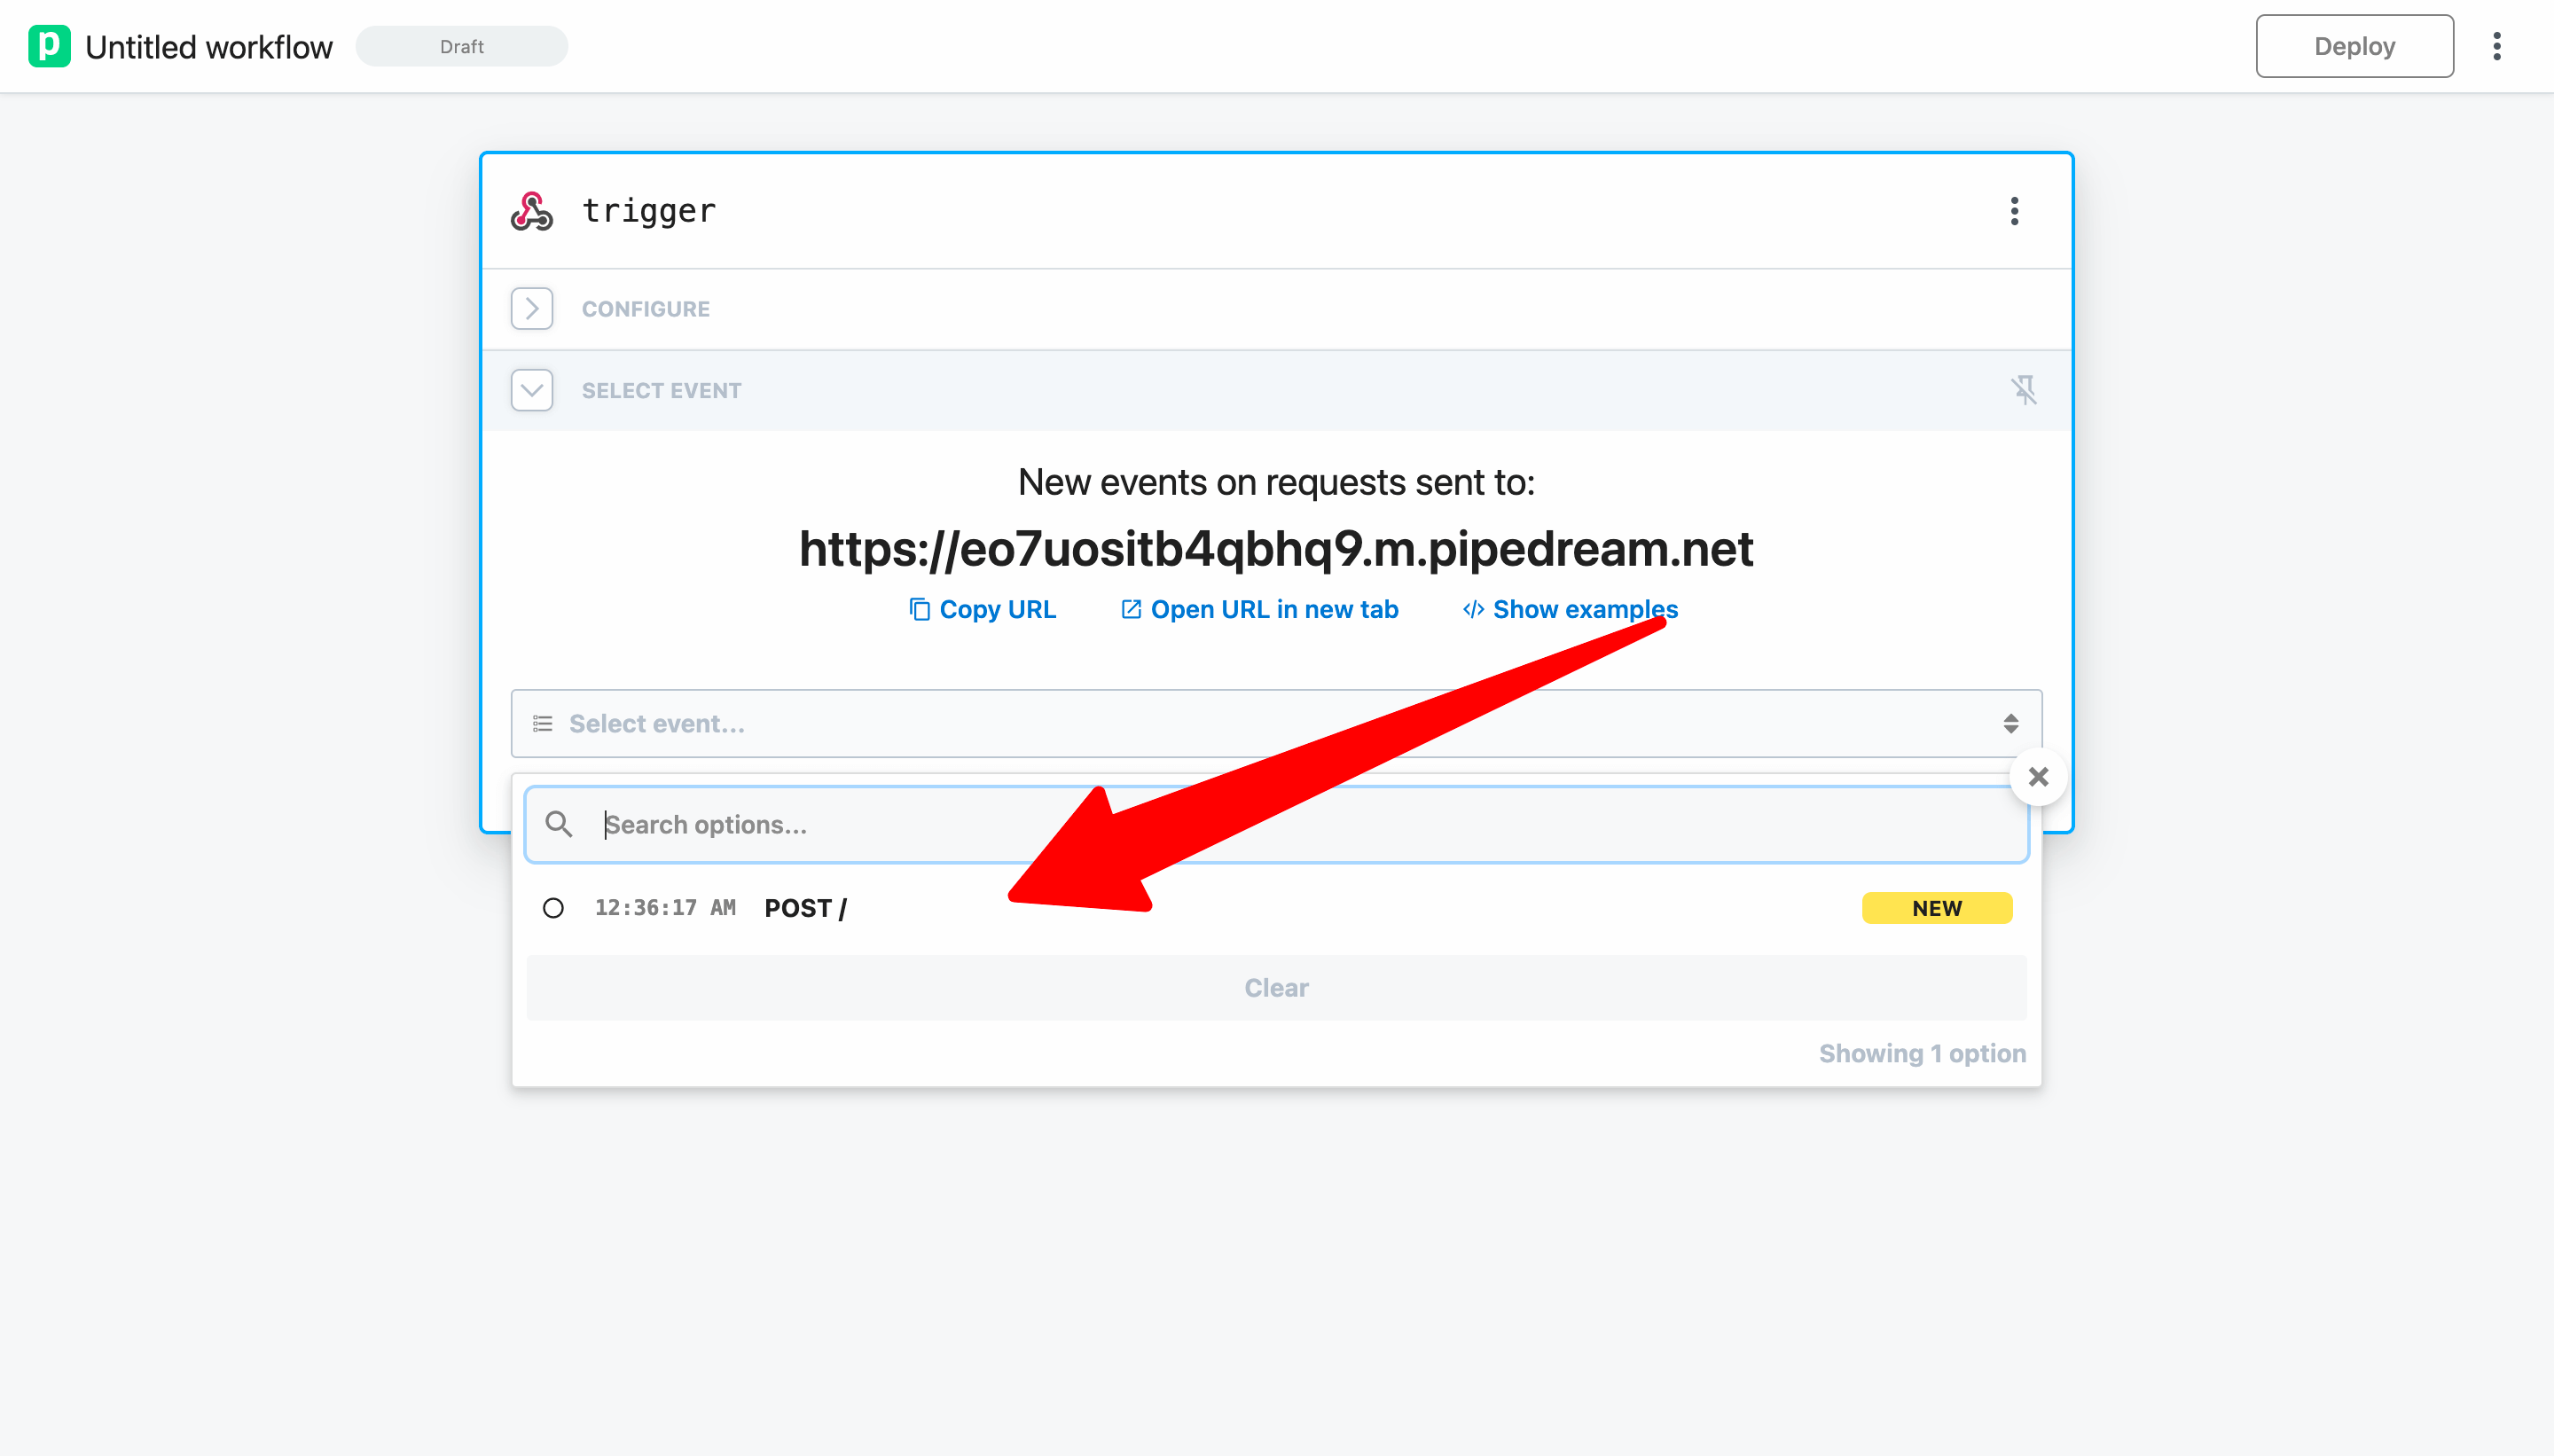
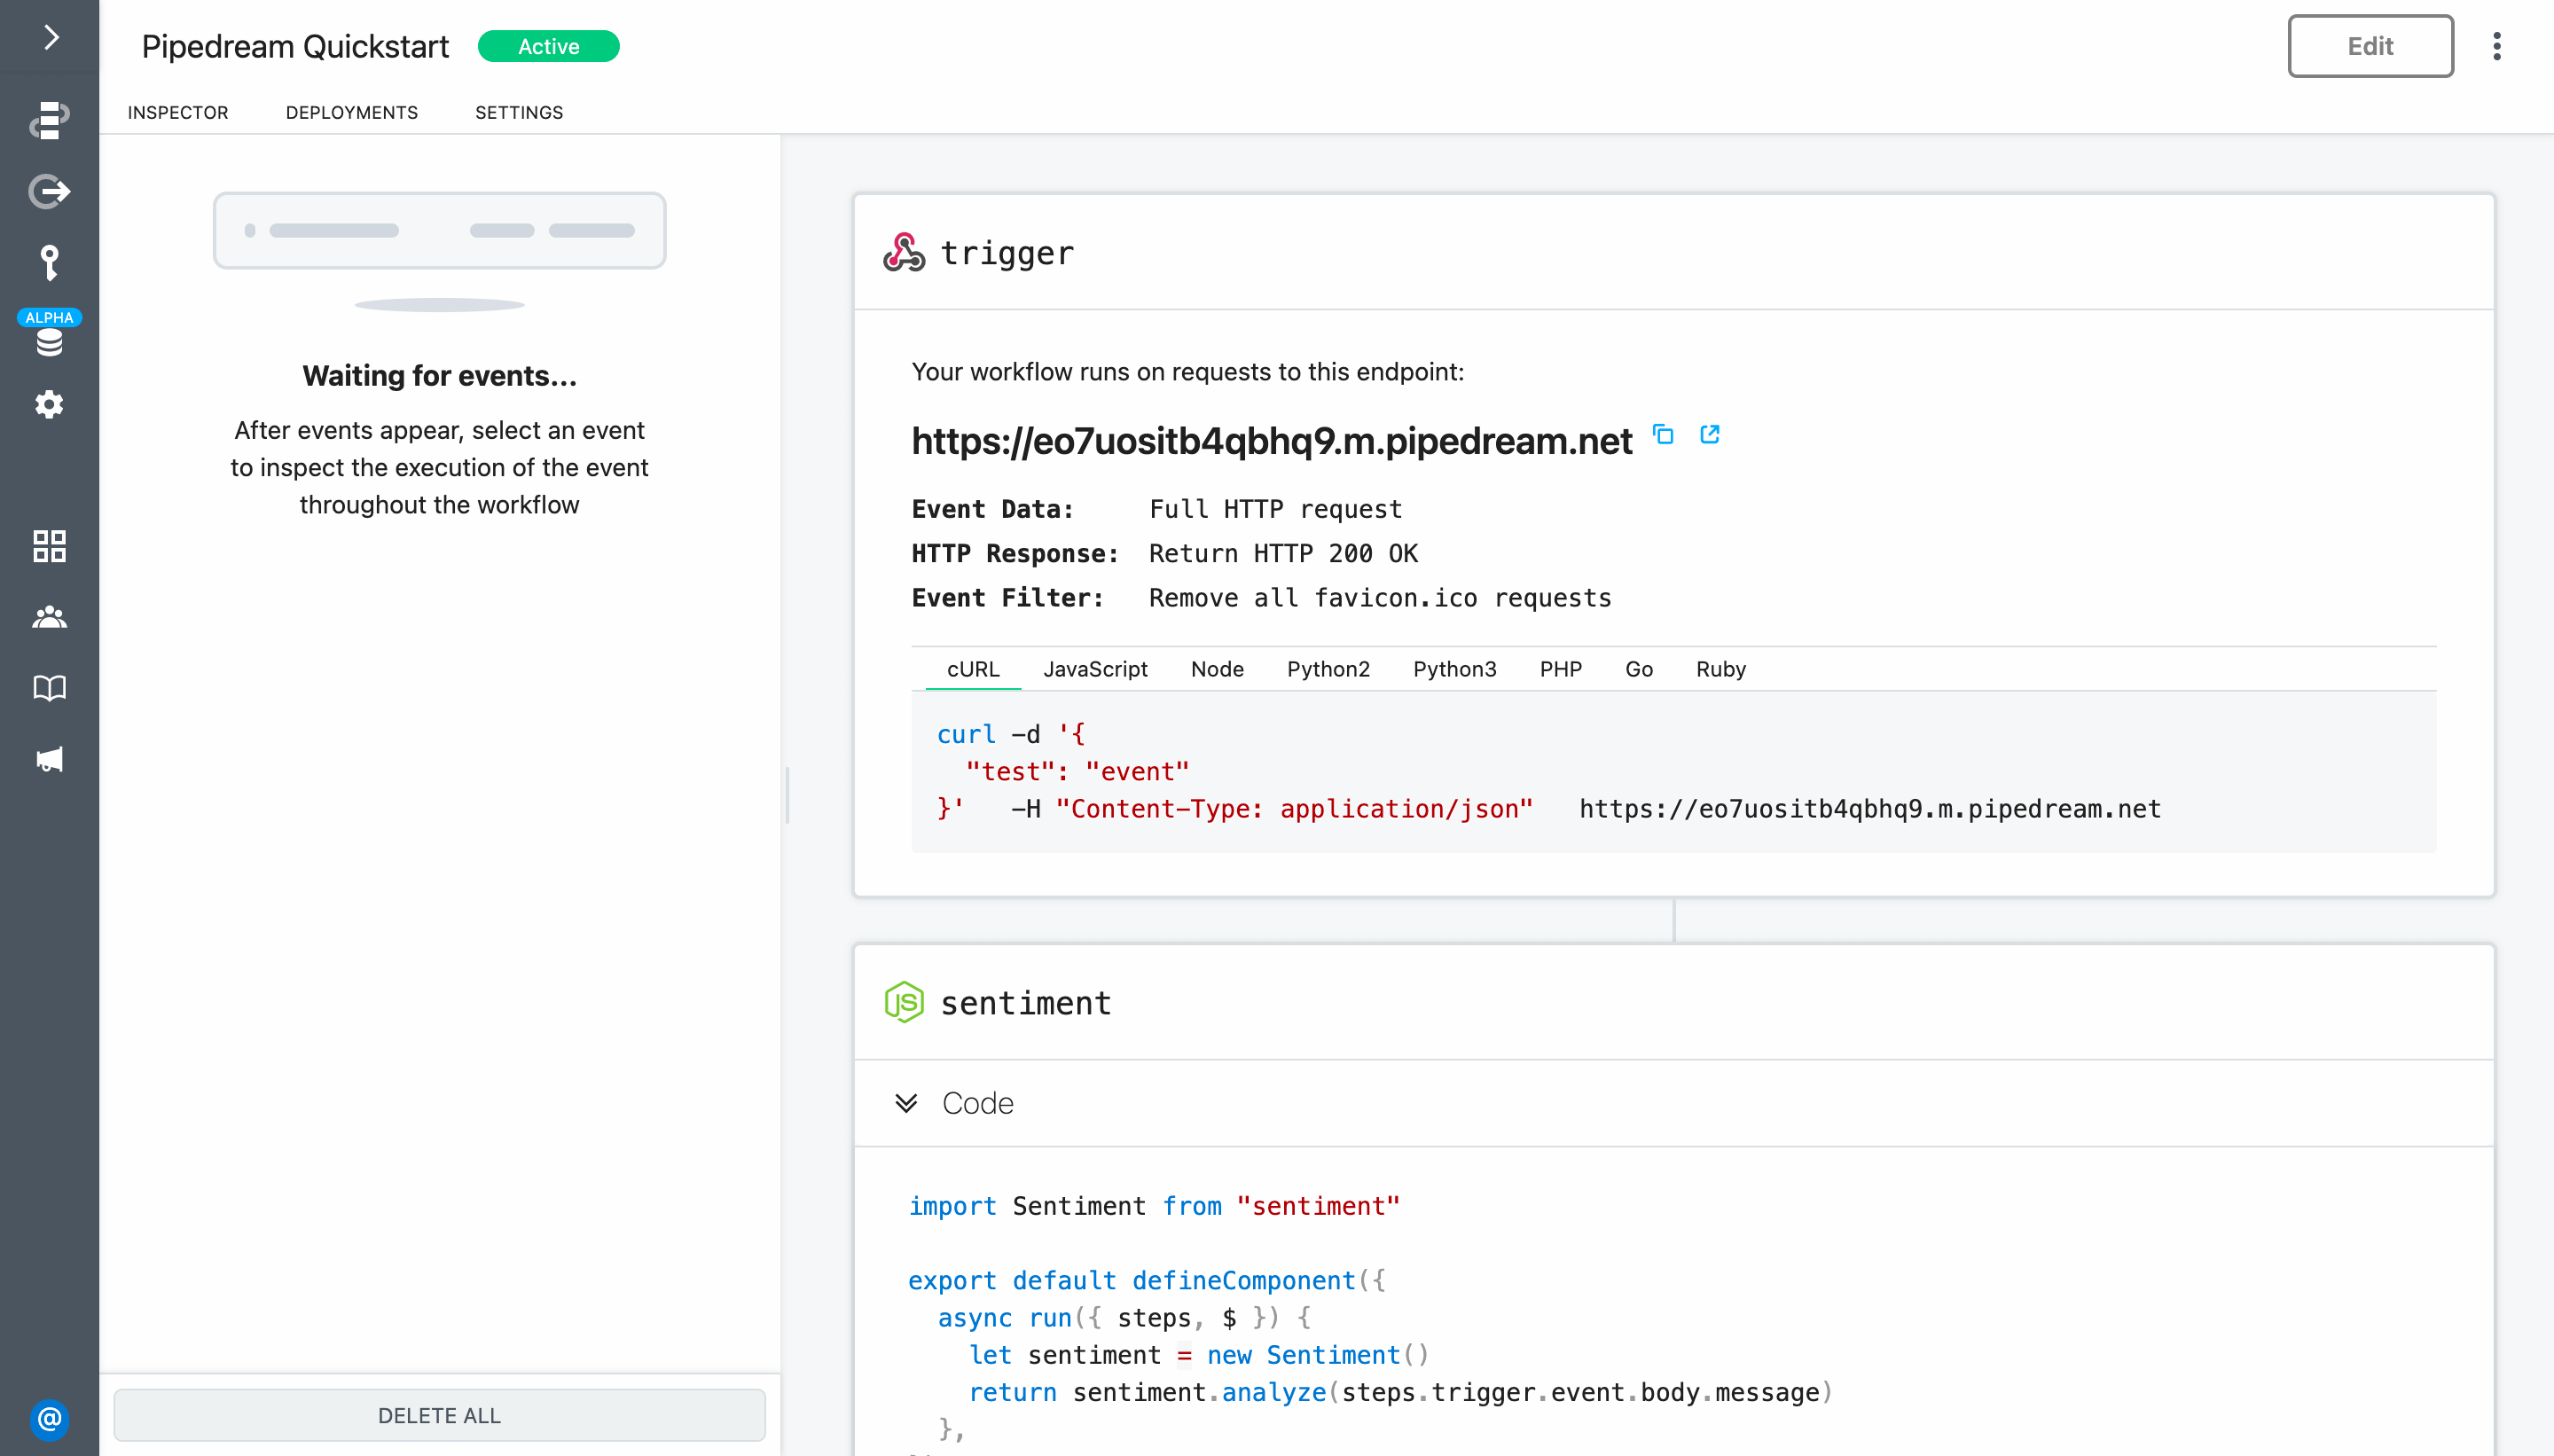
Pipedream will generate a unique URL to trigger this workflow.
# Send data to the workflow
Next, send data to the trigger URL to help you build the workflow. For this example, send an HTTP POST request with a JSON body containing a simple message.
{
  "message": "Pipedream is awesome!"
}
You can edit and run the following cURL command (or use your favorite HTTP tool).
curl -d '{
  "message": "Pipedream is awesome!"
}'   -H "Content-Type: application/json"   YOUR-TRIGGER-URL-GOES-HERE
When Pipedream receives the request, it will be available to select from the event selector.
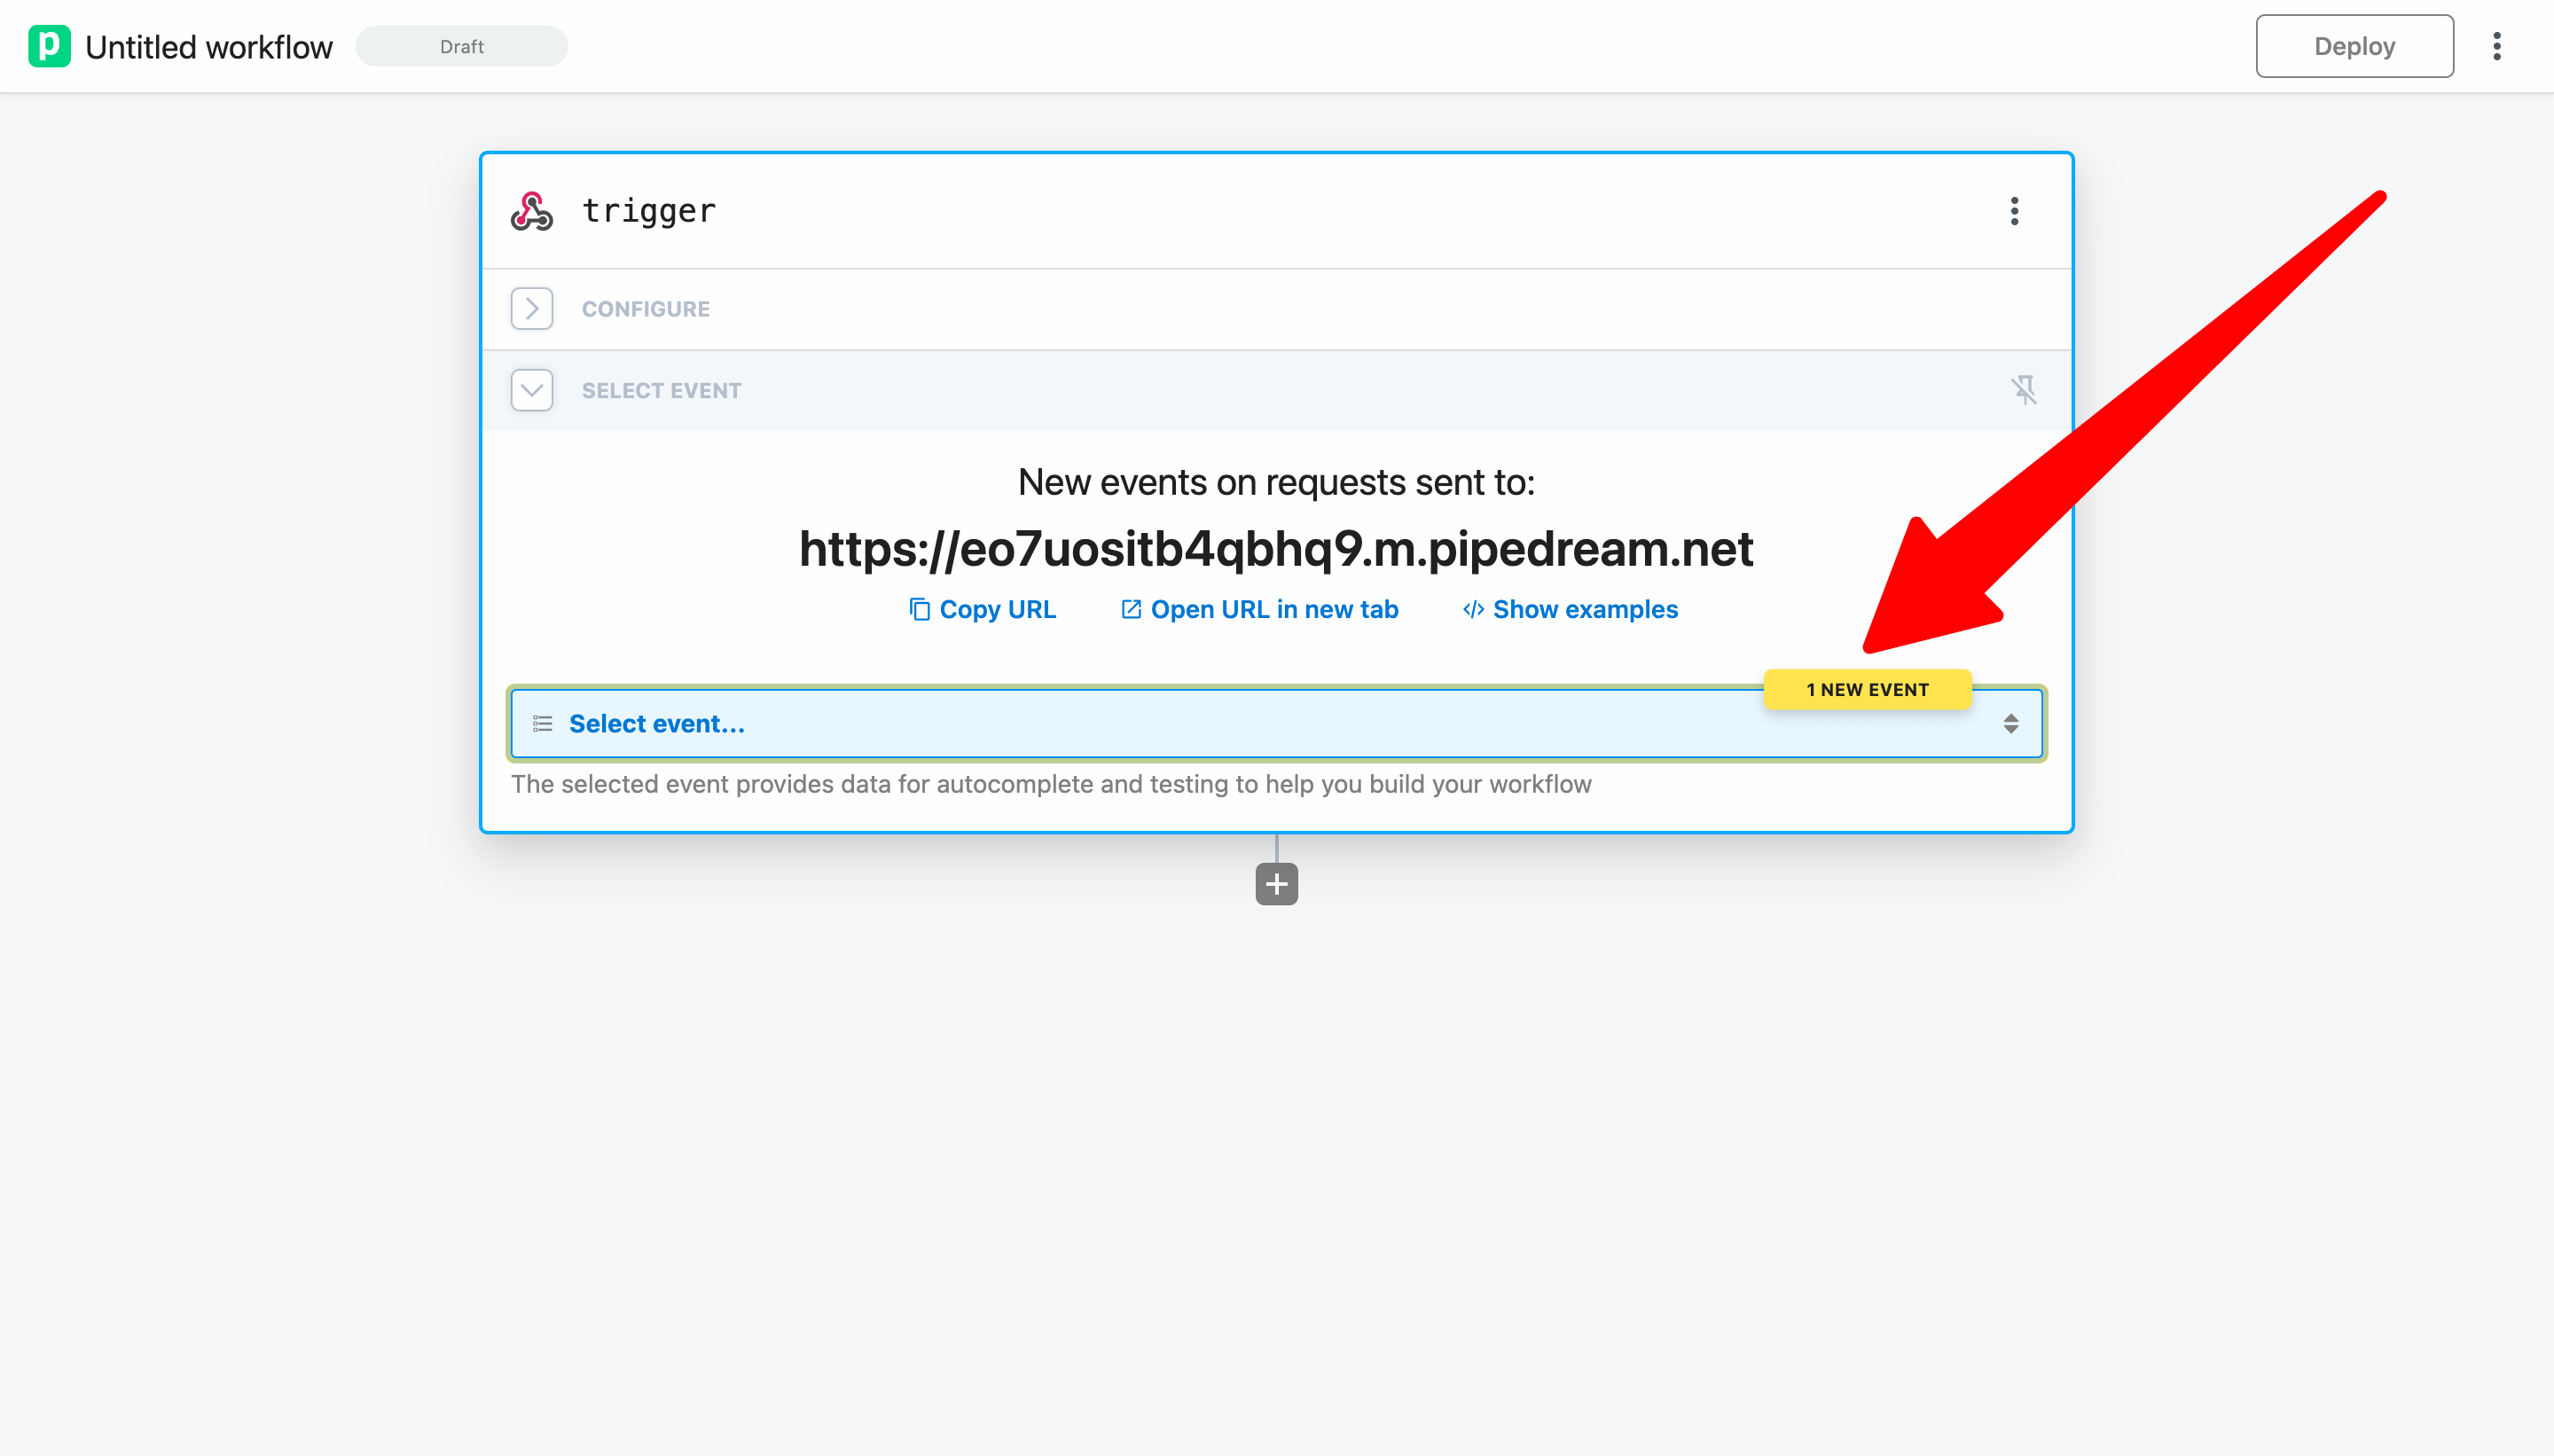
Click on the drop down menu and select the event you generated.
Pipedream will automatically display the contents of the selected event. Expand the body to validate that the message was received.
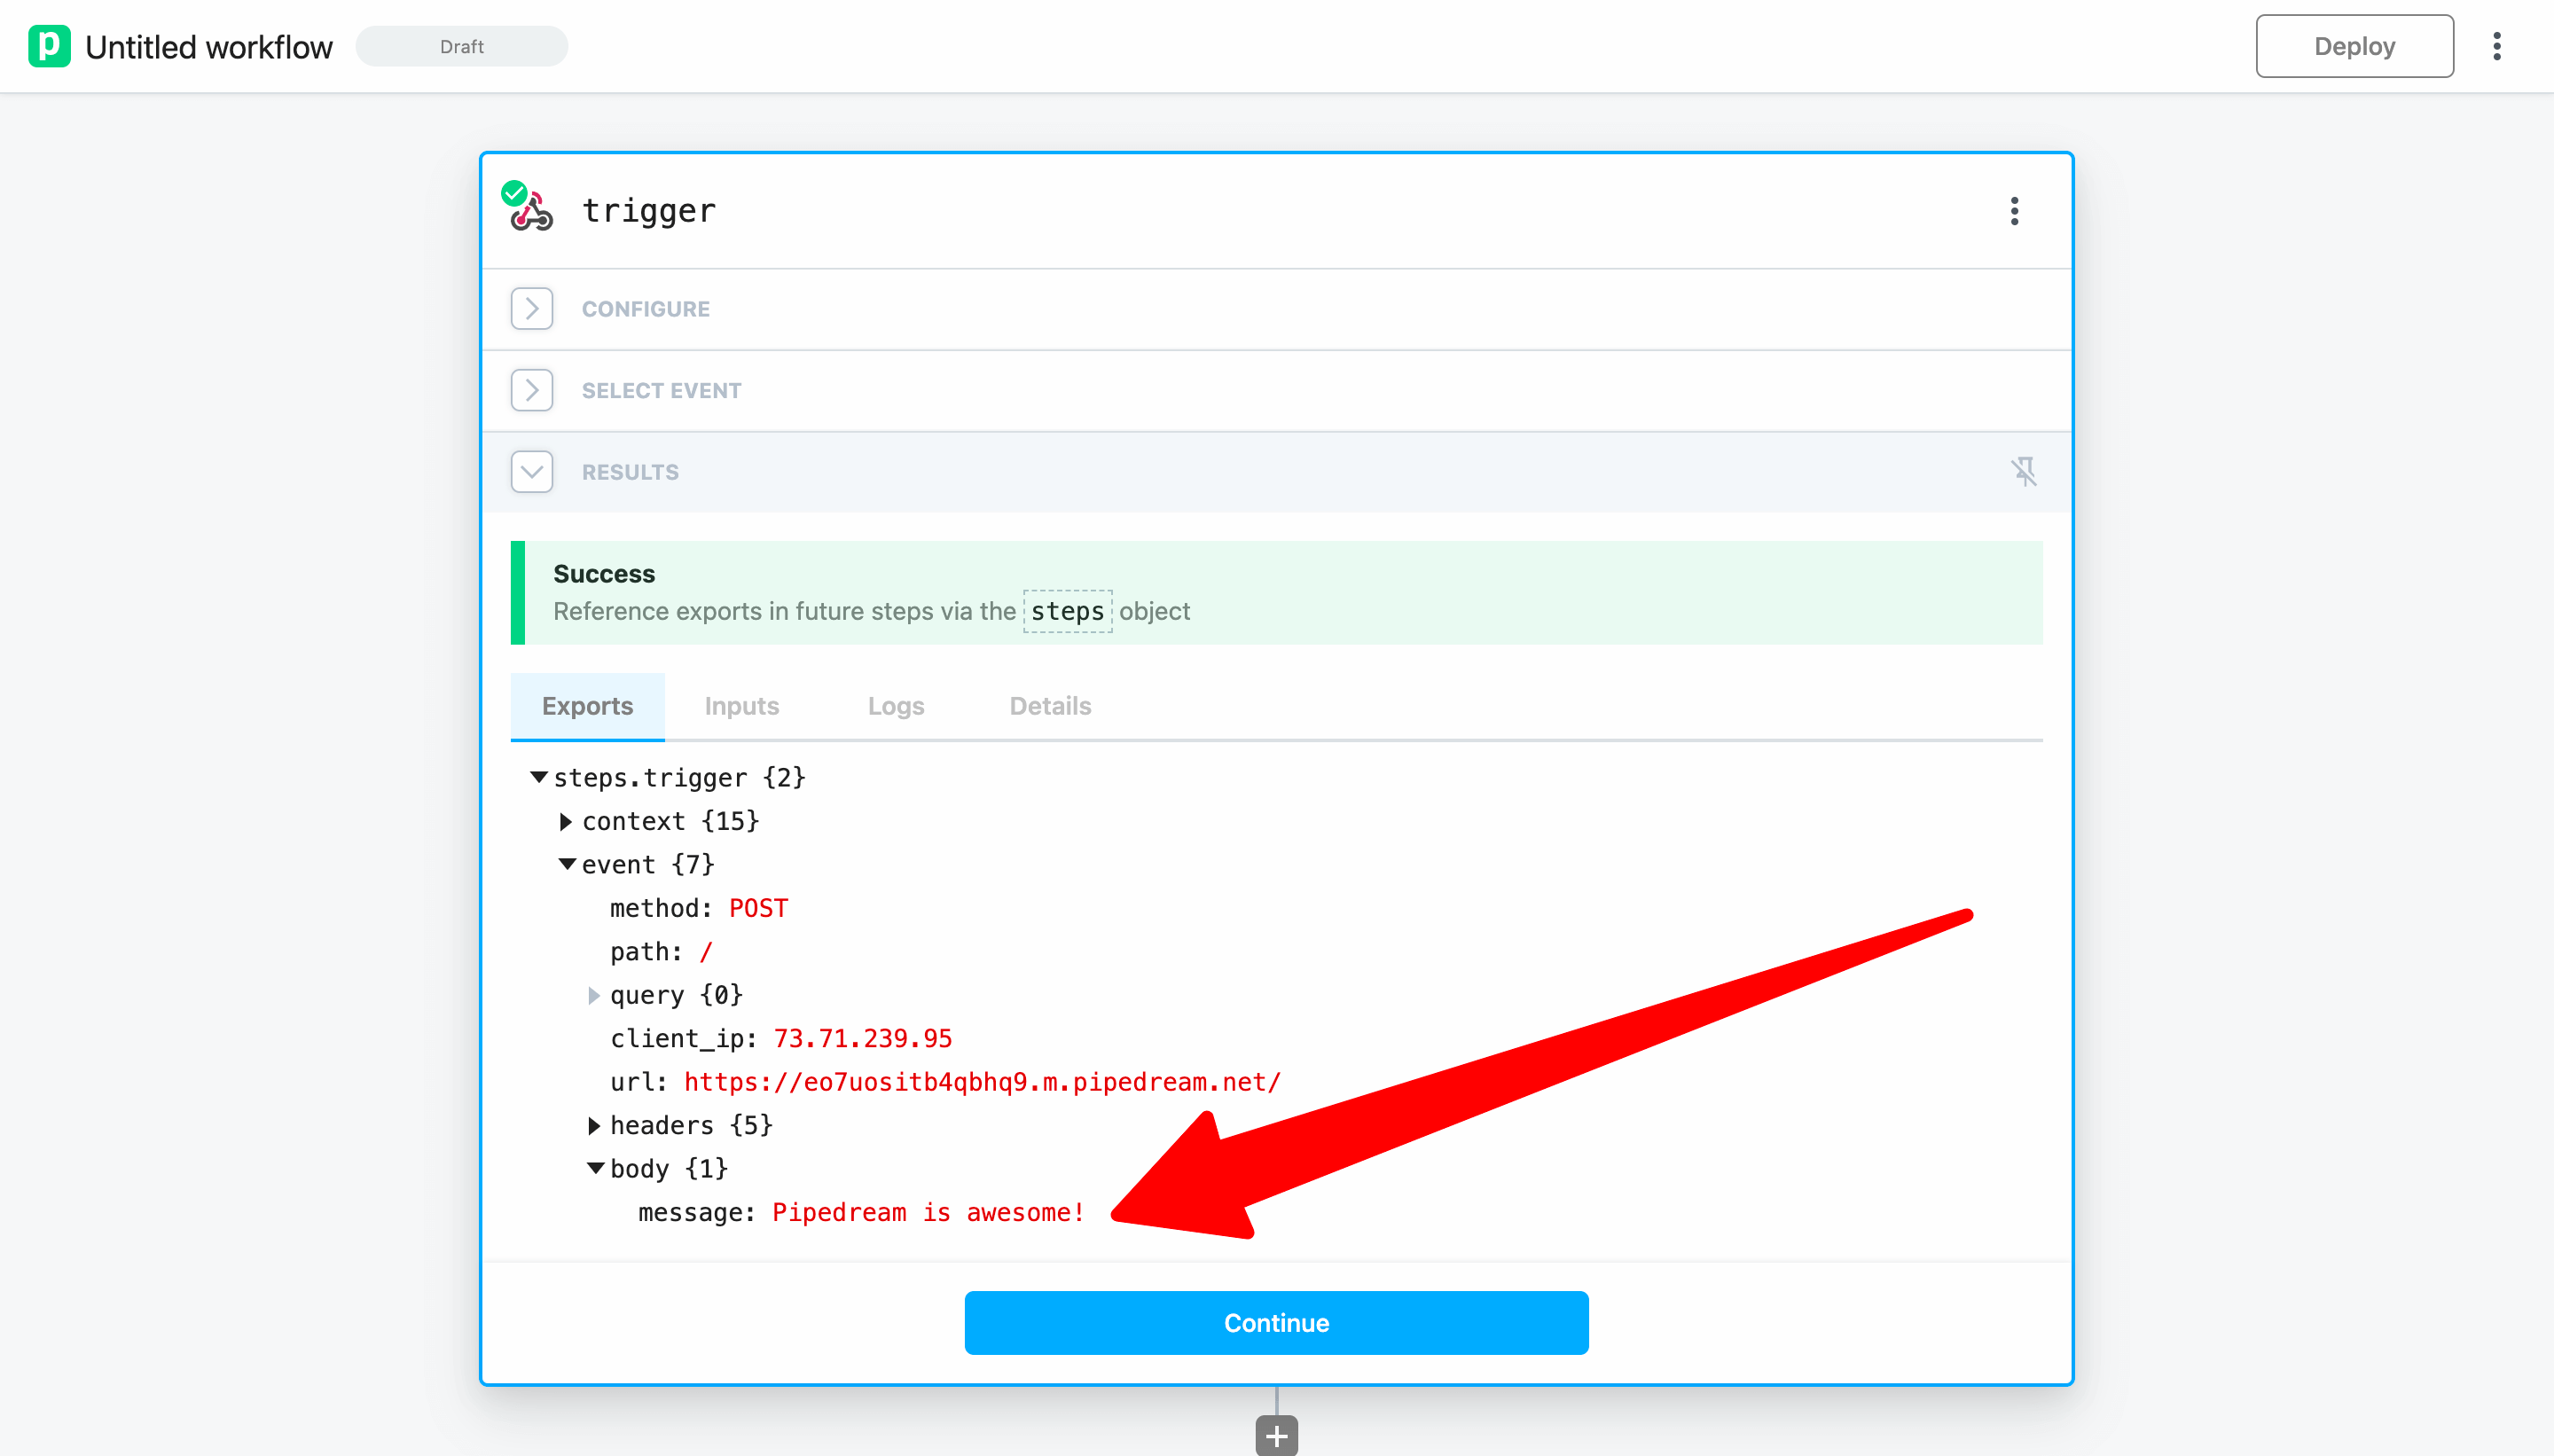
If you need to send a different event to your workflow, go back to the Select Event section and select it from the event selector.
TIP
The selected event will be used to provide autocomplete suggestion as you build your workflow. The data will also be used when testing later steps.
# Enrich trigger data using Node.js and npm
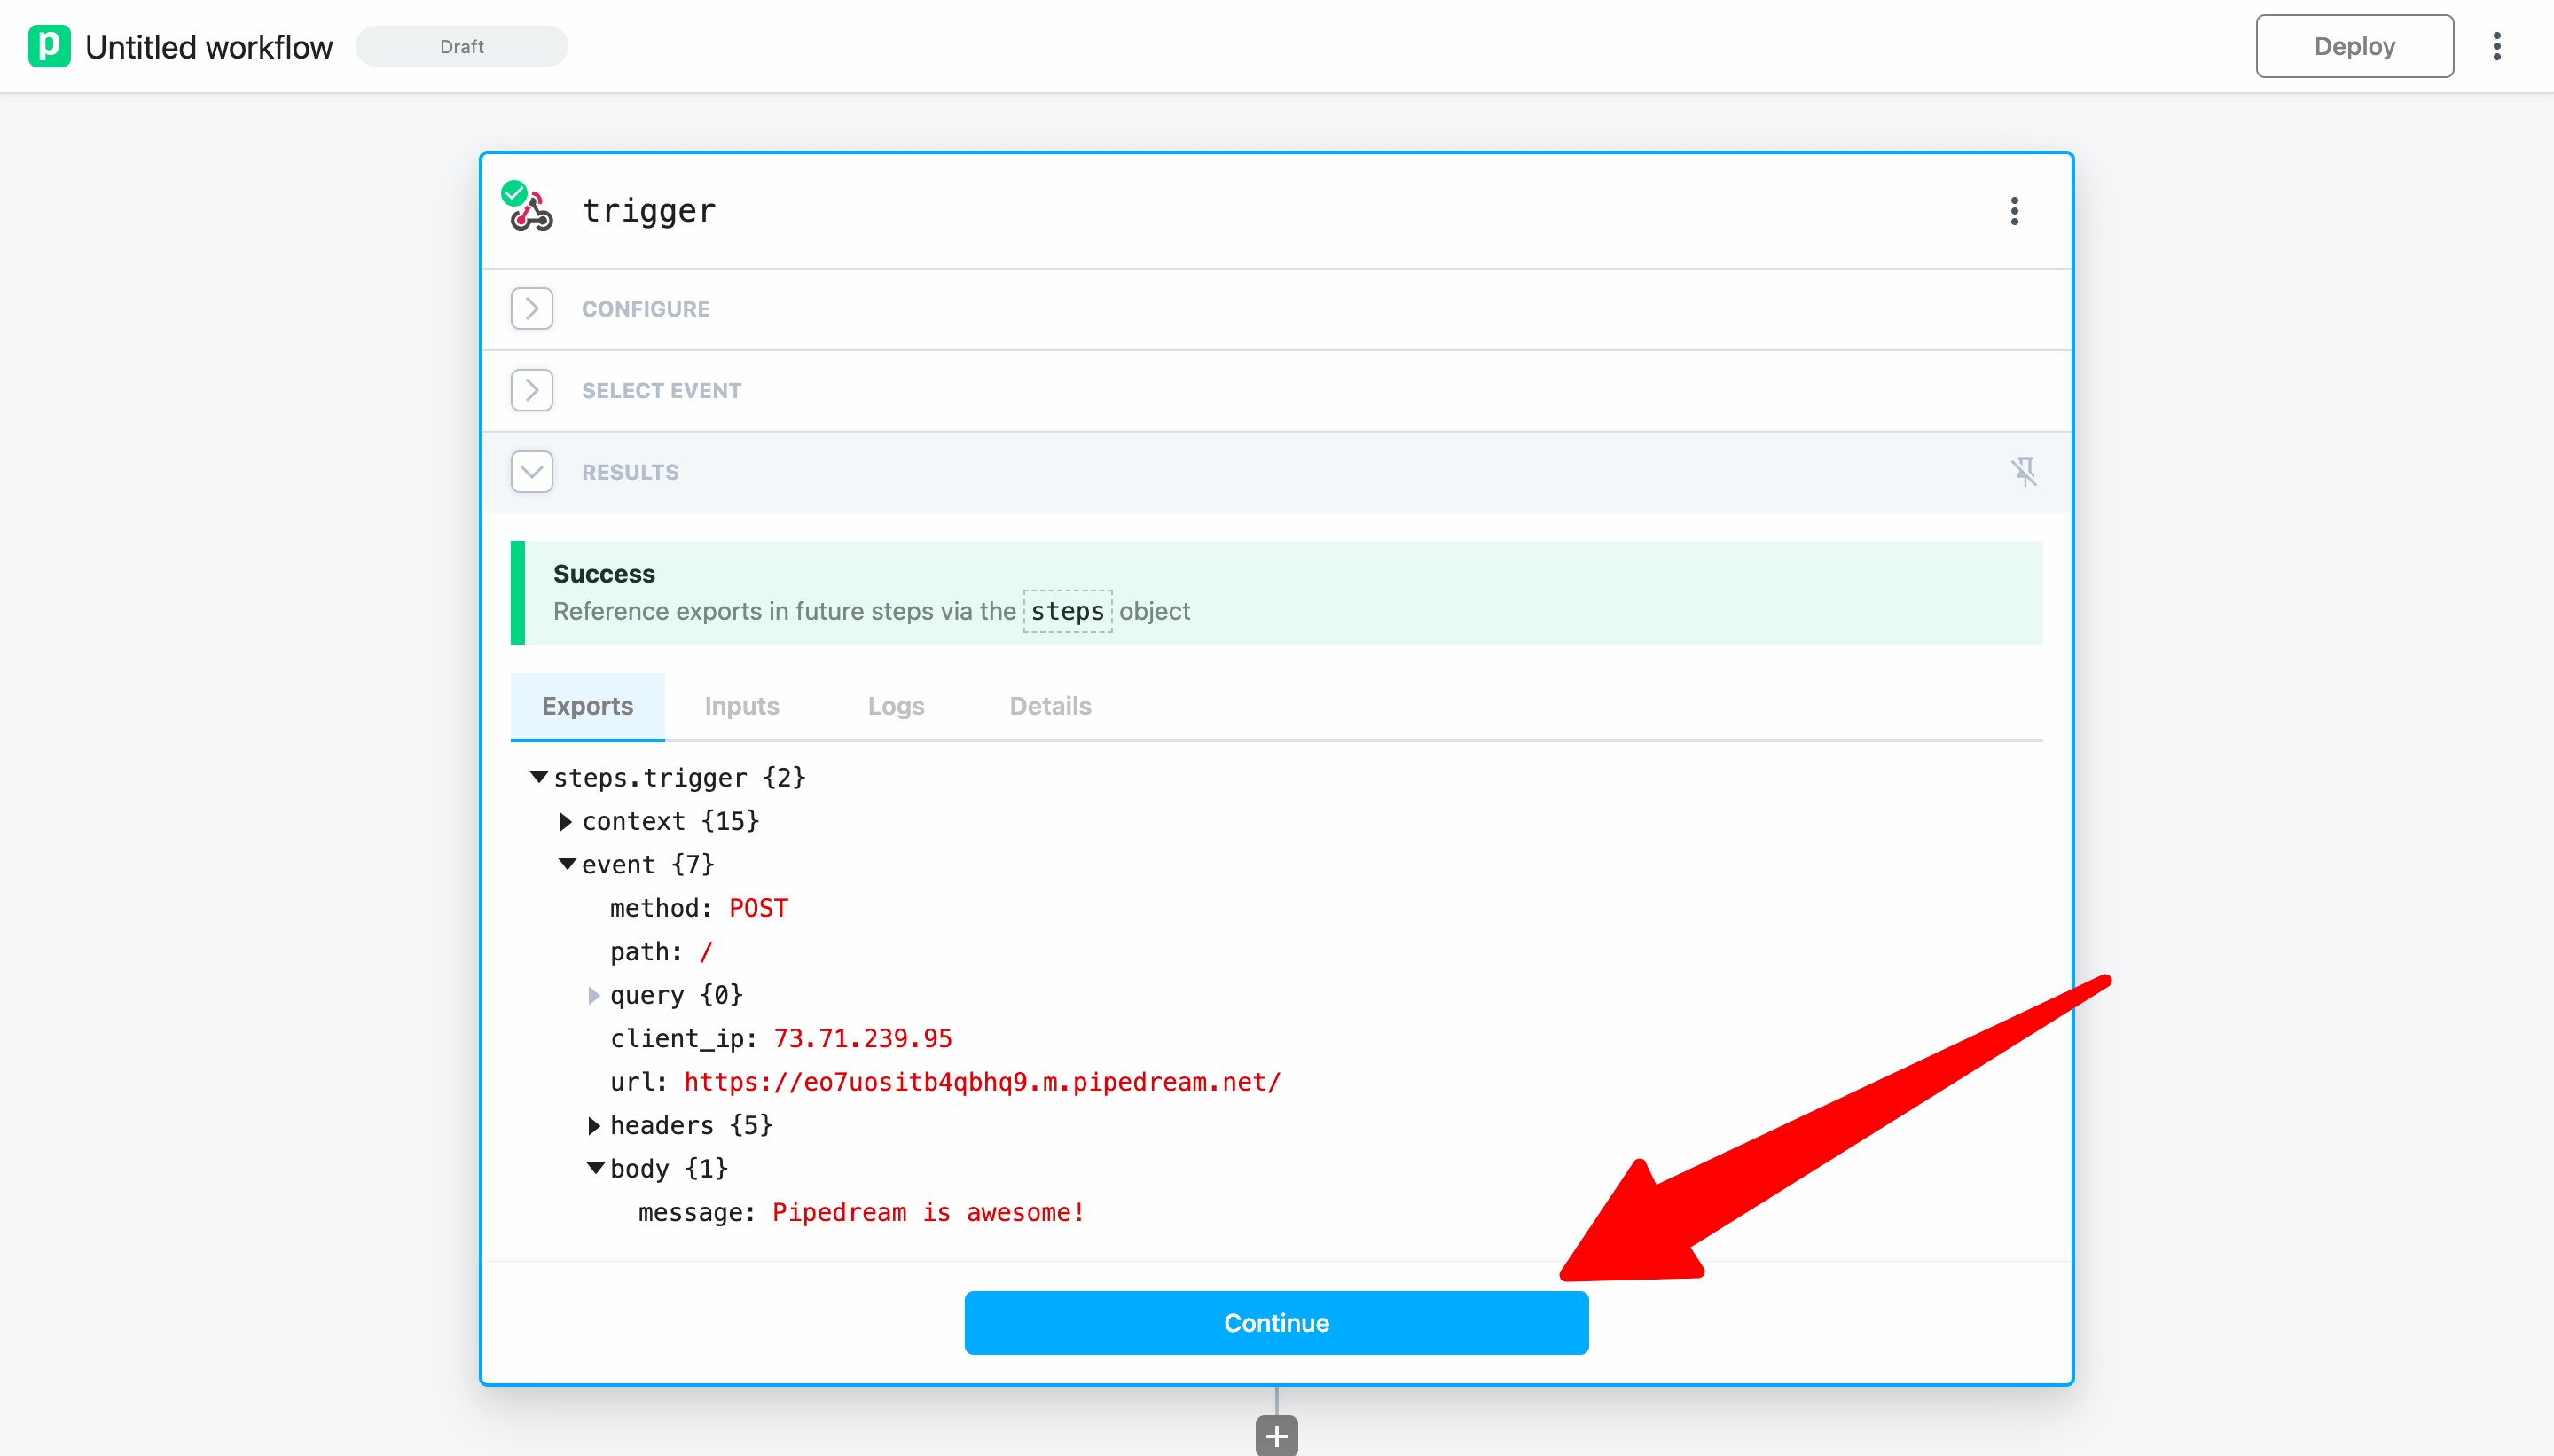
Before we send data to Google Sheets, let's use the npm sentiment (opens new window) package to generate a sentiment score for our message. To do that, click Continue or the + button.
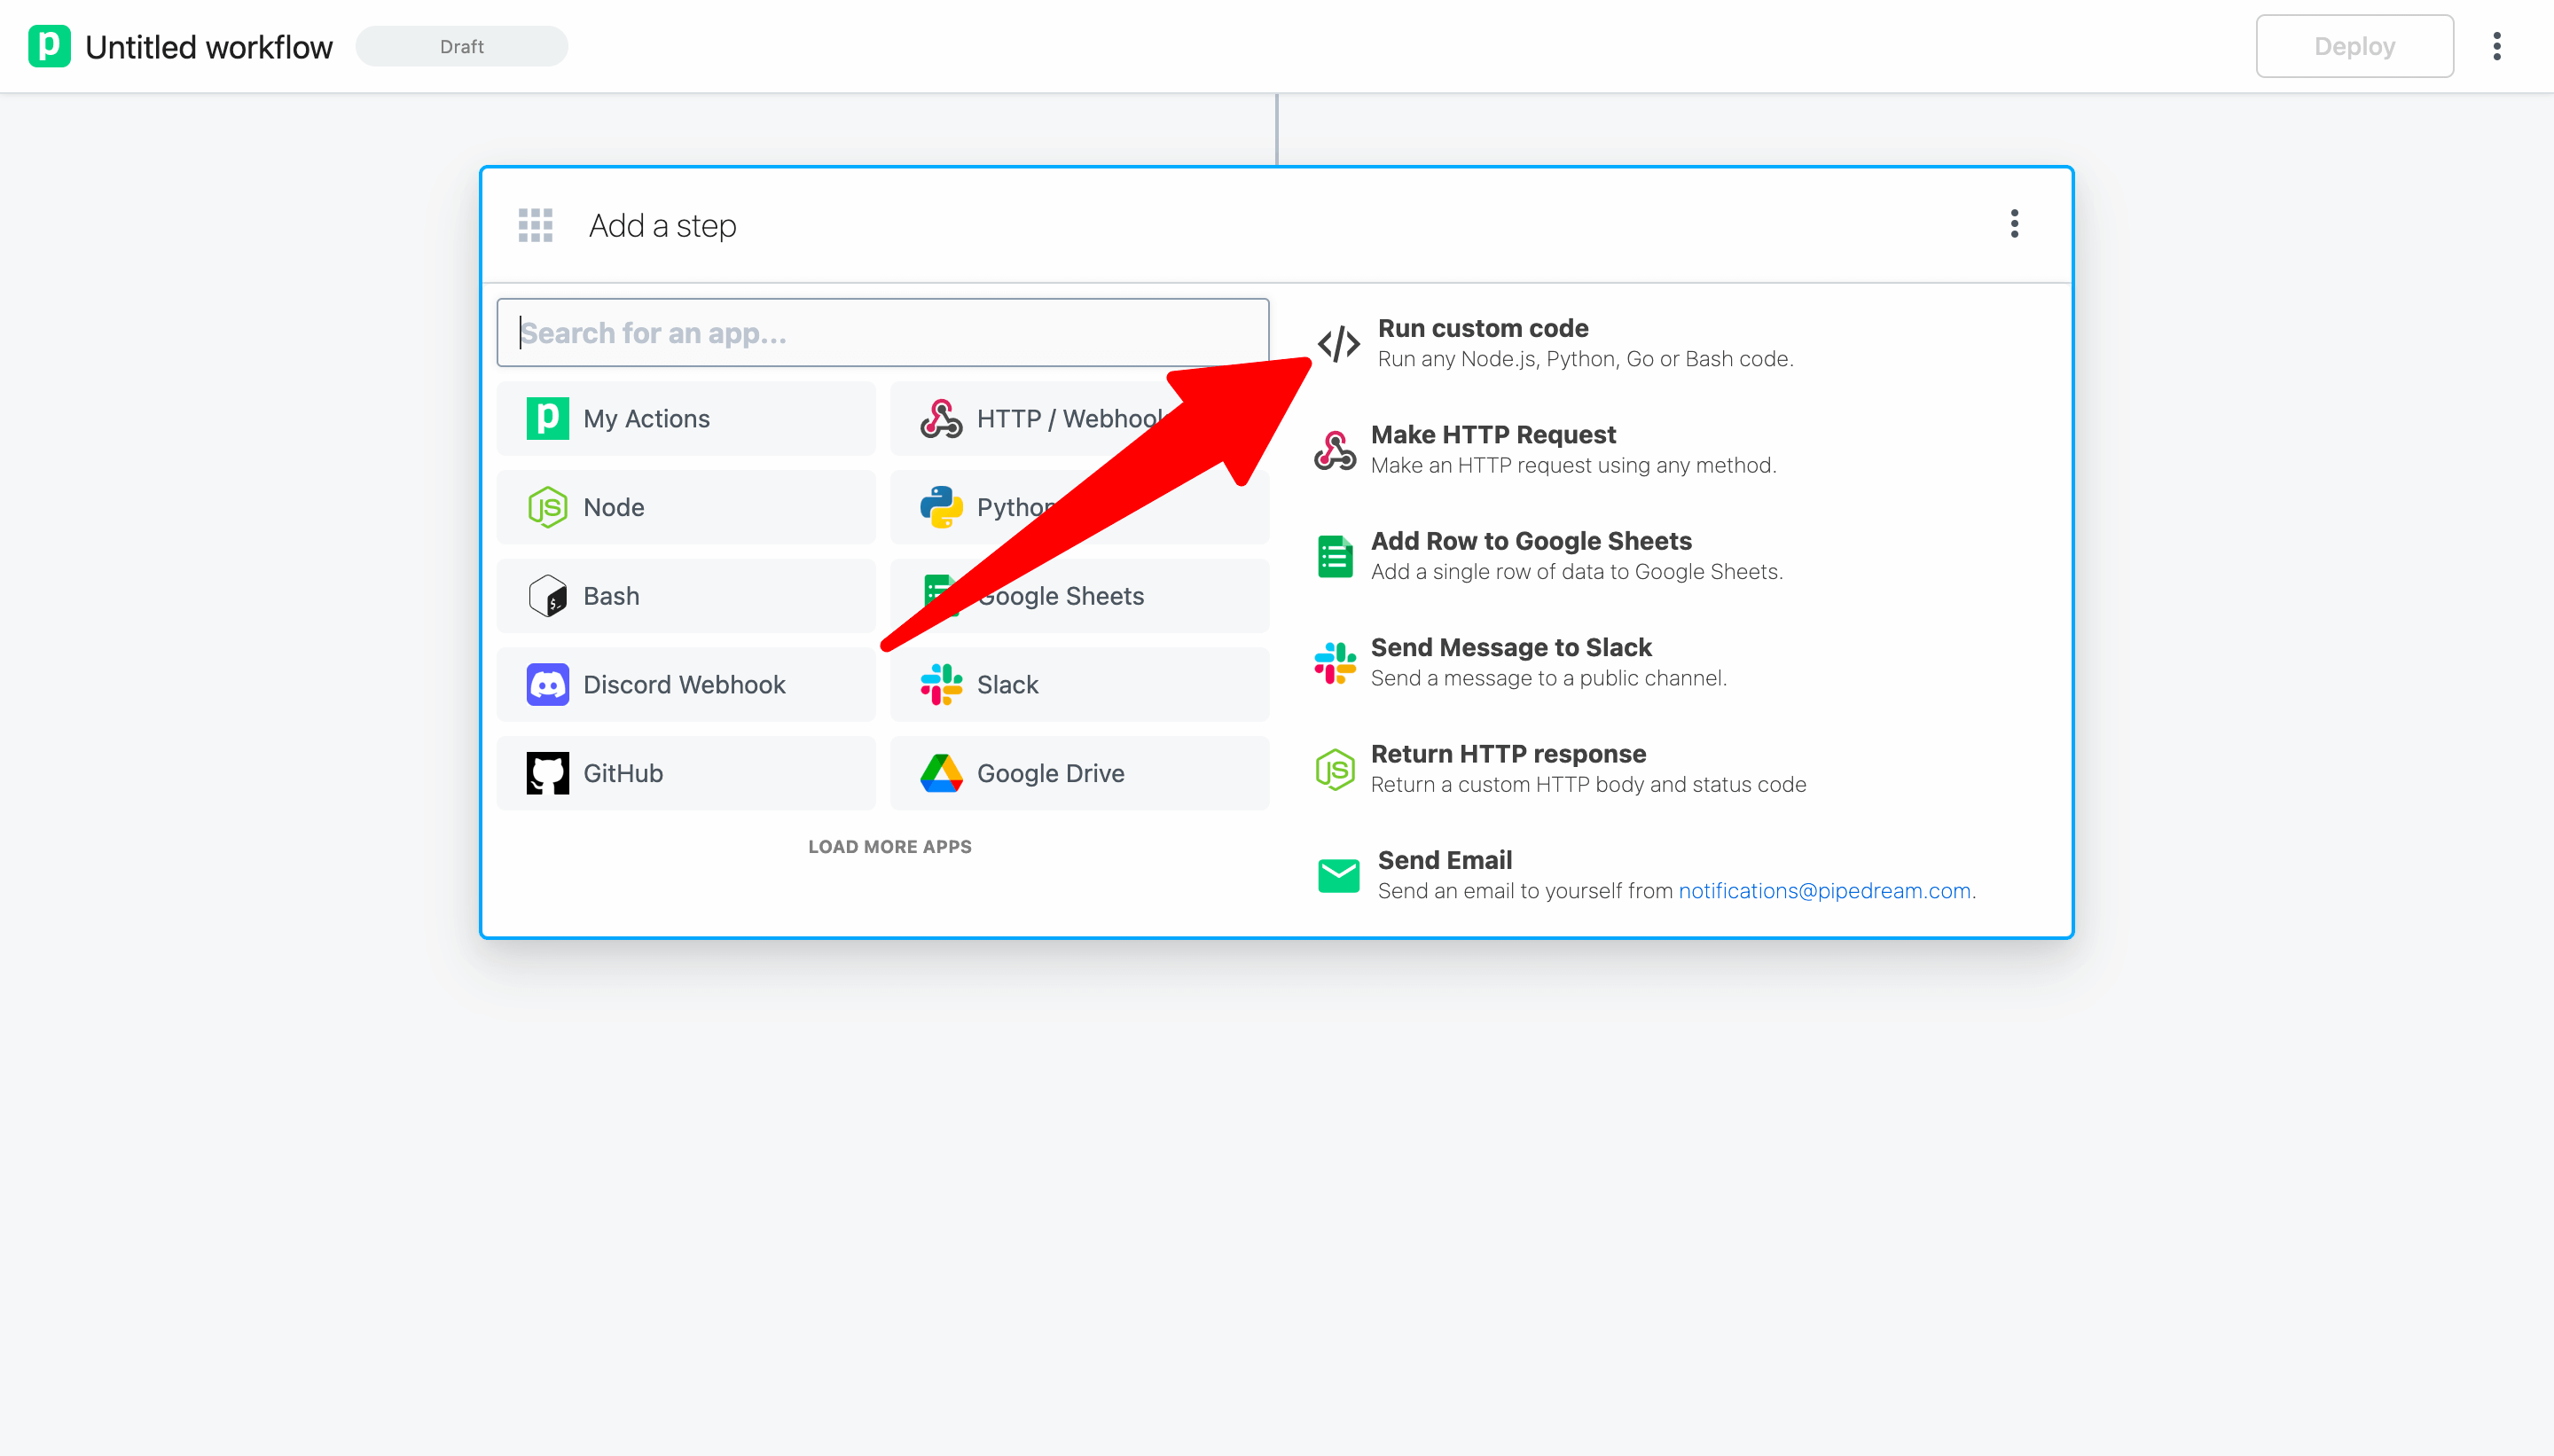
That will open the Add a step menu. Select Run custom code.
Pipedream will add a Node.js code step. Rename the step to sentiment.
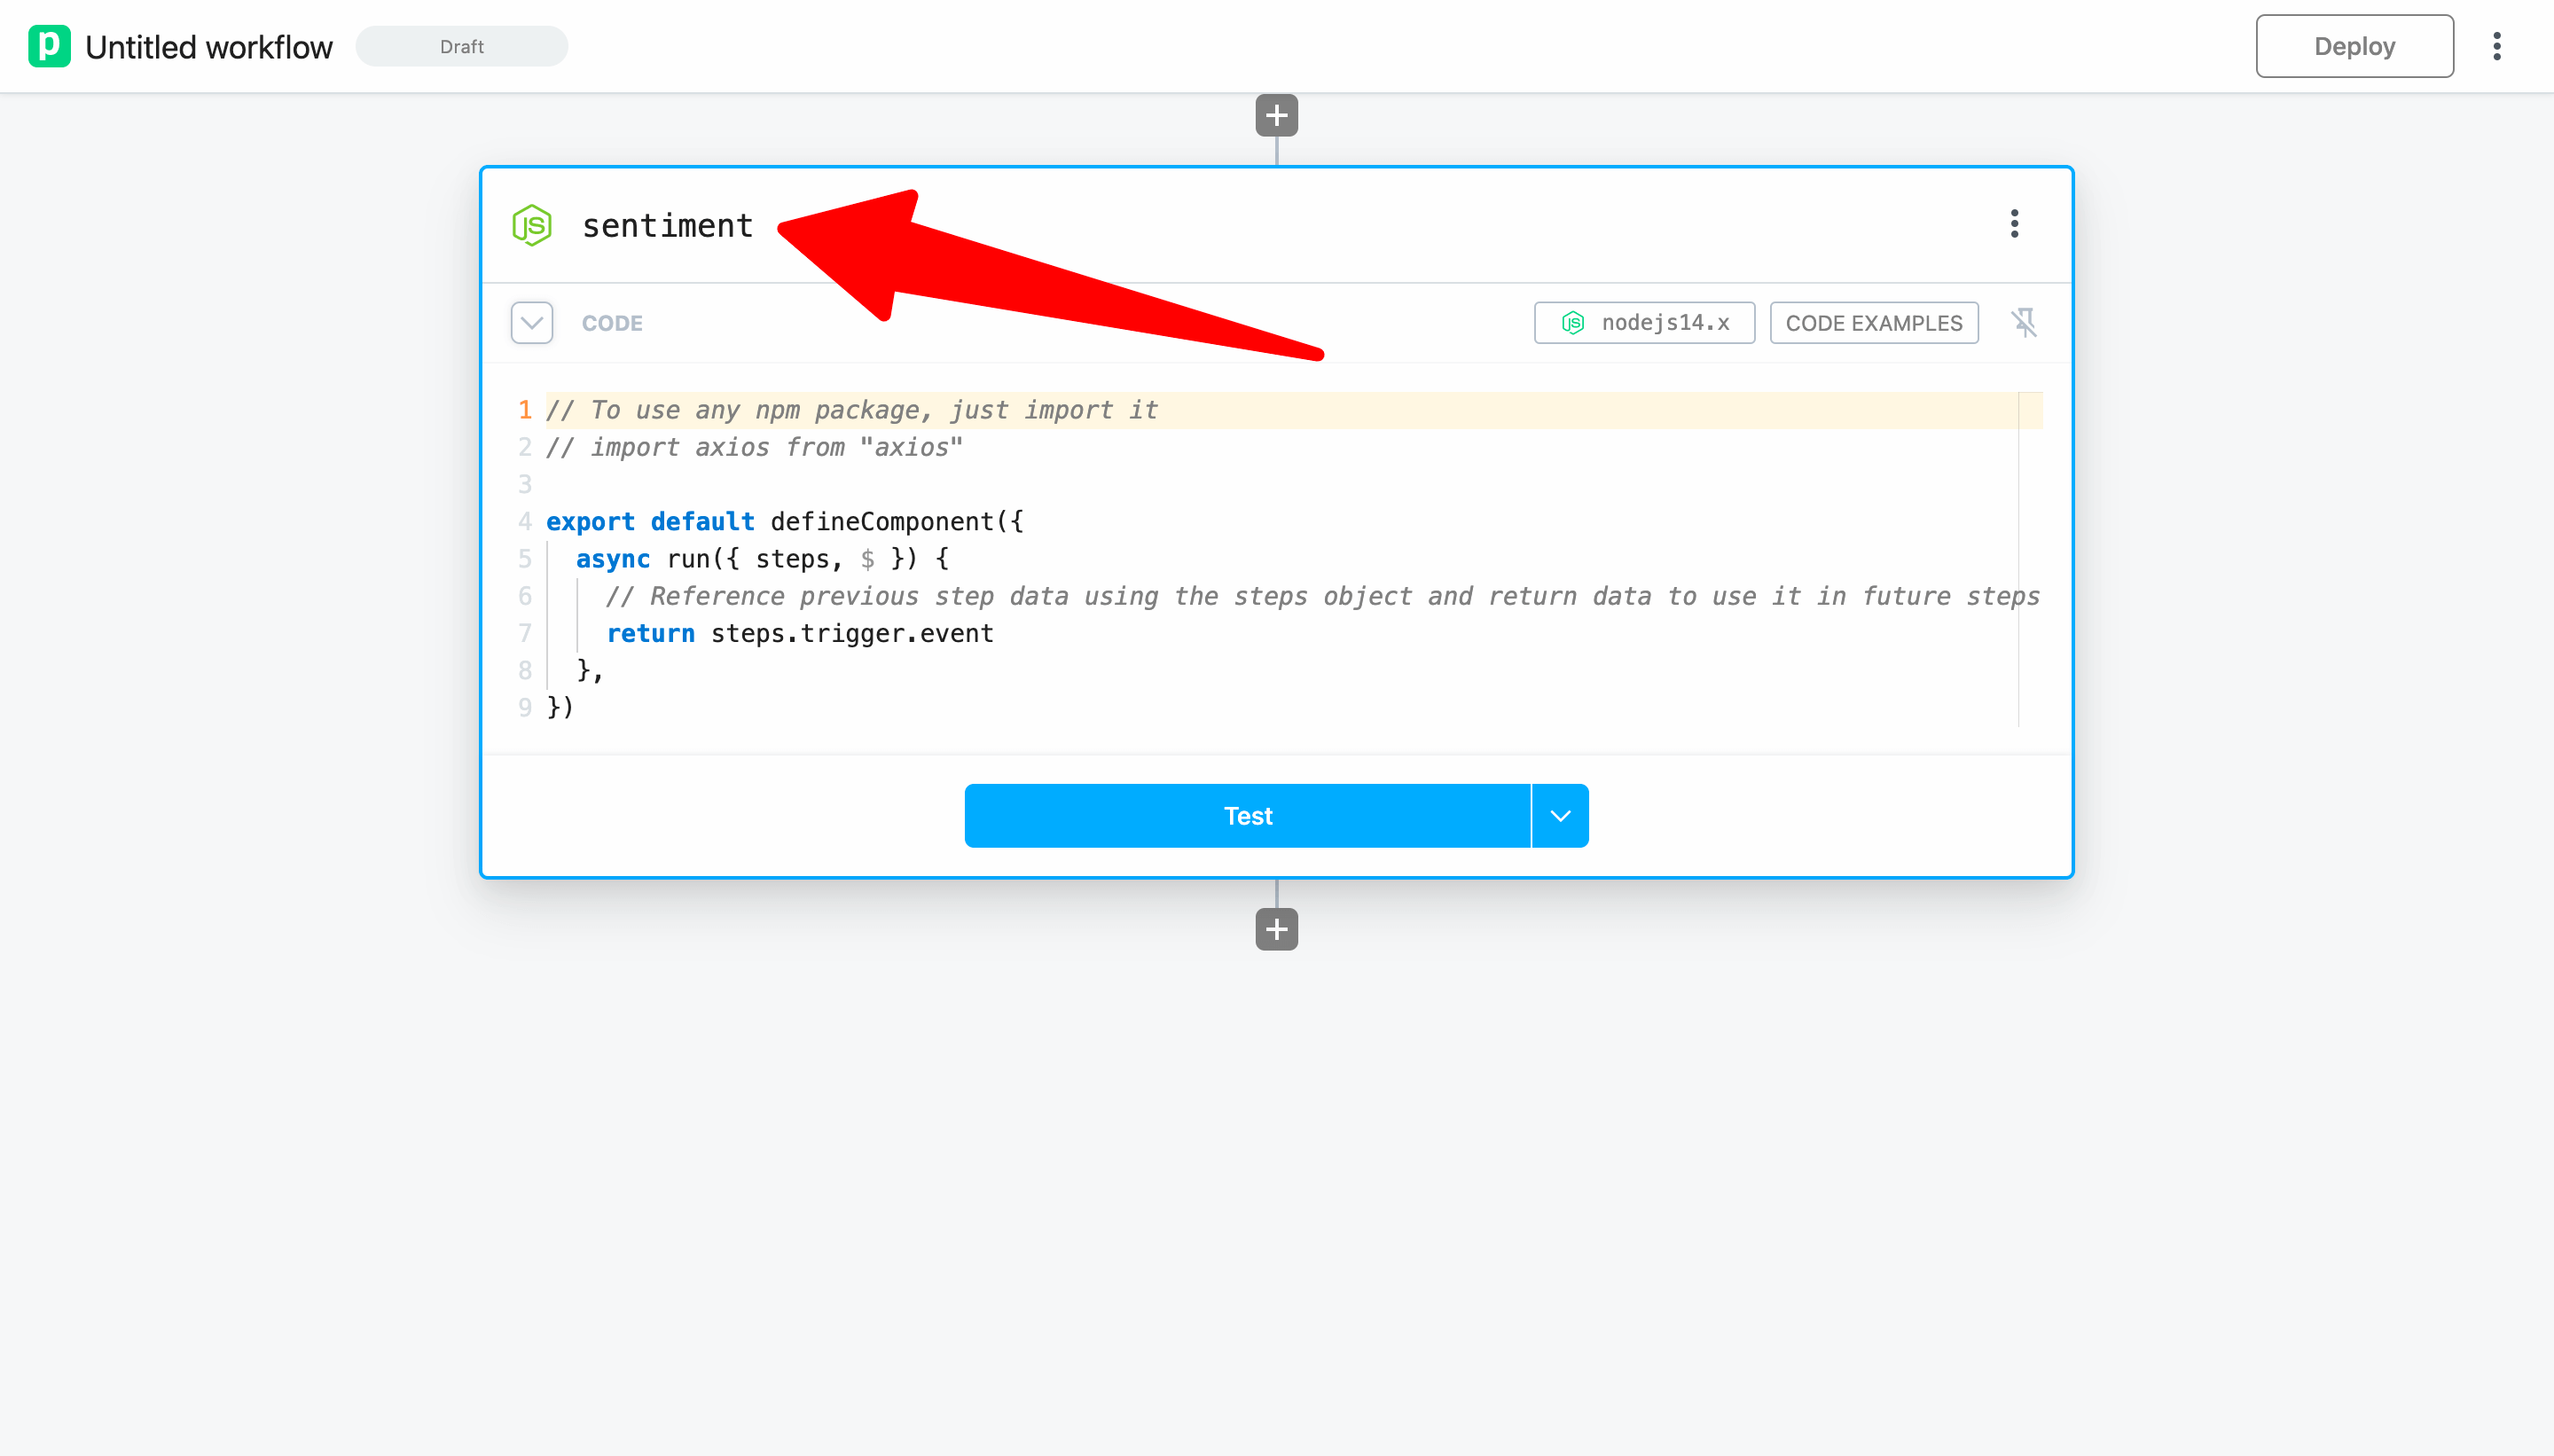
Next, add the following code to the code step:
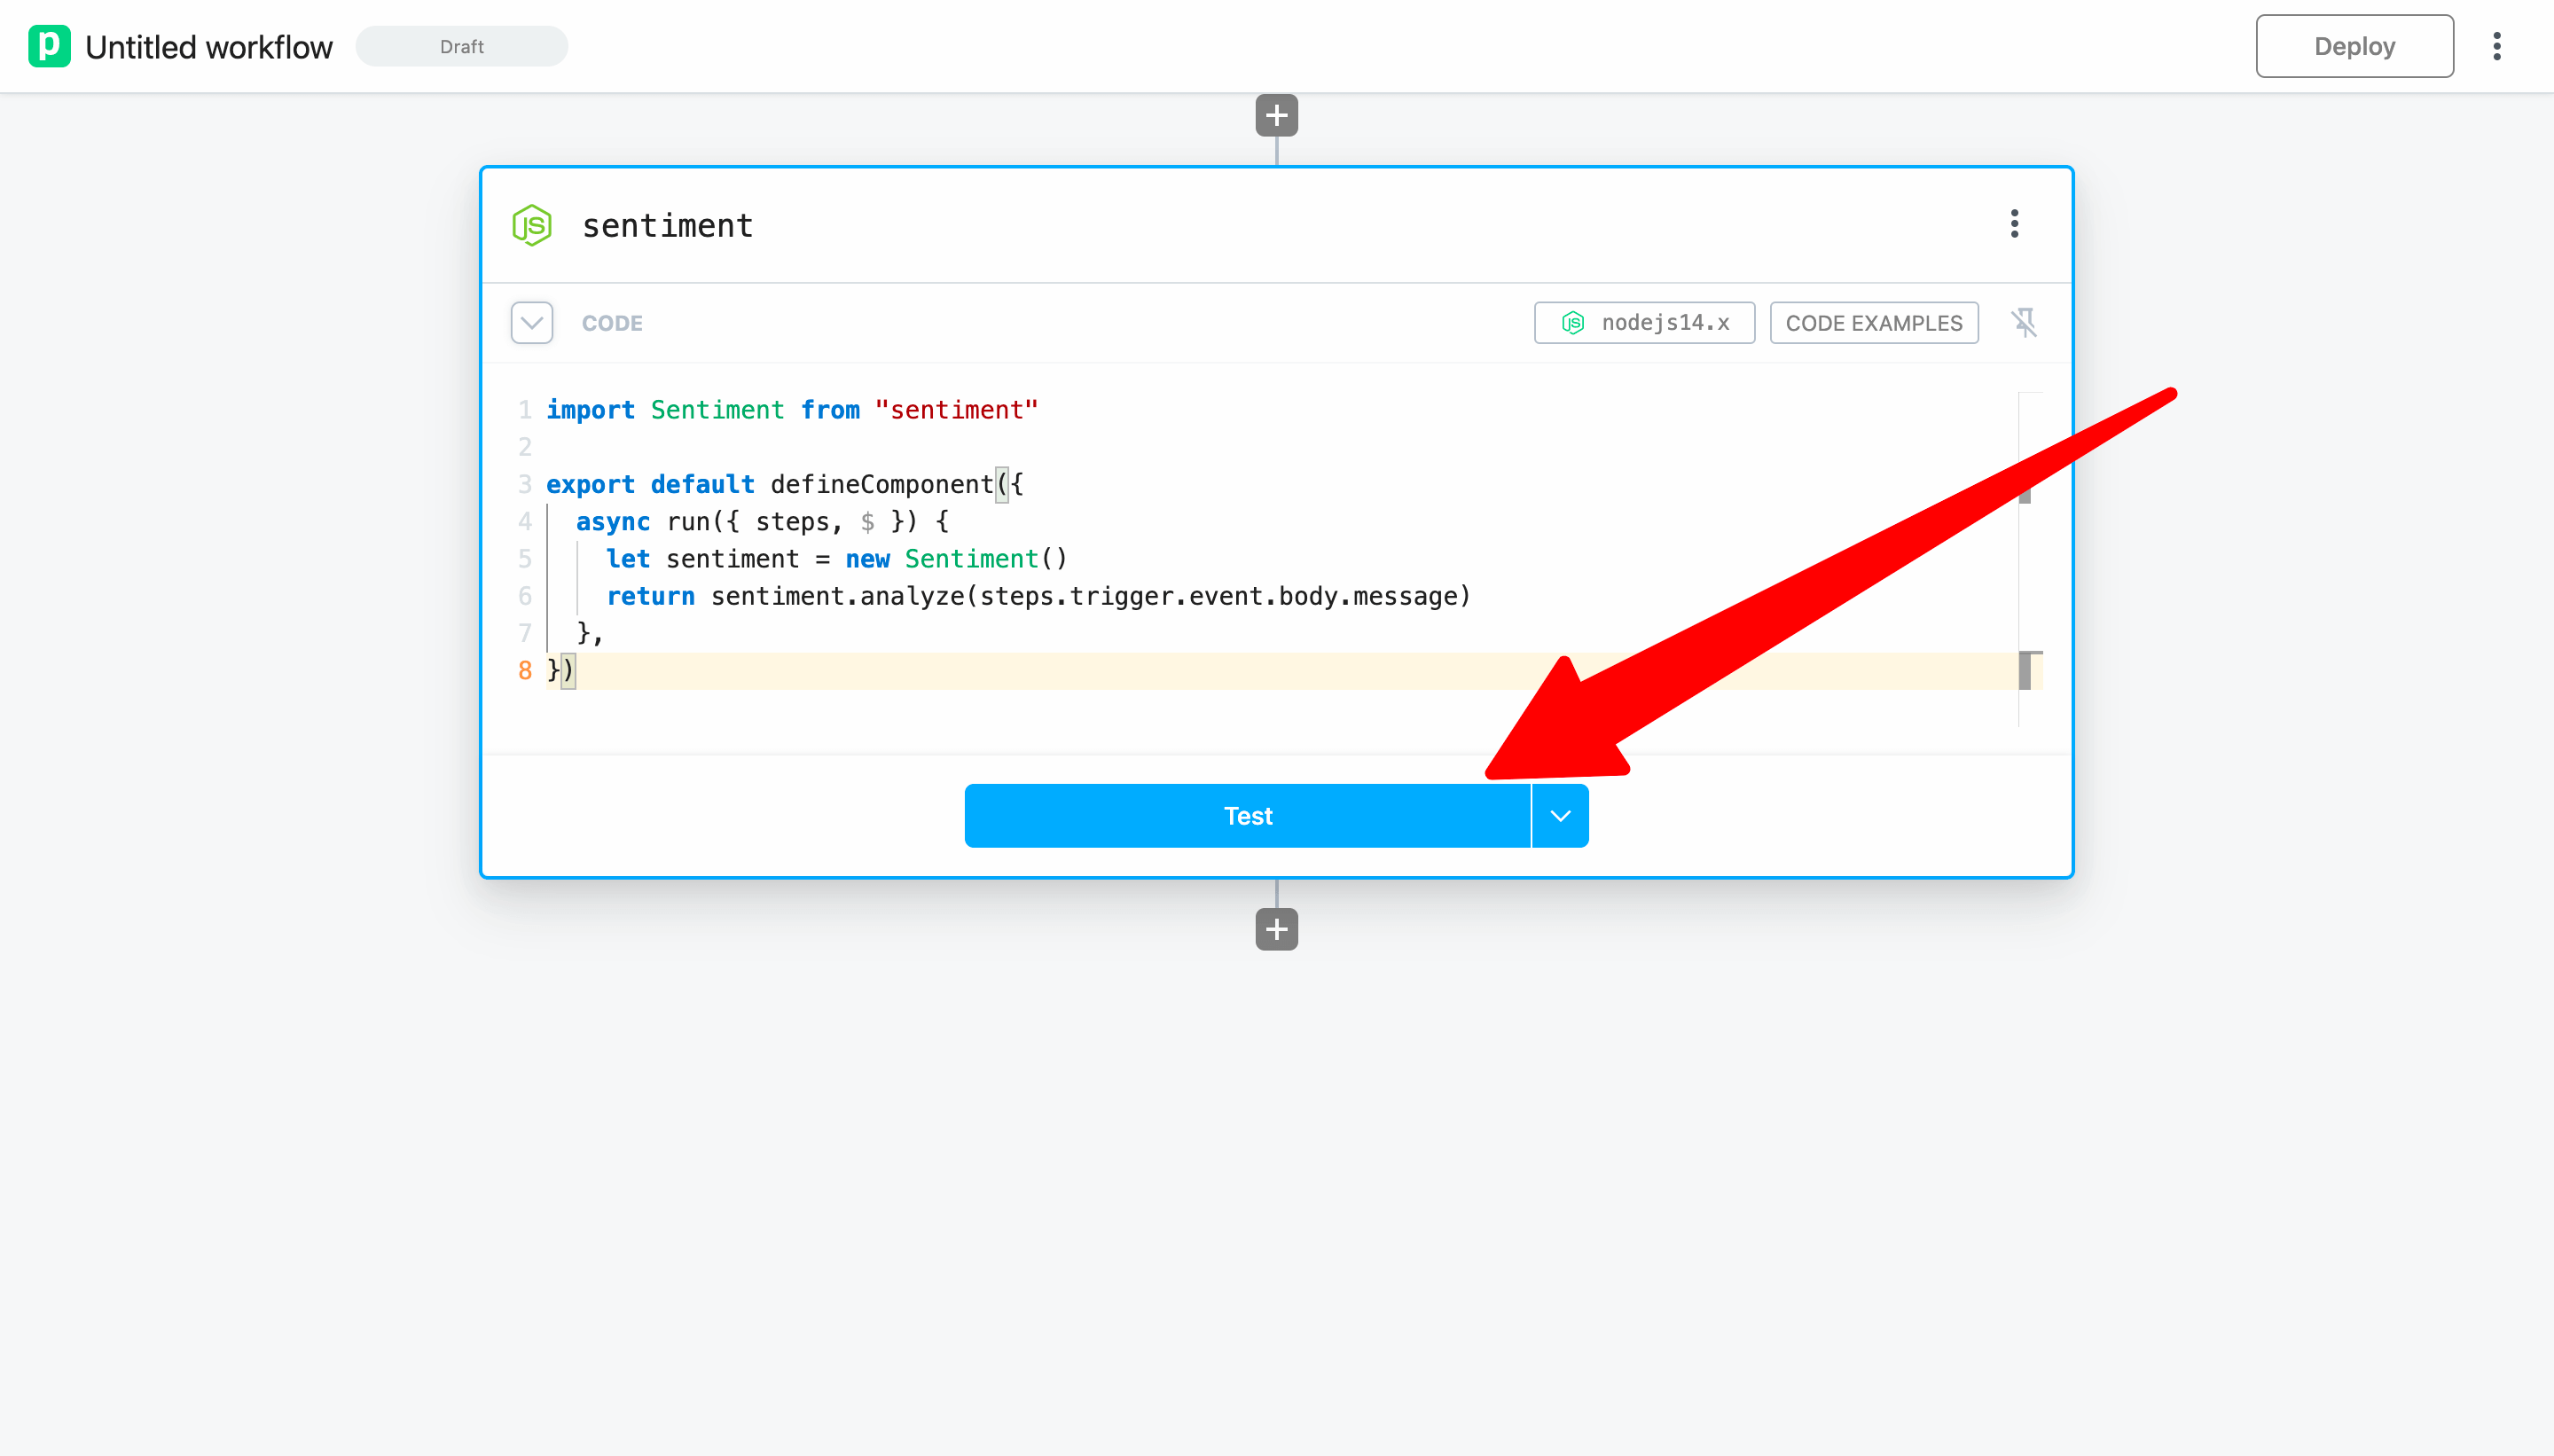
import Sentiment from "sentiment"

export default defineComponent({
  async run({ steps, $ }) {
    let sentiment = new Sentiment()
    return sentiment.analyze(steps.trigger.event.body.message)
  },
})
This code imports the npm package, passes the message we sent to our trigger to the analyze() function by referencing steps.trigger.event.body.message and then returns the result.
TIP
To use any npm package on Pipedream, just import it. There's no npm install or package.json required.
TIP
Any data you return from a step is exported so it can be inspected and referenced it in future steps via the steps object. In this example, return values will be exported to steps.sentiment.$return_value because we renamed the step to sentiment .
Your code step should now look like the screenshot below. To run the step and test the code, click the Test button.
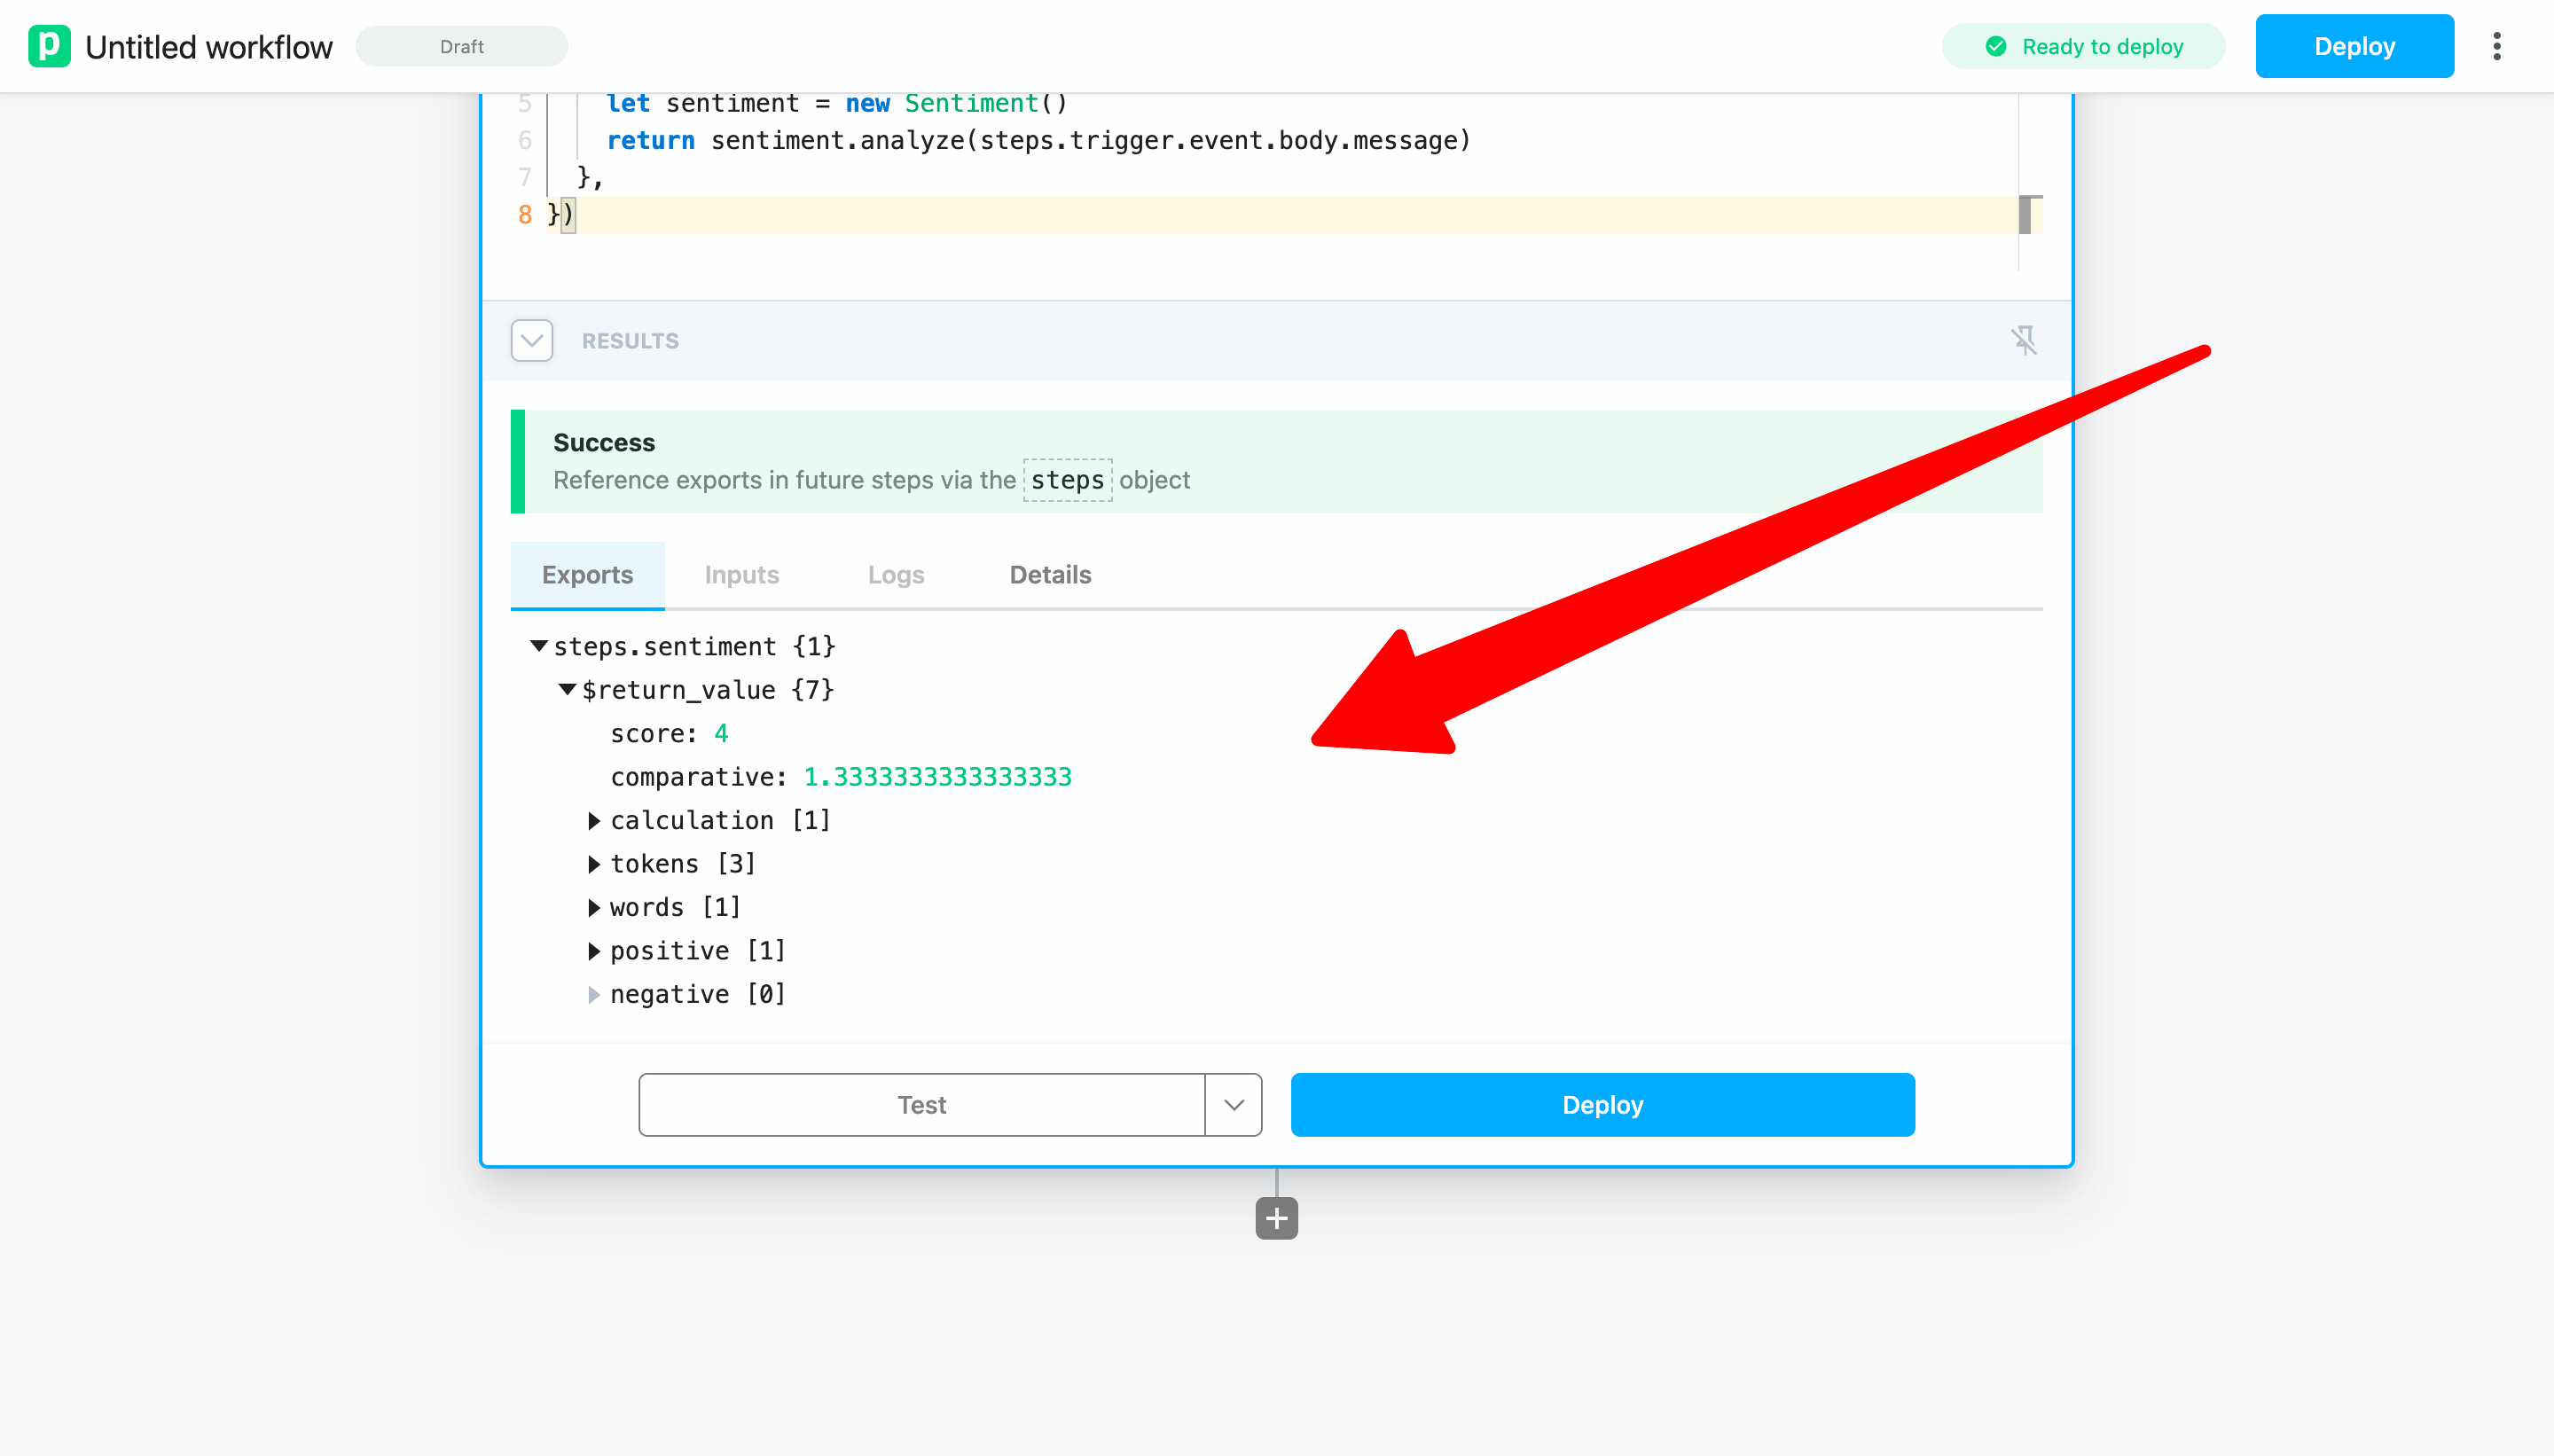
You should see the results of the sentiment analysis when the test is complete.
TIP
When you Test a step, only the current step is executed. Use the caret to test different ranges of steps including the entire workflow.
# Save data to Google Sheets
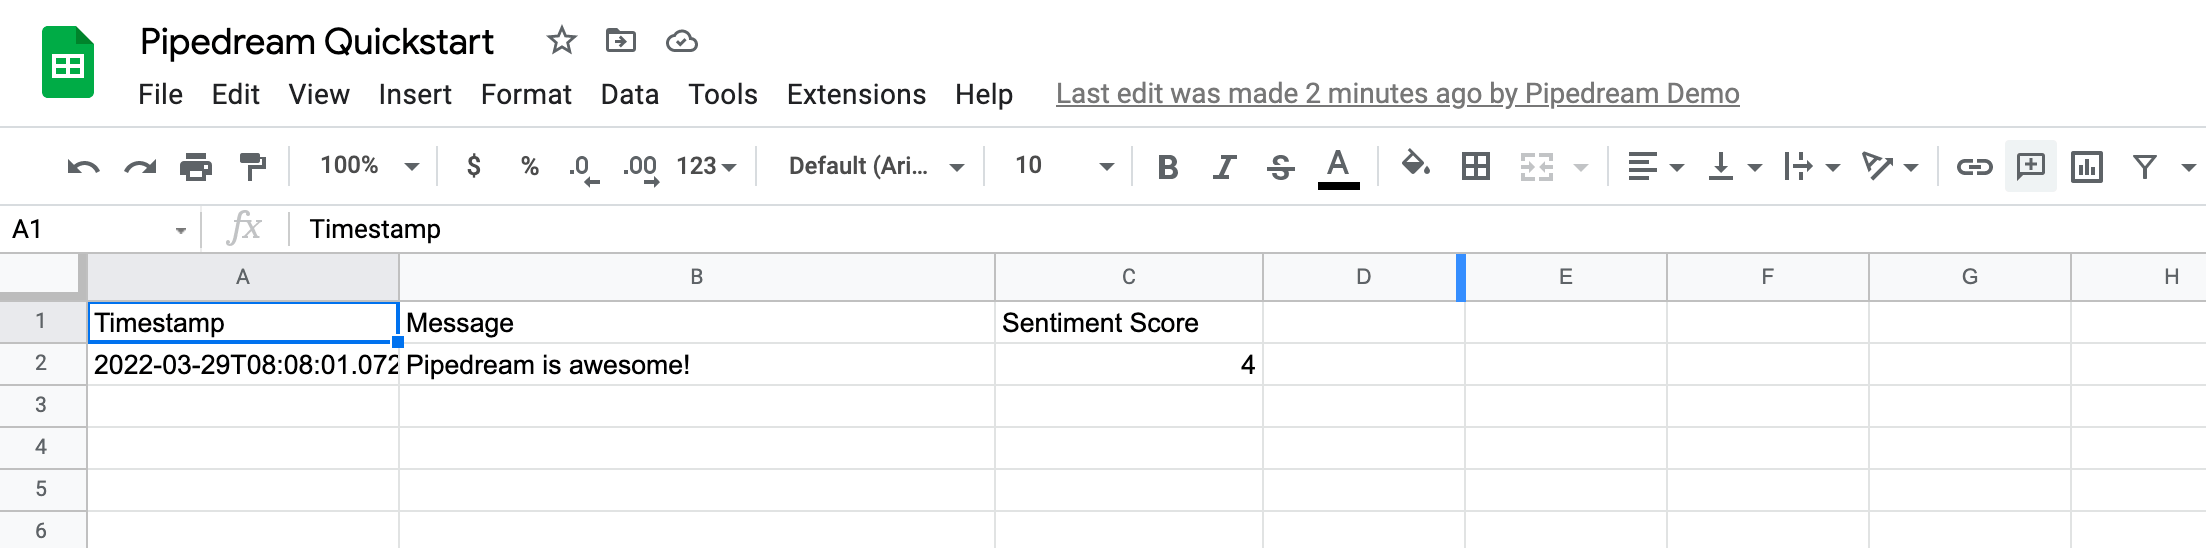
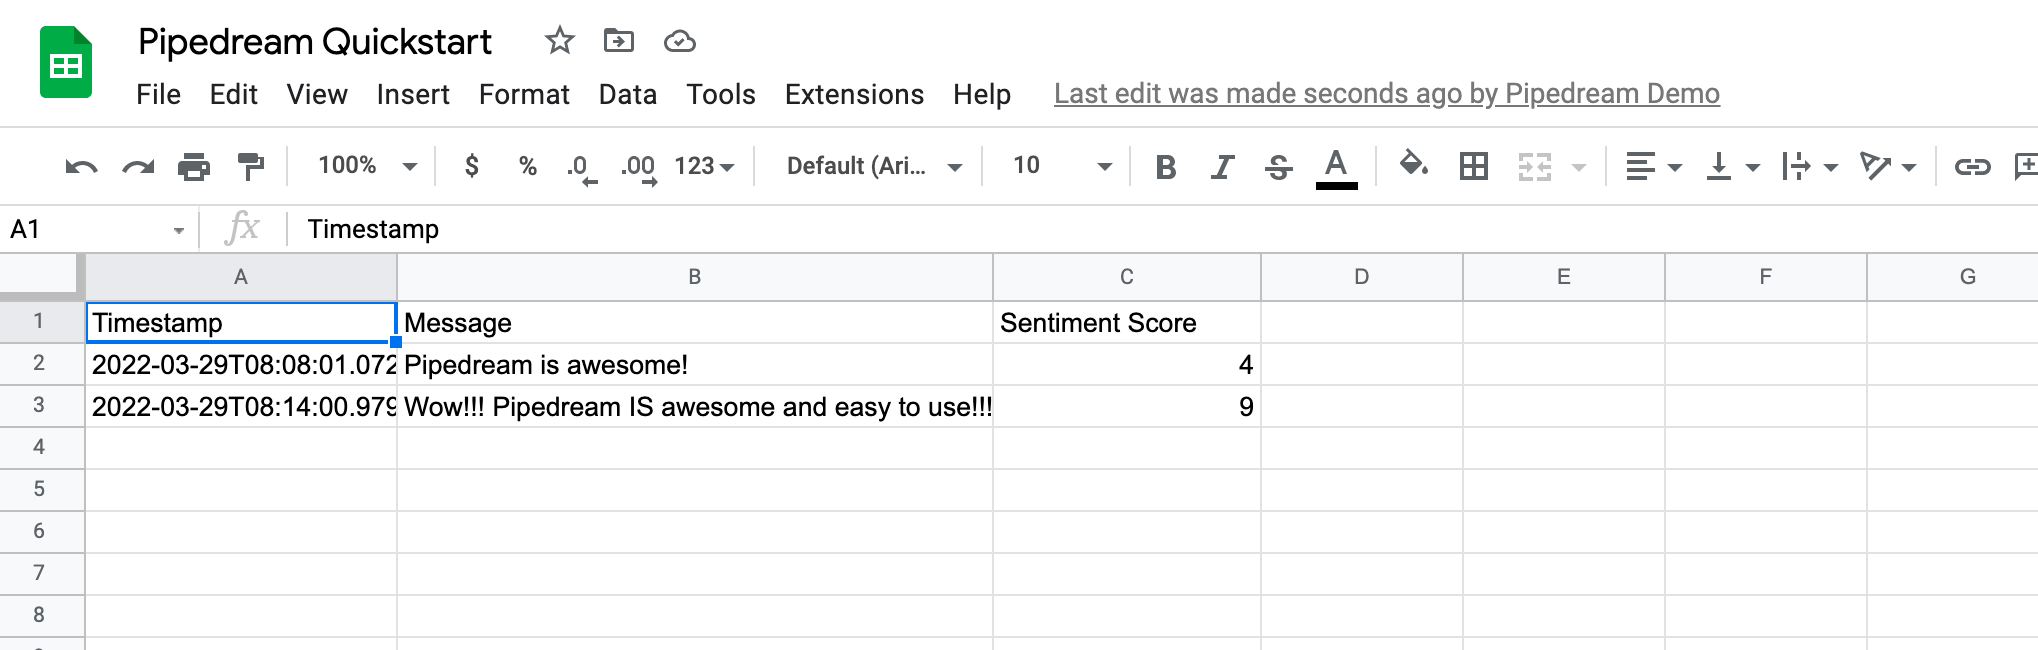
Next, create a Google Sheet and add Timestamp, Message and Sentiment Score to the first row. These labels act as our column headers amd will help us configure the Google Sheets step of the workflow.
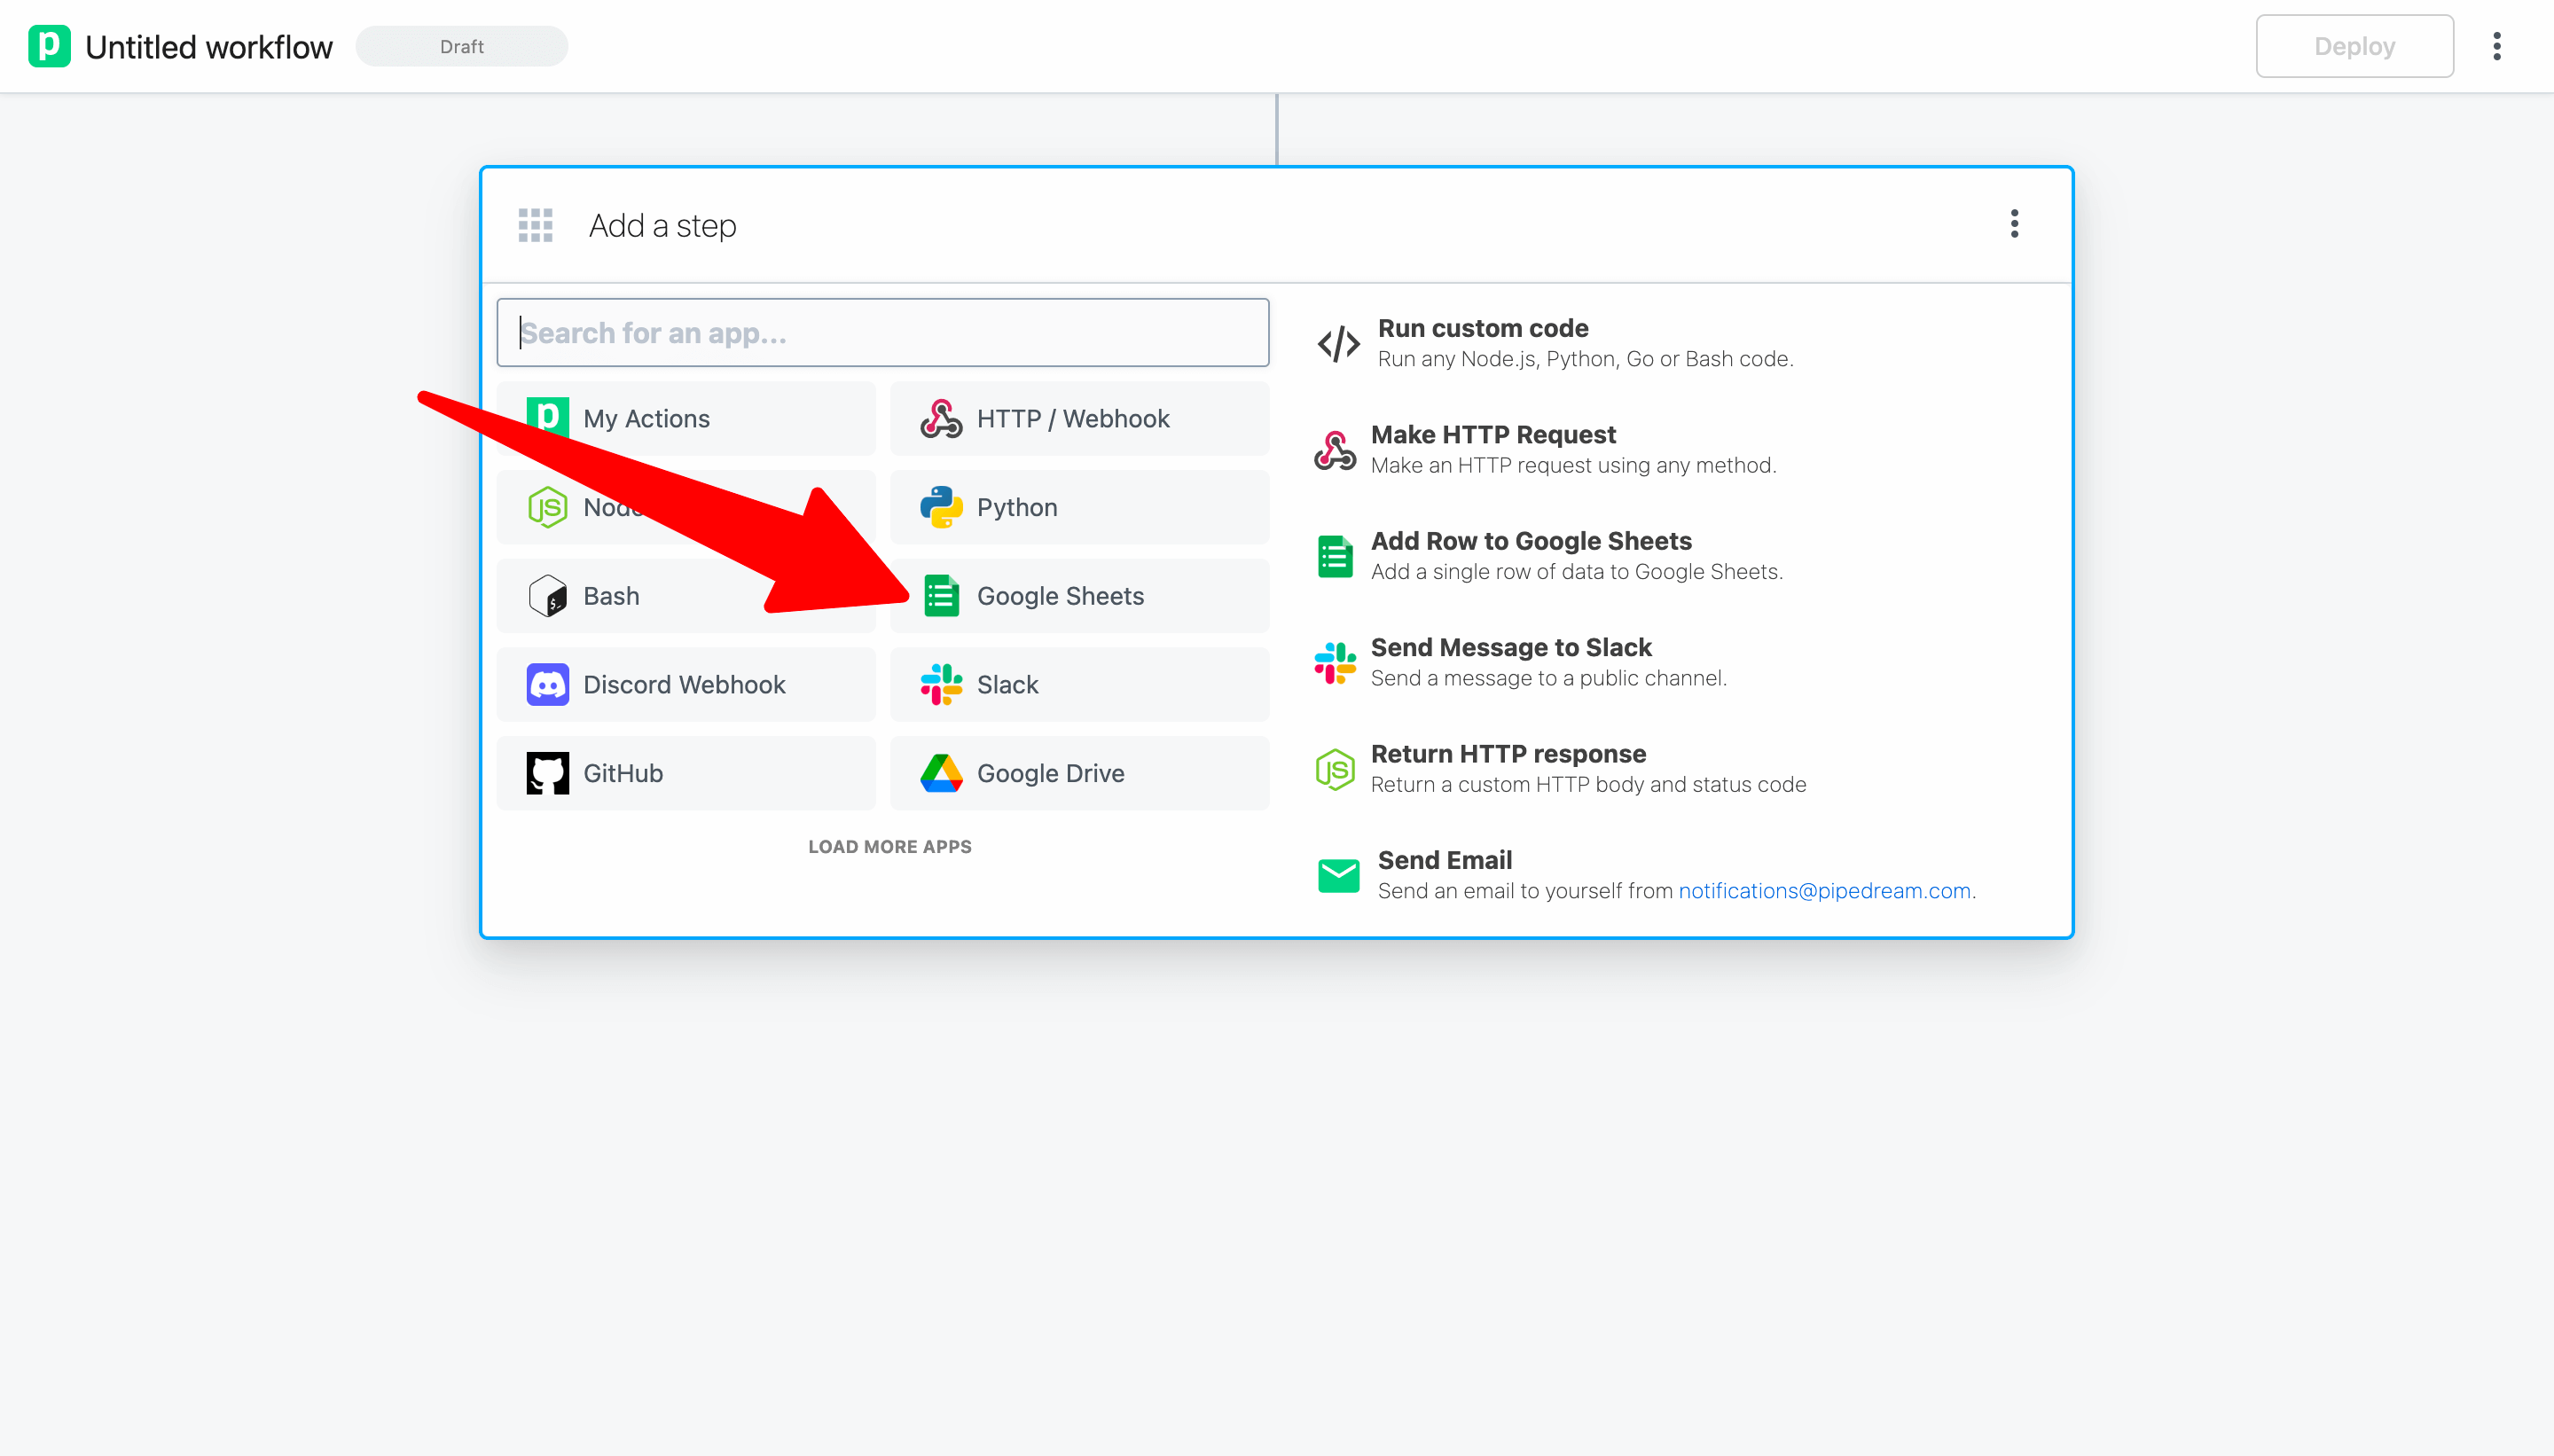
Next, let's add a step to the workflow to send the data to Google Sheets. First, click + after the sentiment code step and select the Google Sheets app.
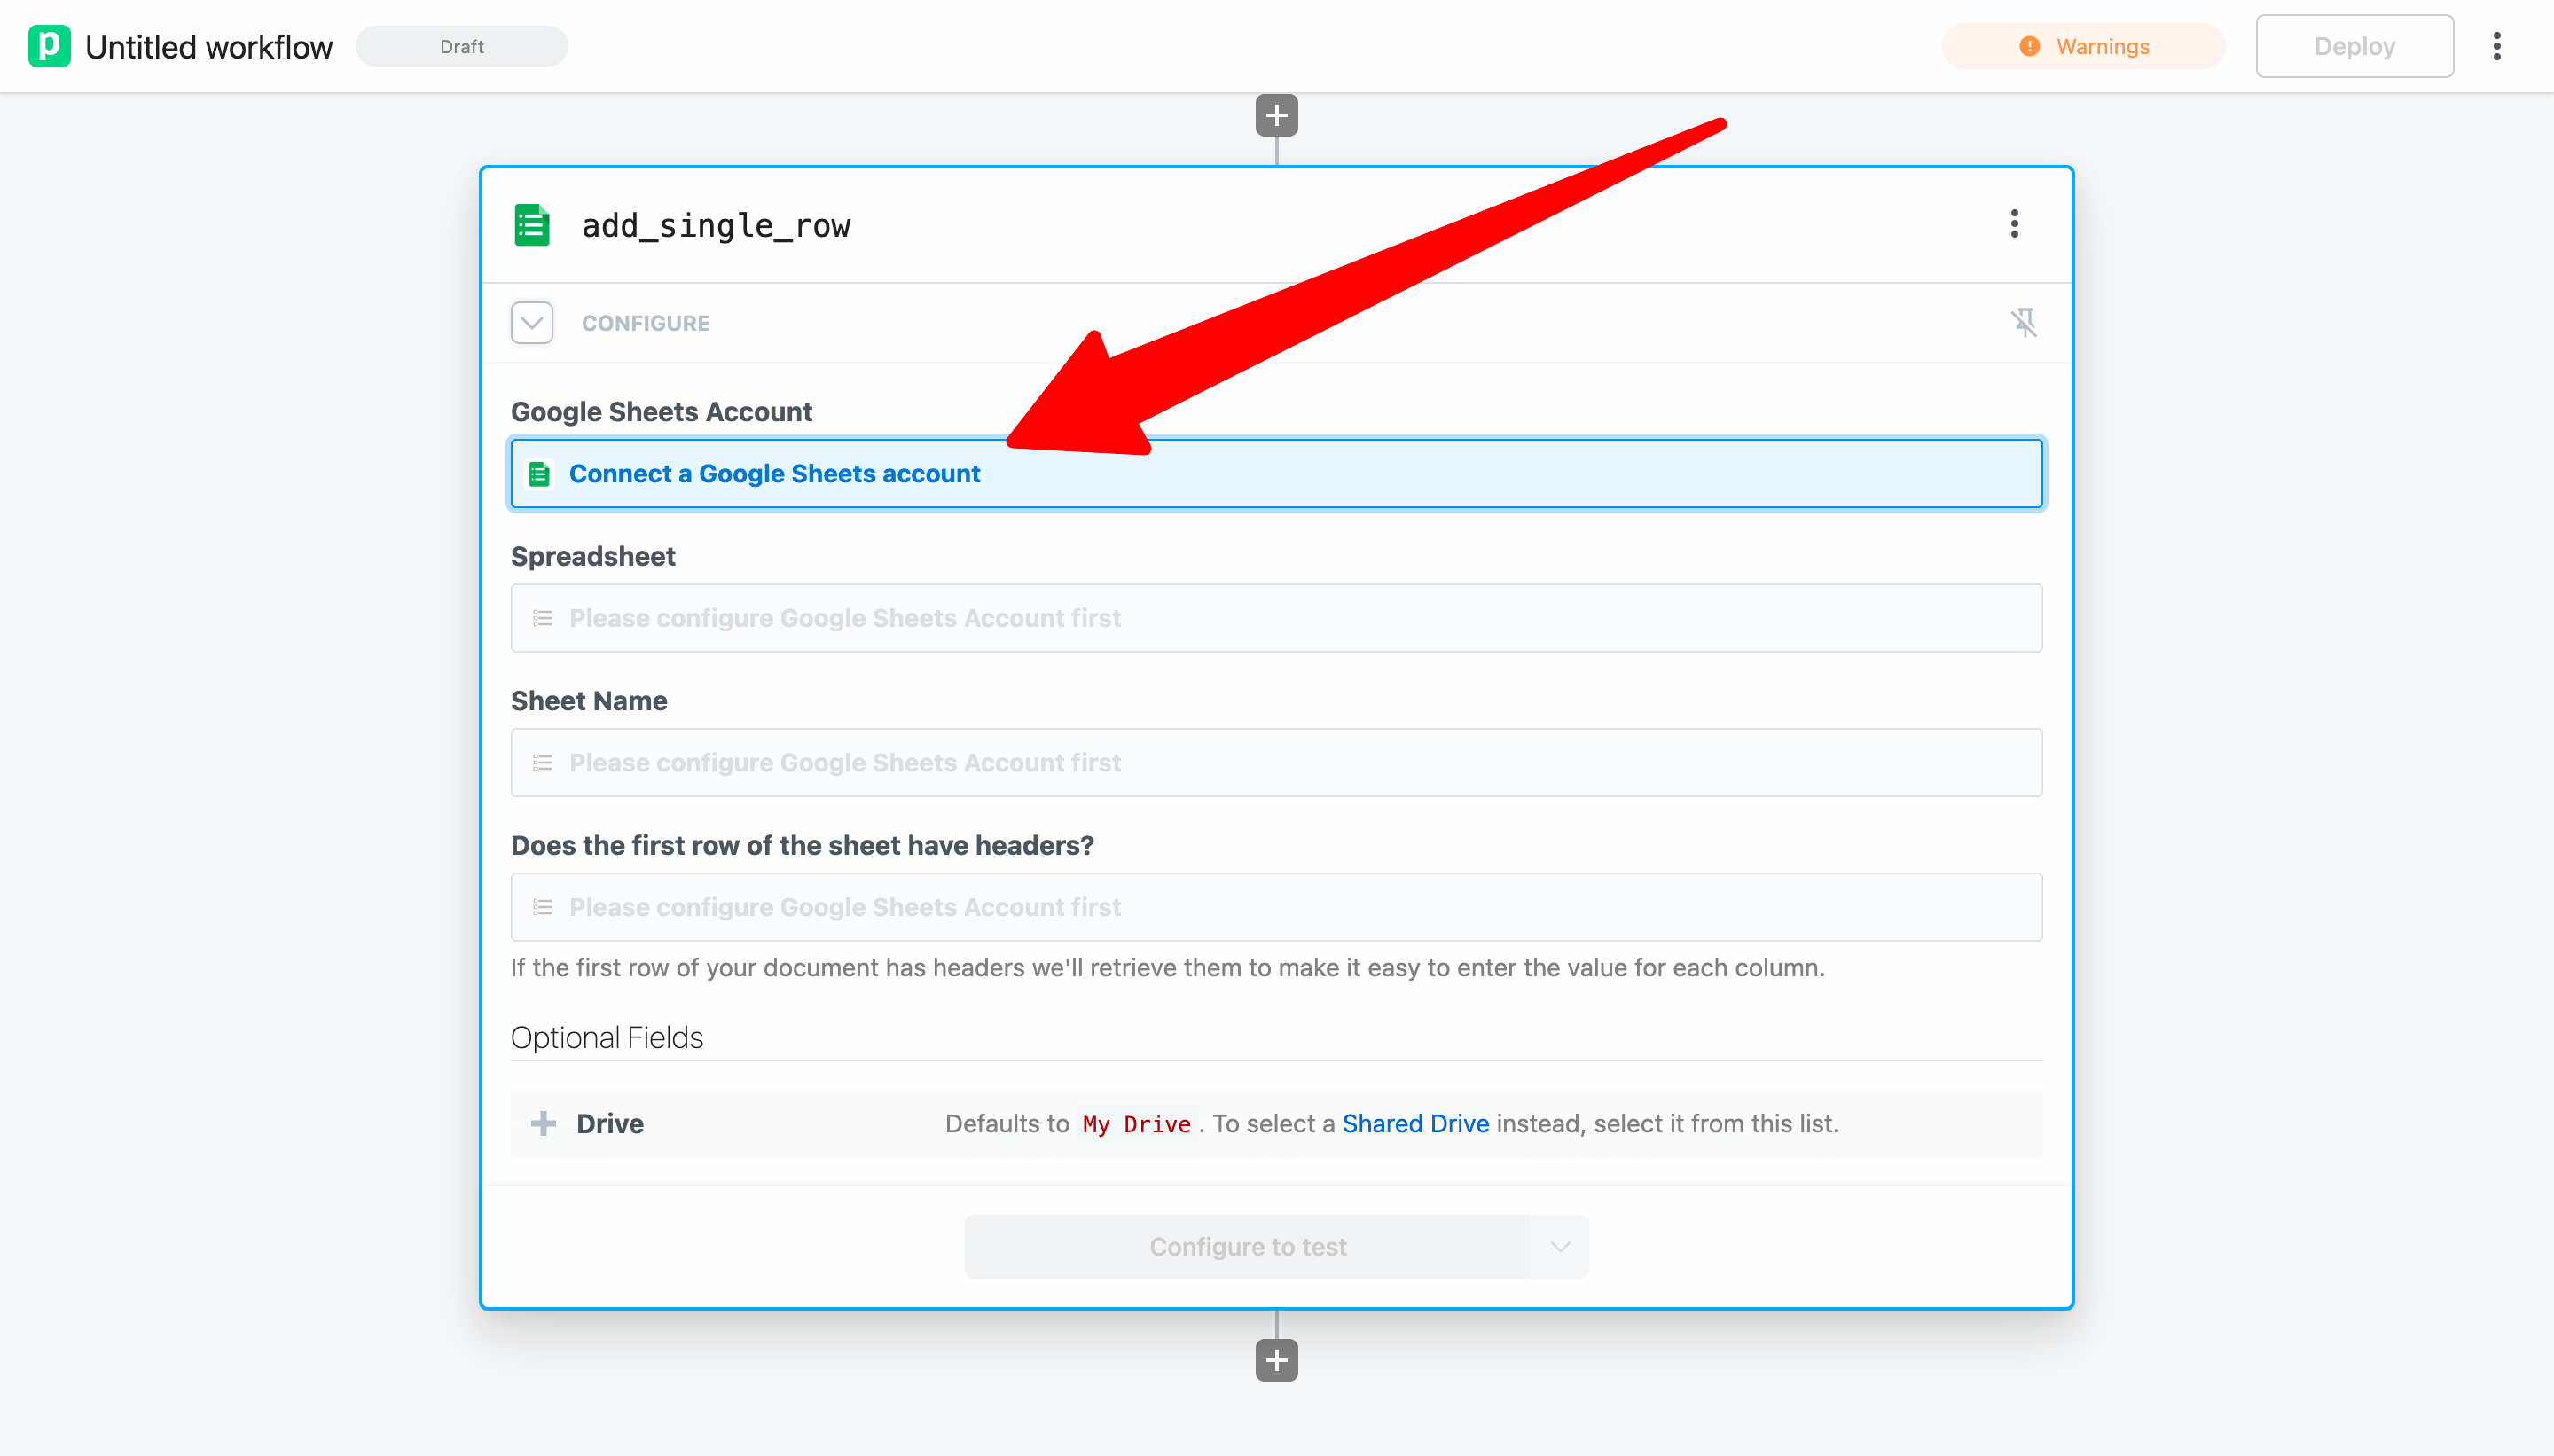
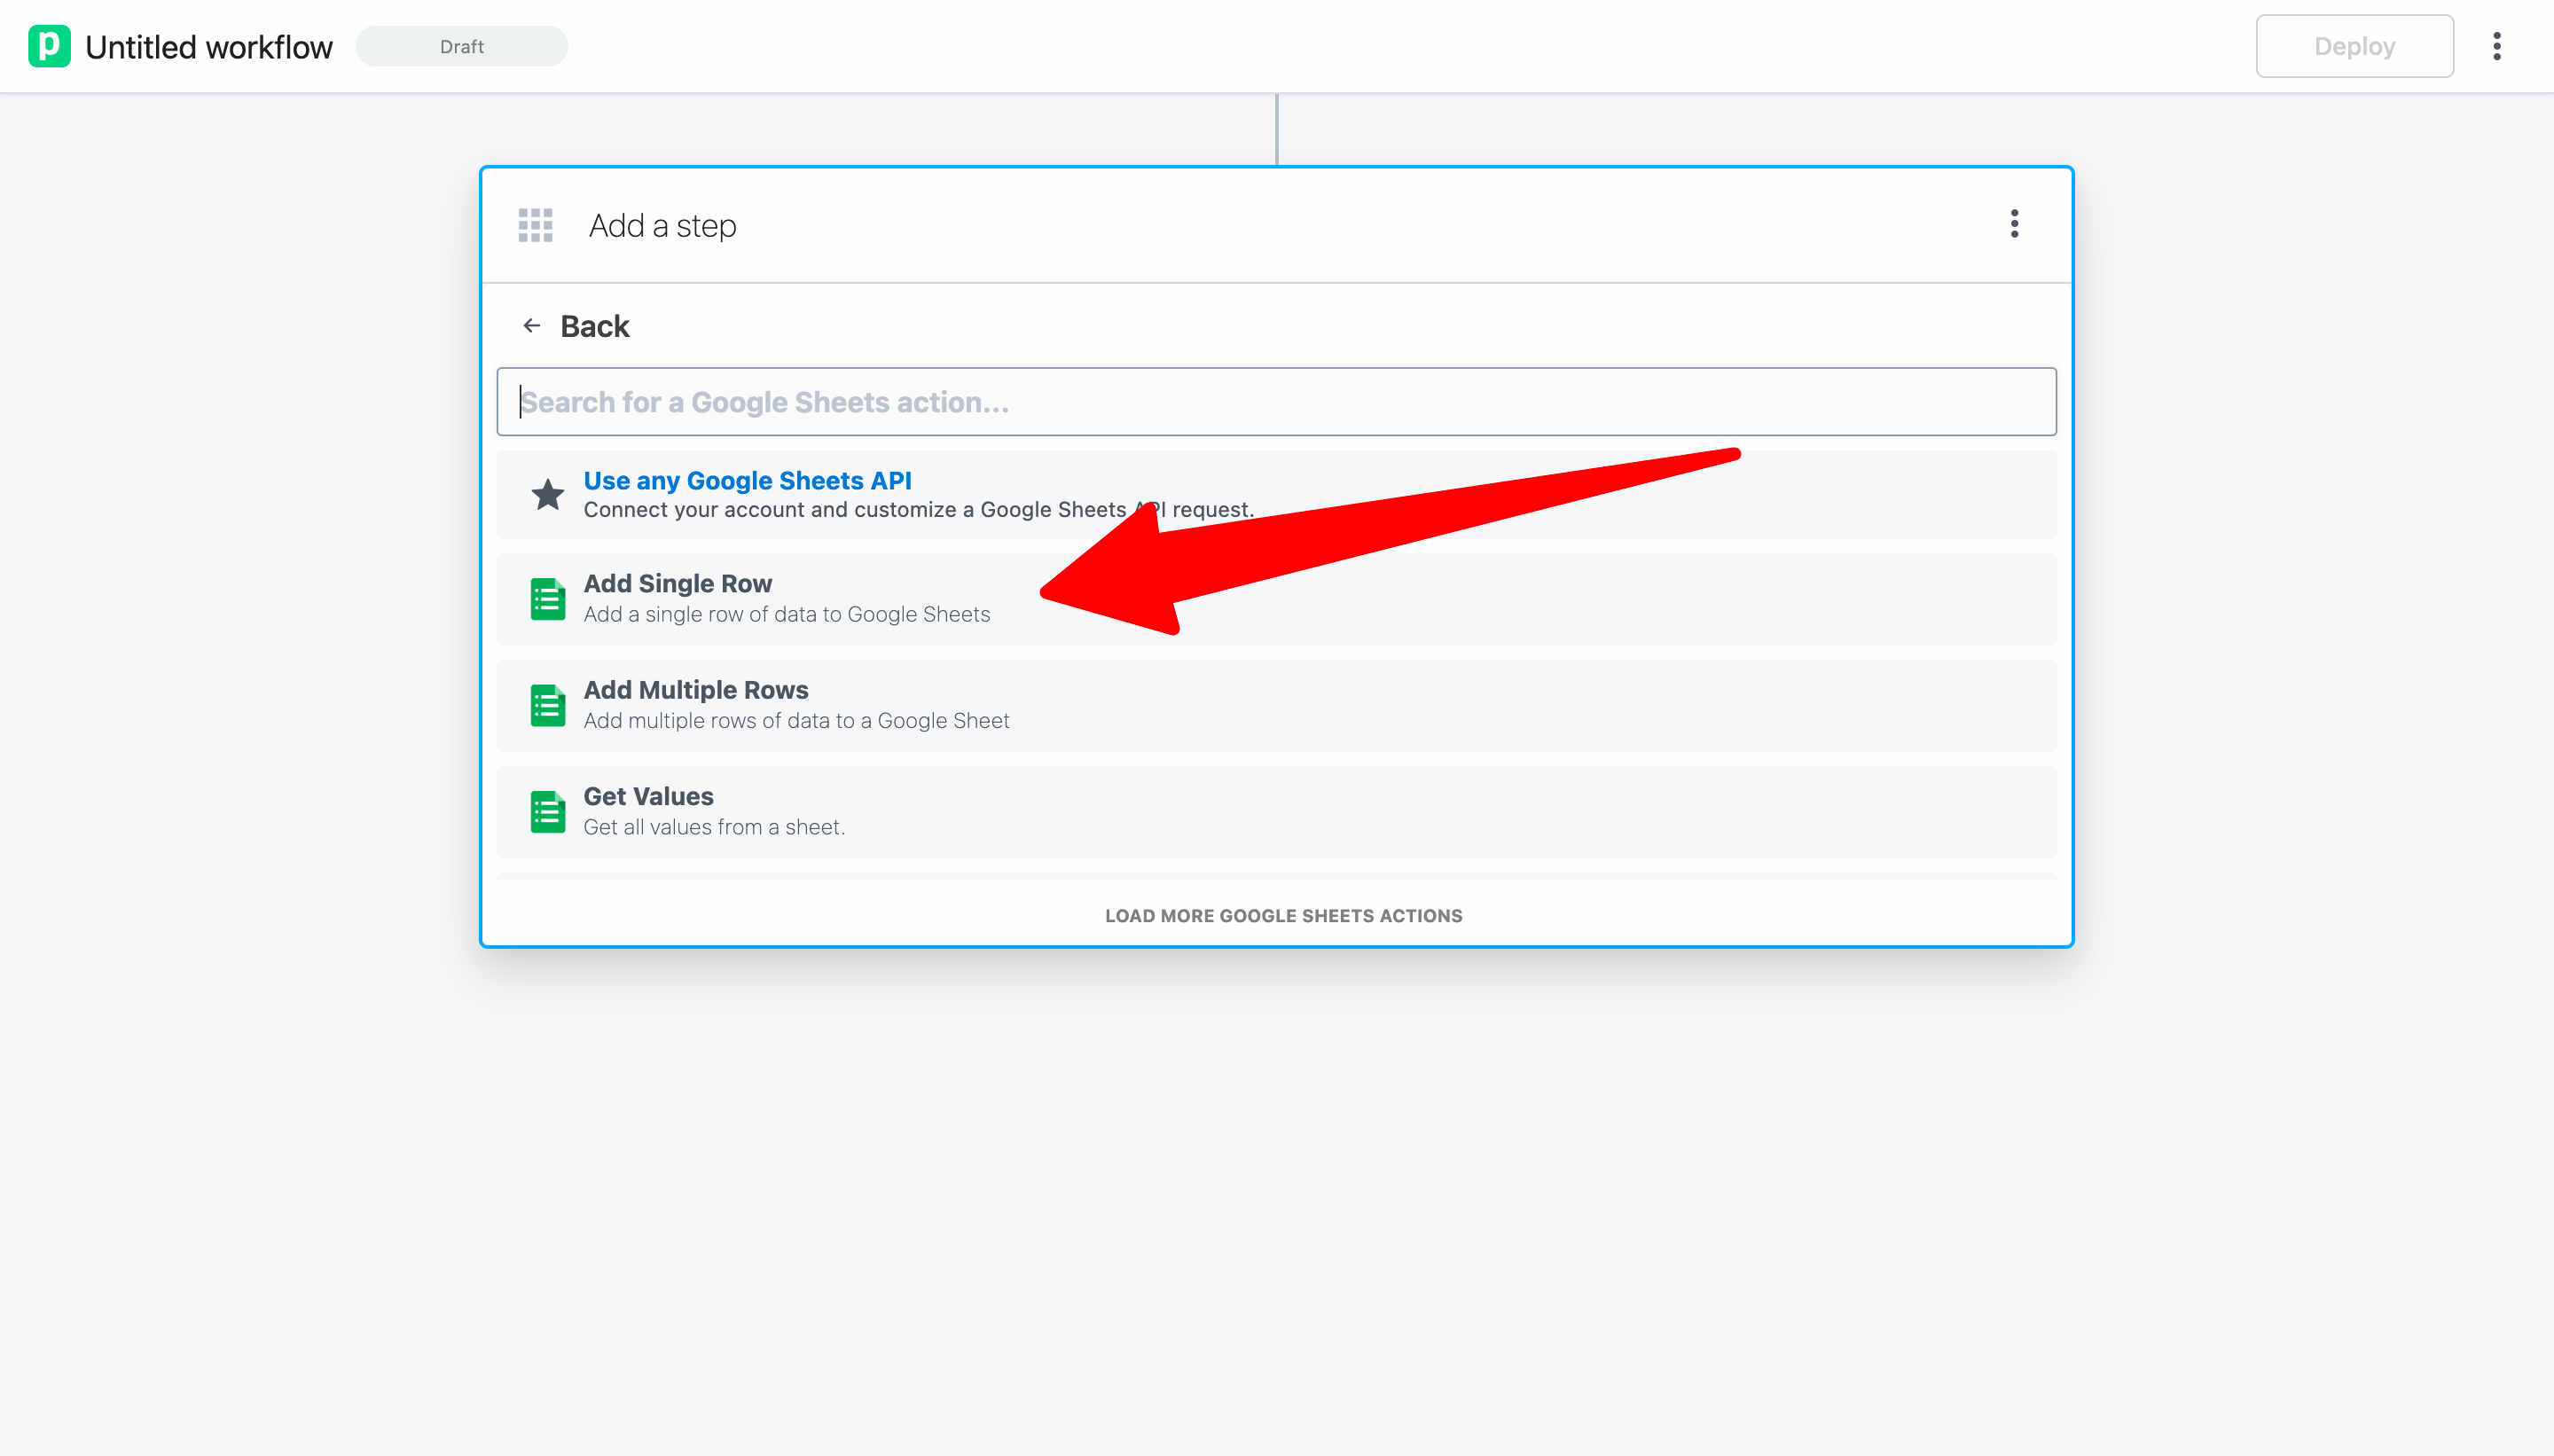
Then select the Add Single Row action.
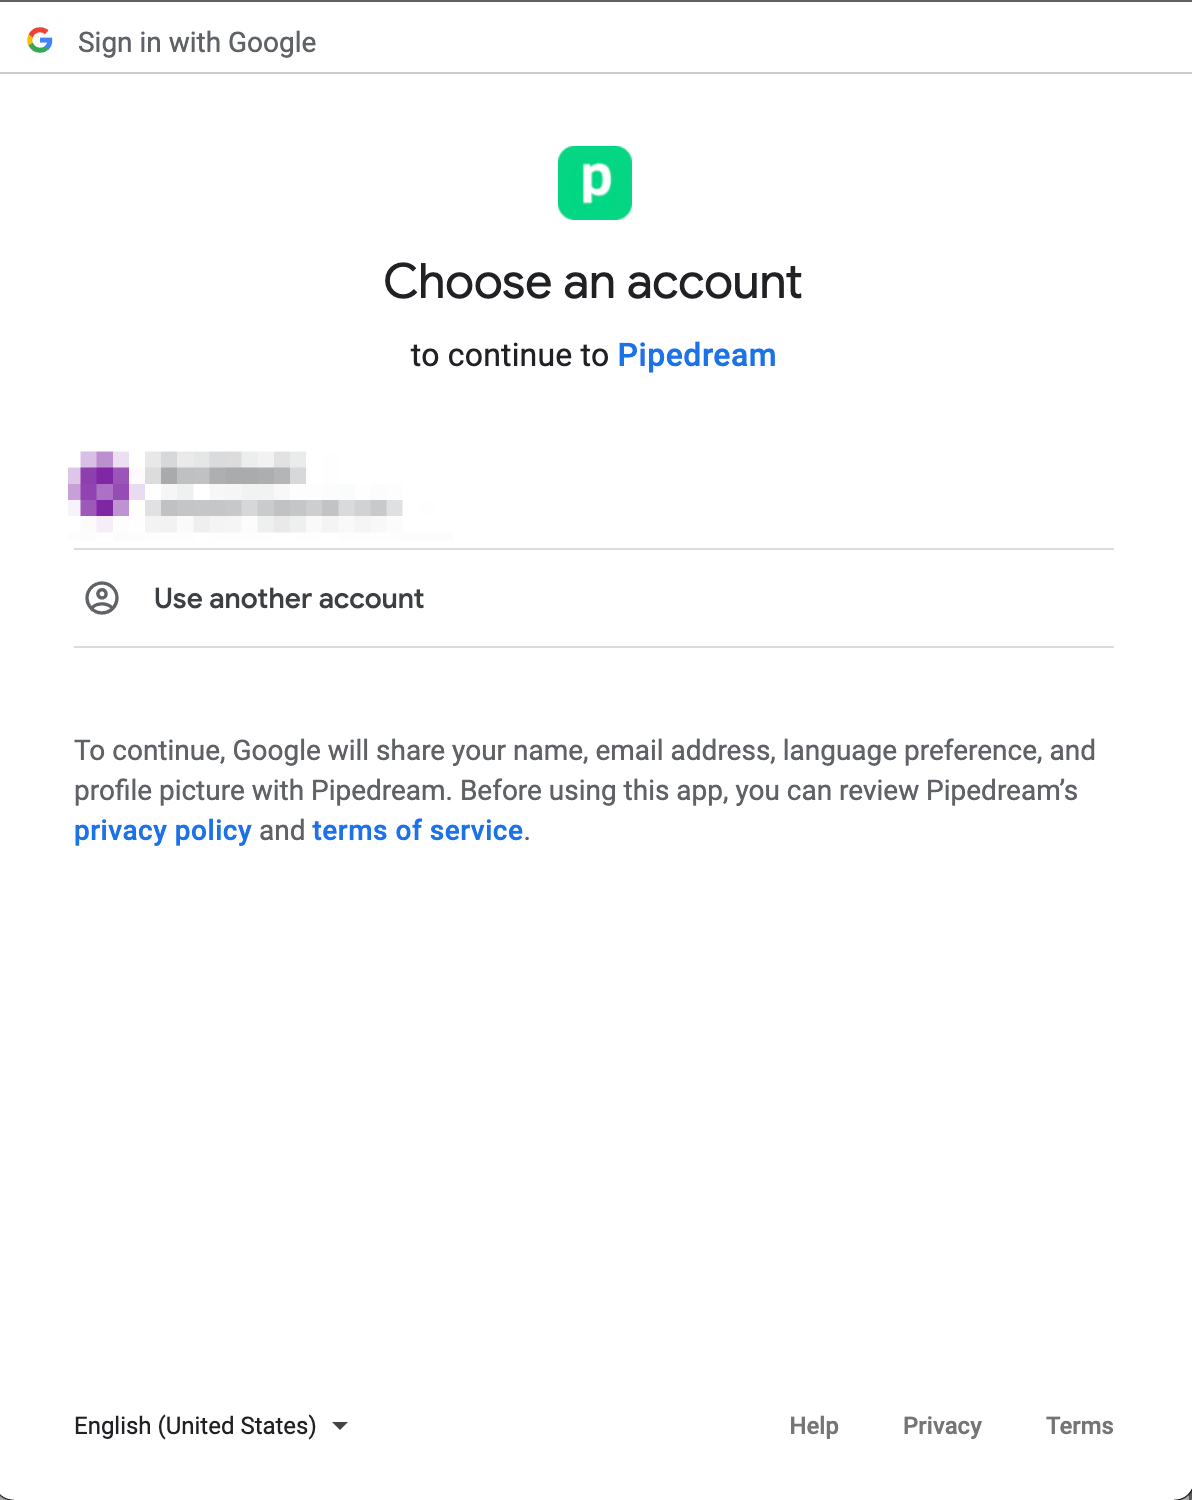
Click to connect you Google Sheets account to Pipedream (or select it from the dropdown if you previously connected an account).

Pipedream will open Google's sign in flow in a new window. Sign in with the account you want to connect.
WARNING
If prompted, you must check the box for Pipedream to See, edit, create and delete all of your Google Drive files. These permissions are required for configure and use the pre-built actions for Google Sheets.
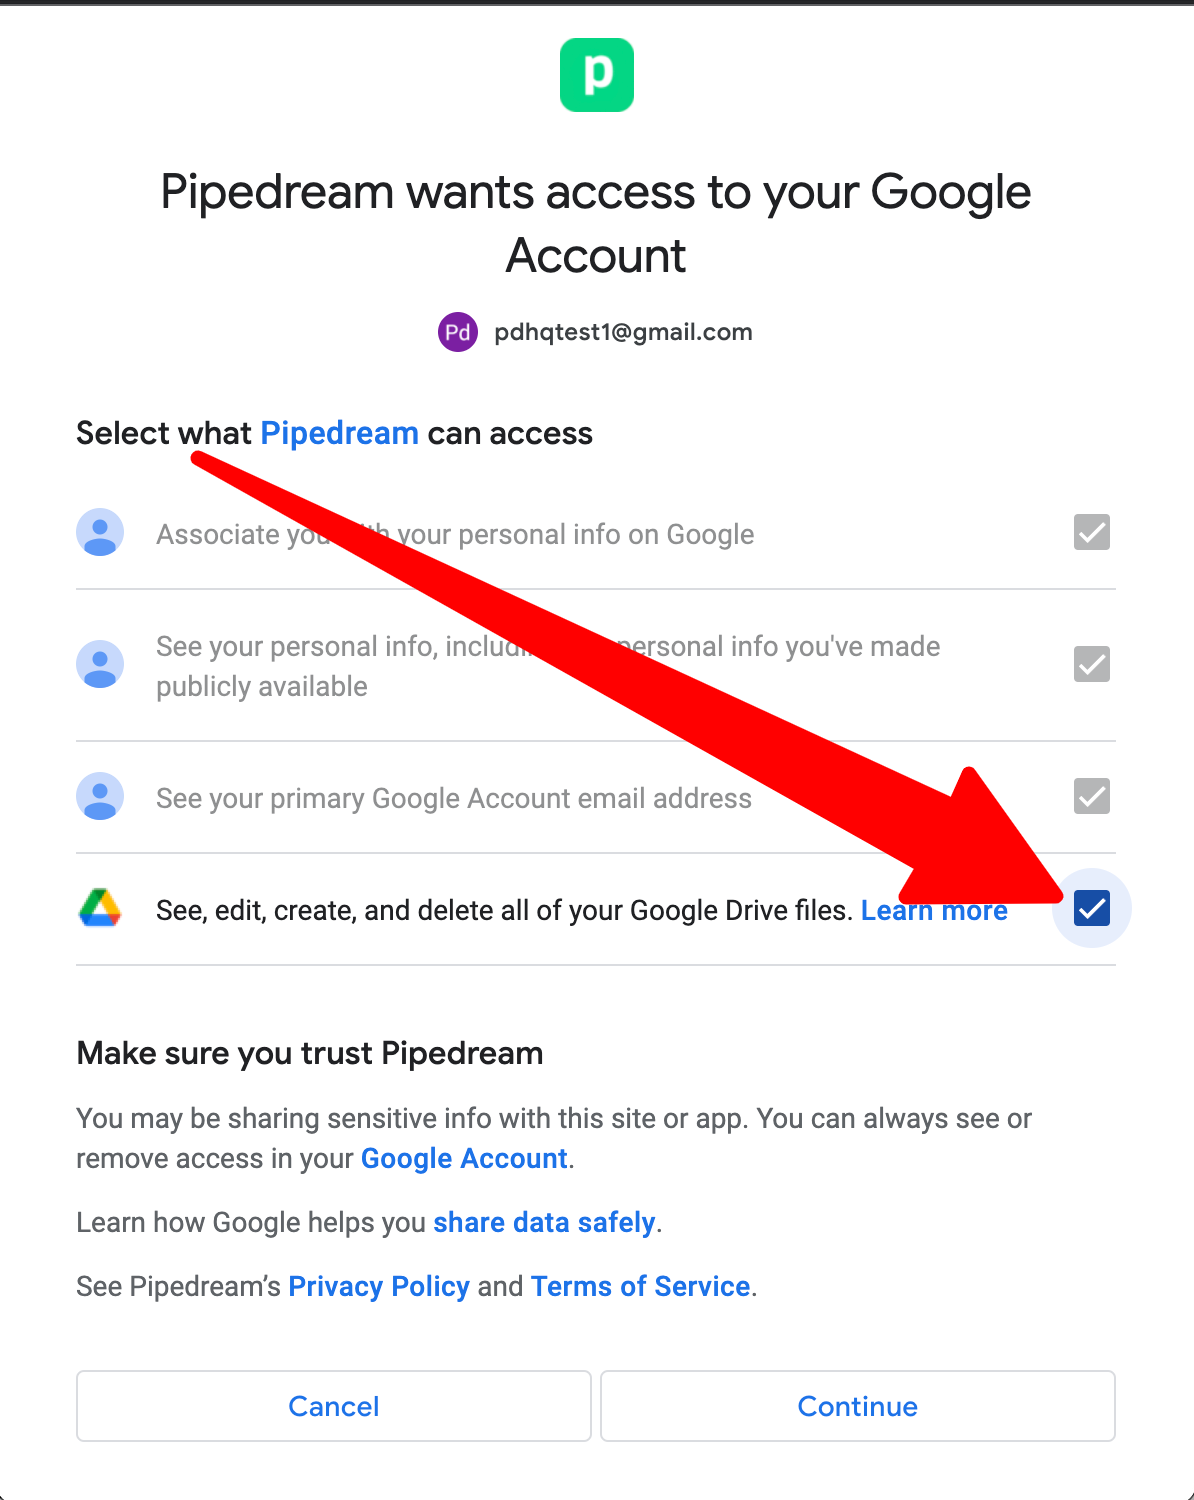
Learn more about Pipedream's privacy and security policy.
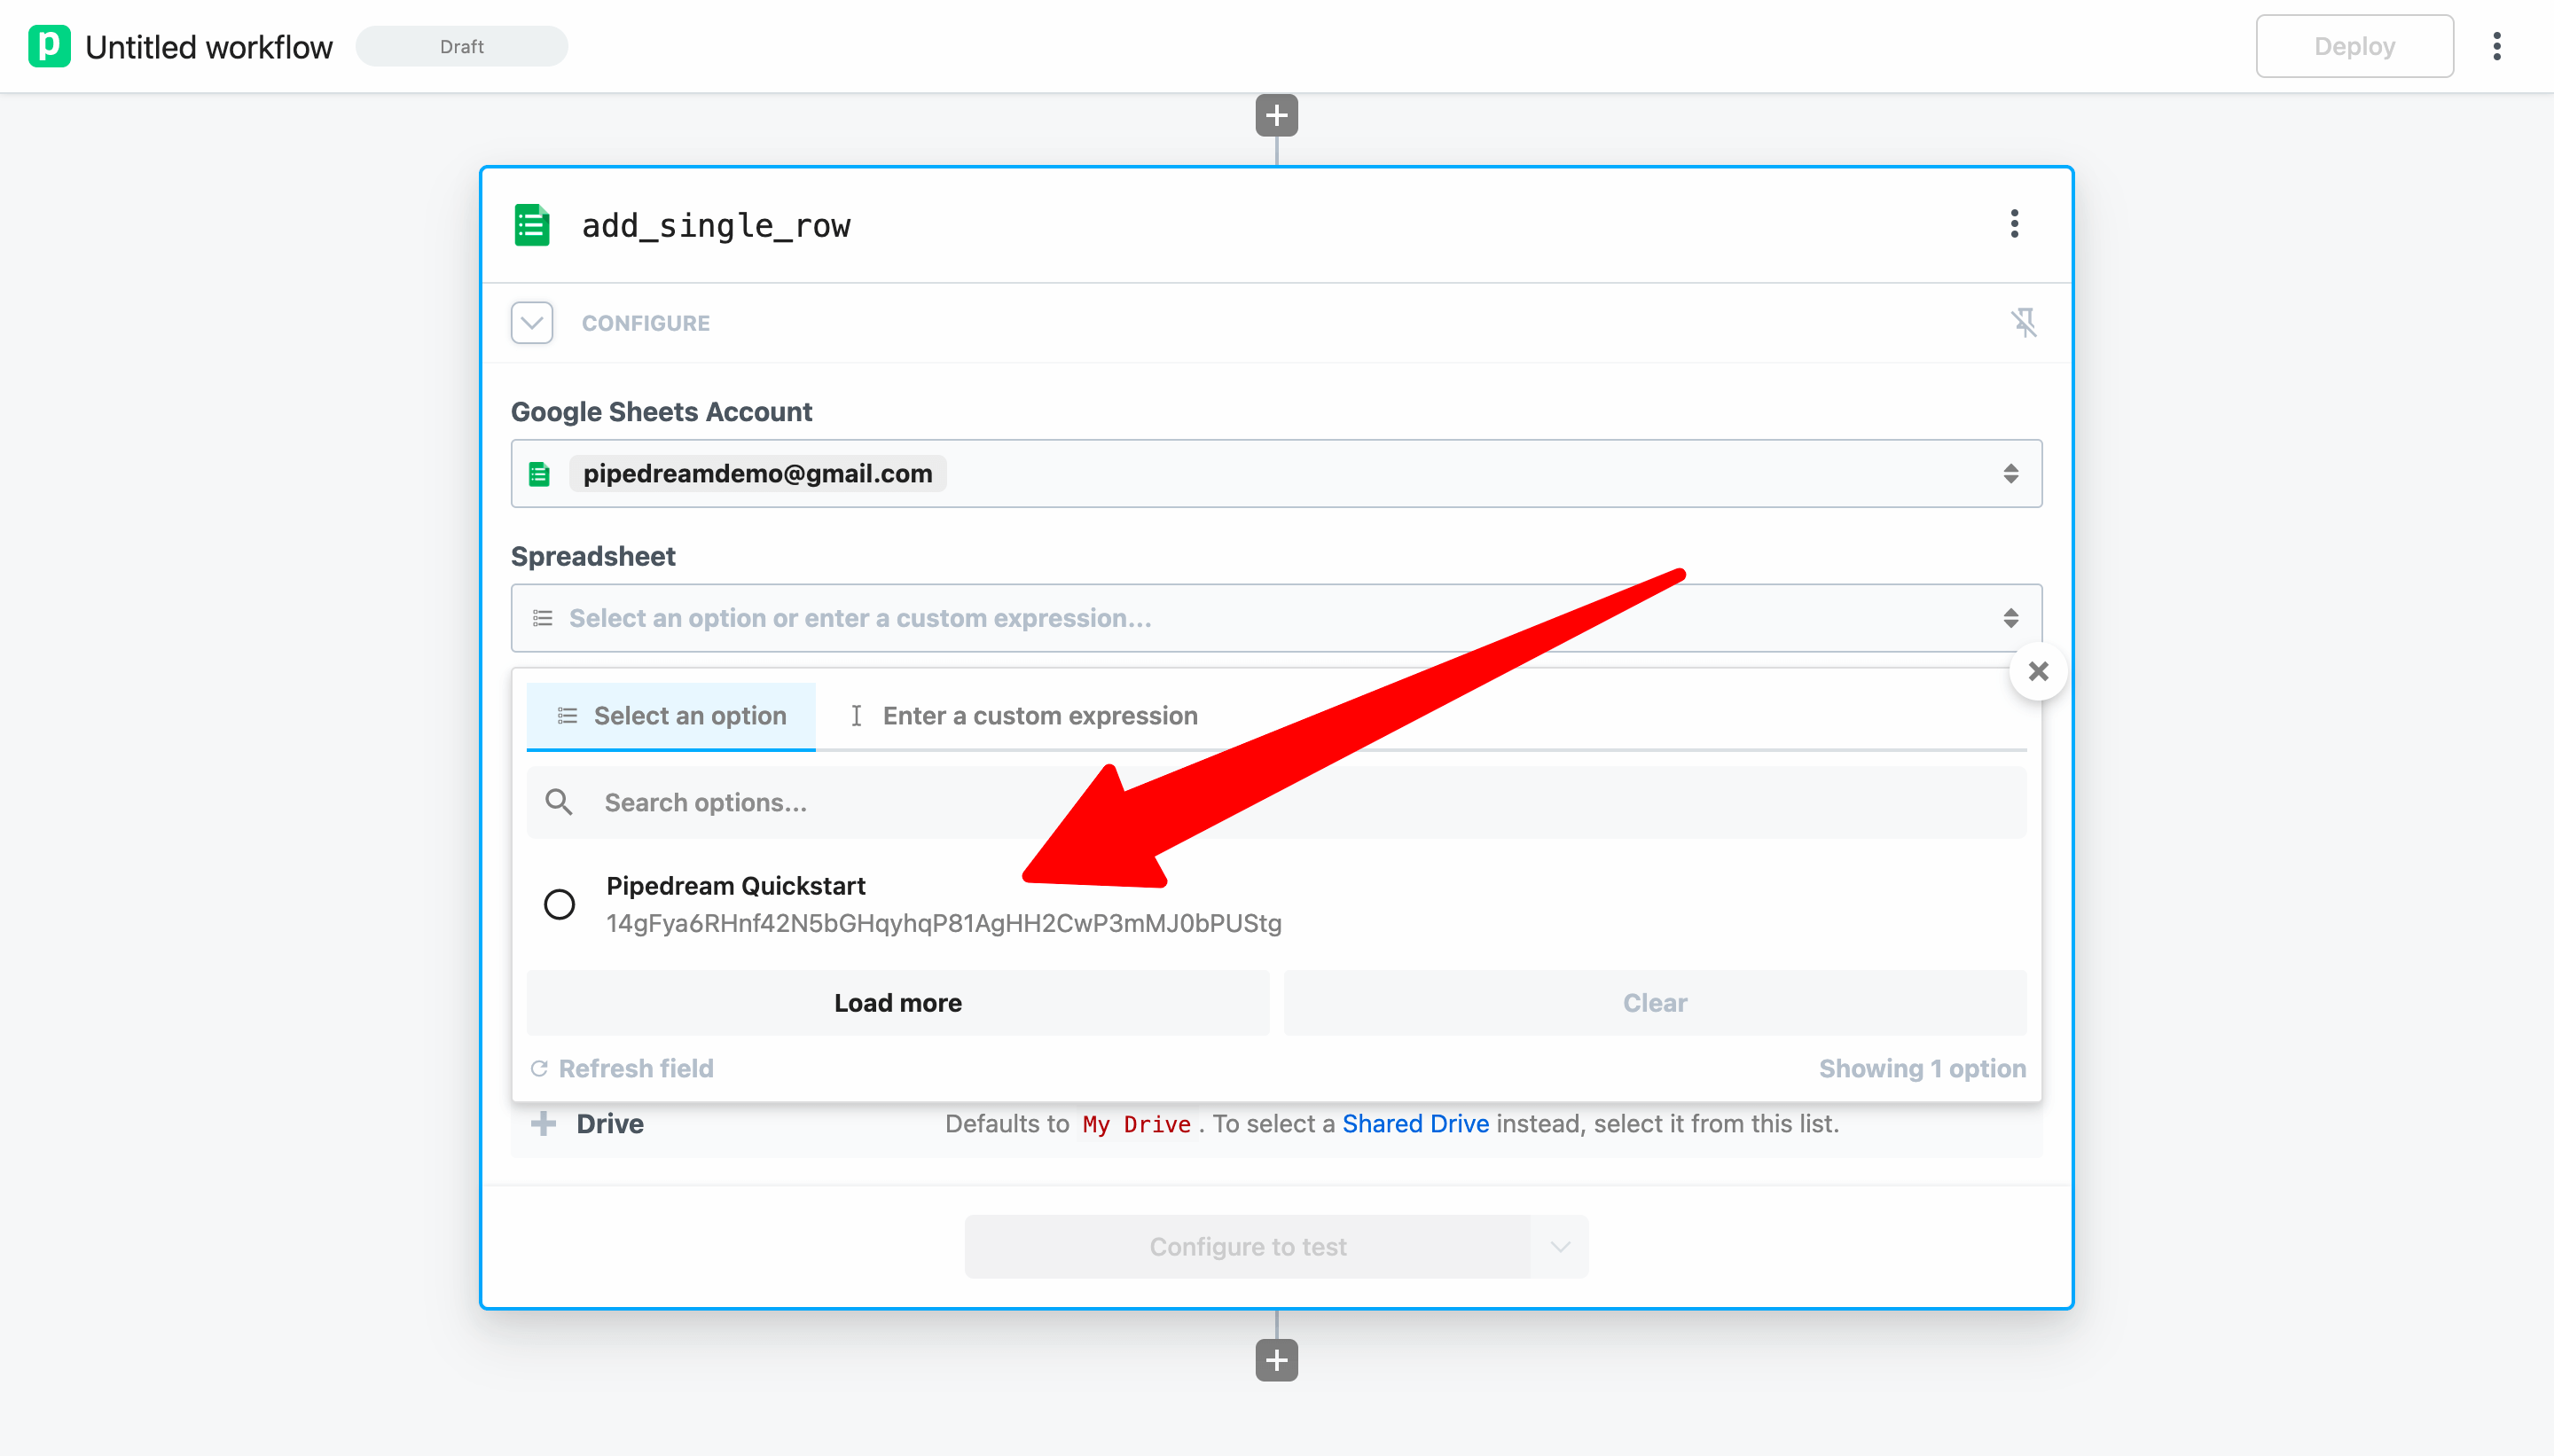
When you complete connecting your Google account, the window should close and you should return to Pipedream. Your connected account should automatically be selected. Next, select your spreadsheet from the dropdown menu:
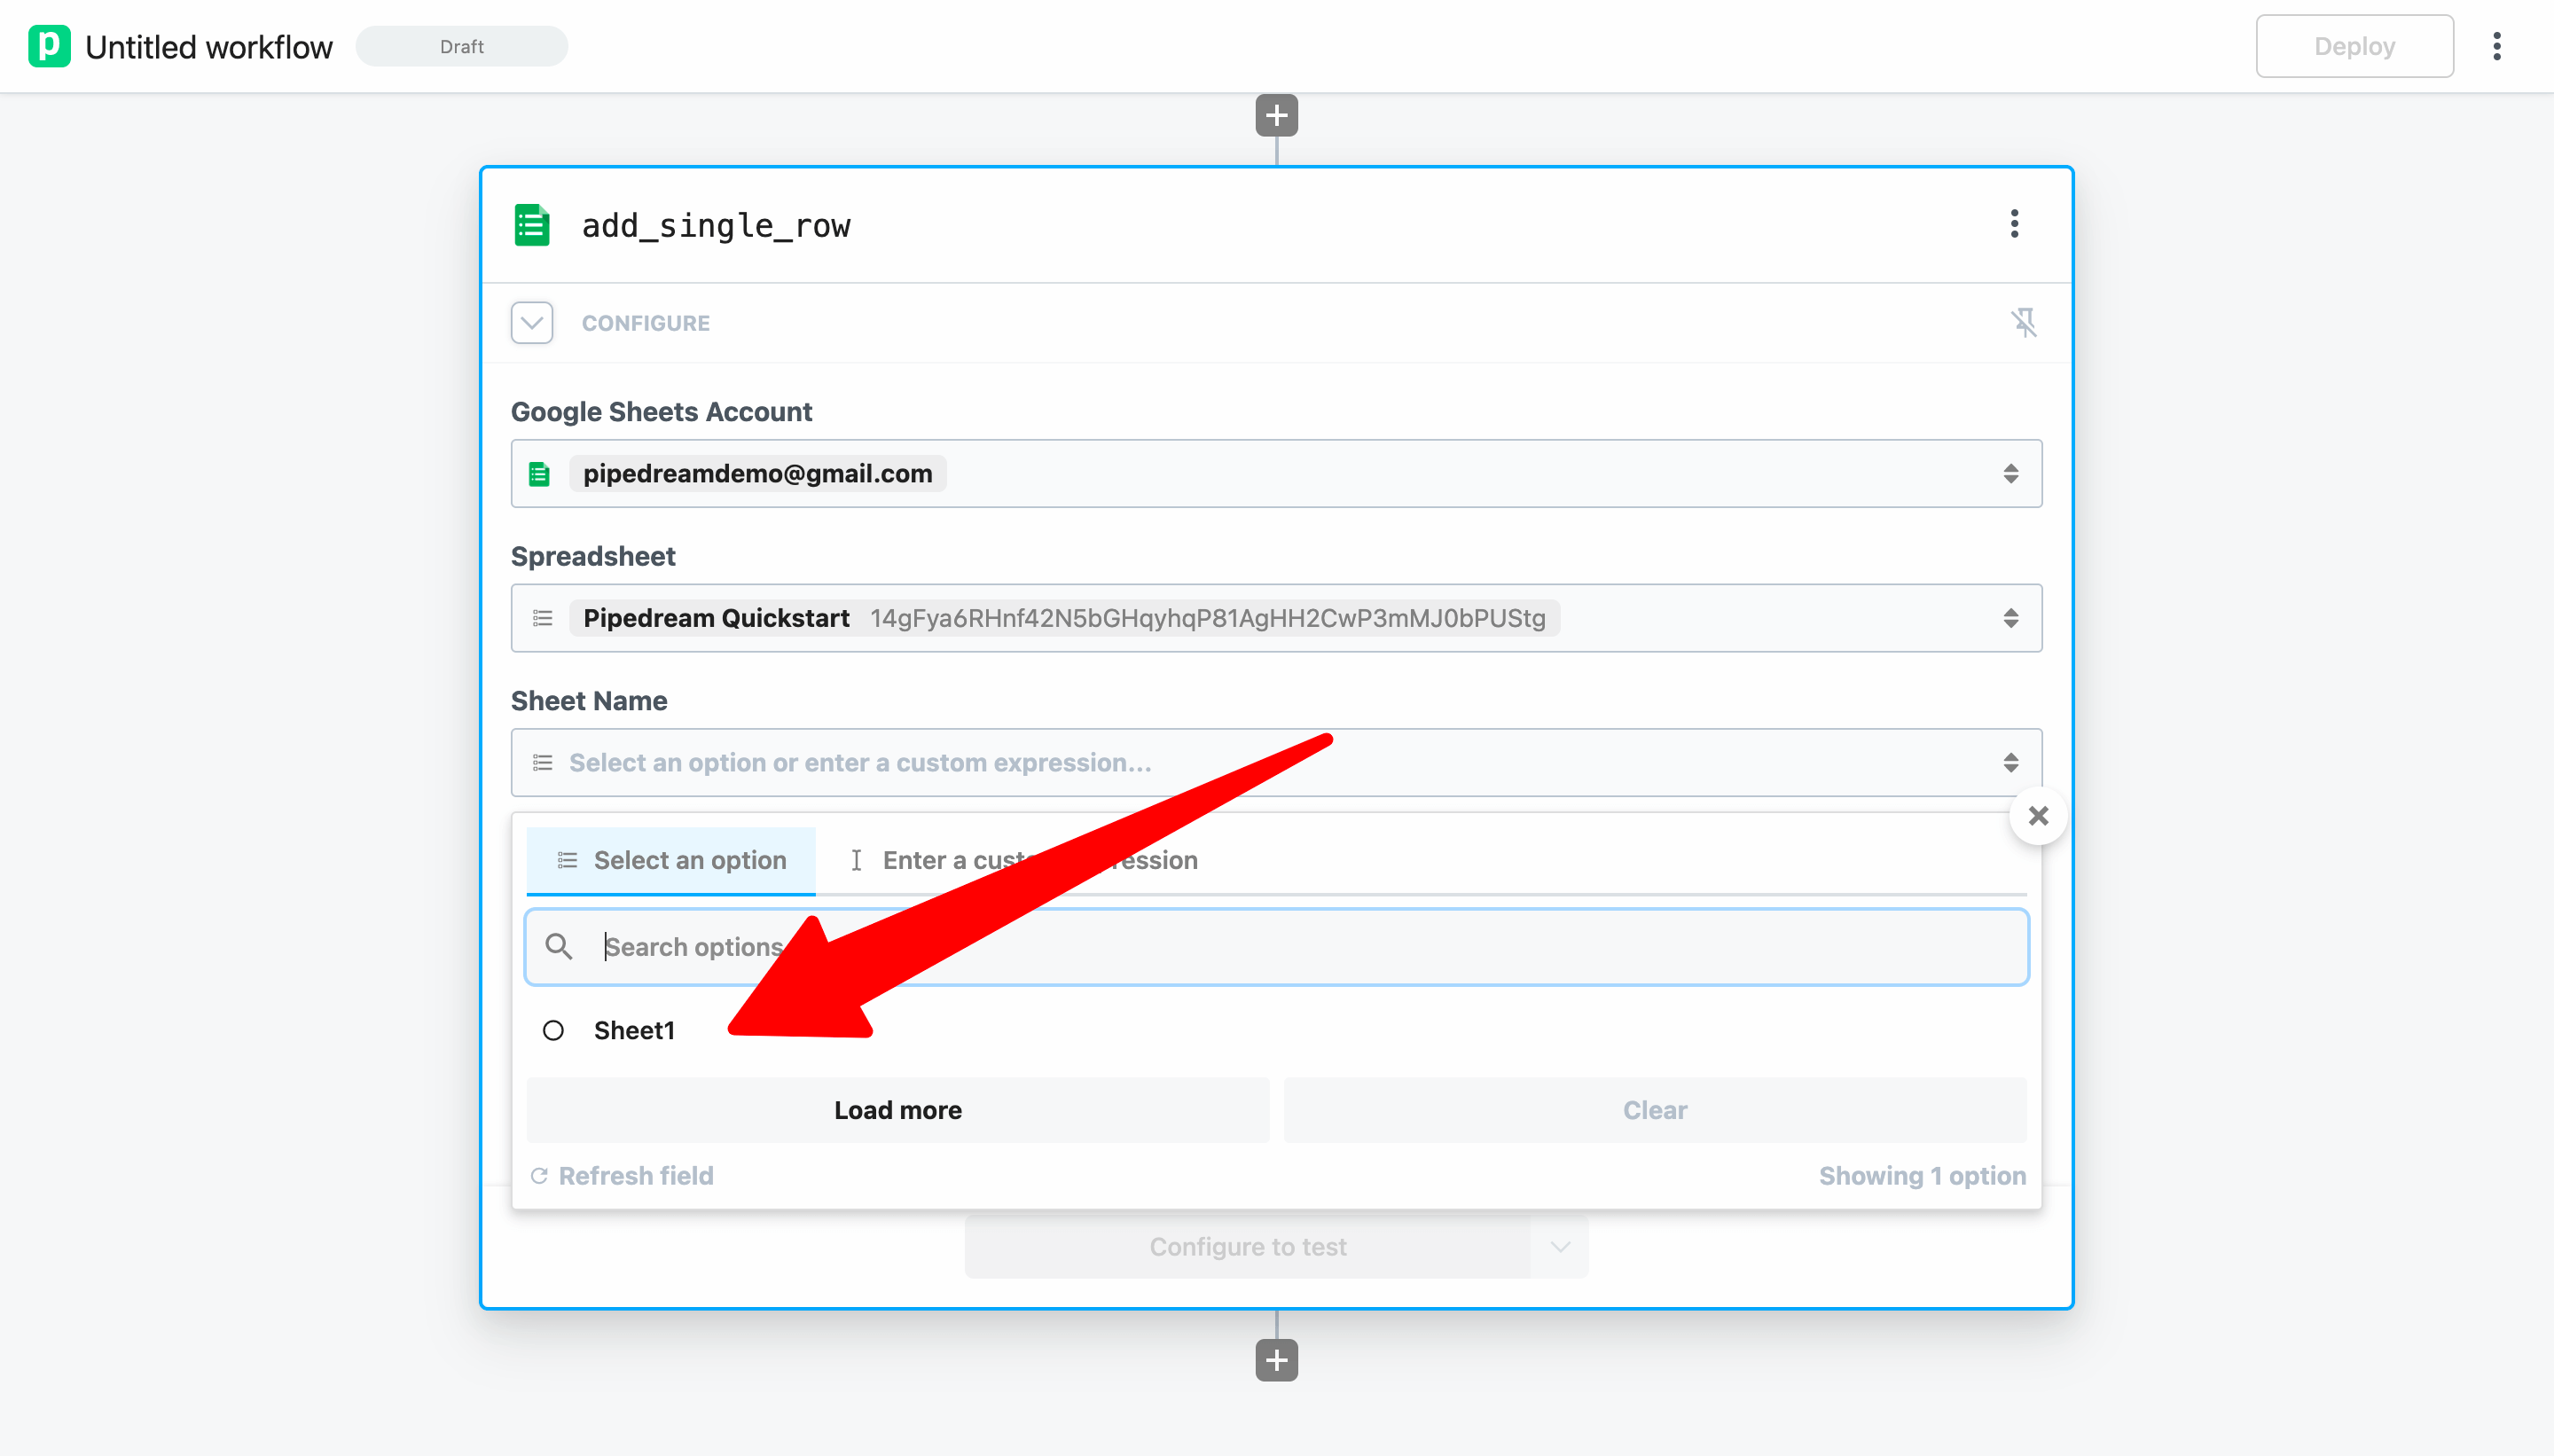
Then select the sheet name (the default sheet name in Google Sheets is Sheet1):
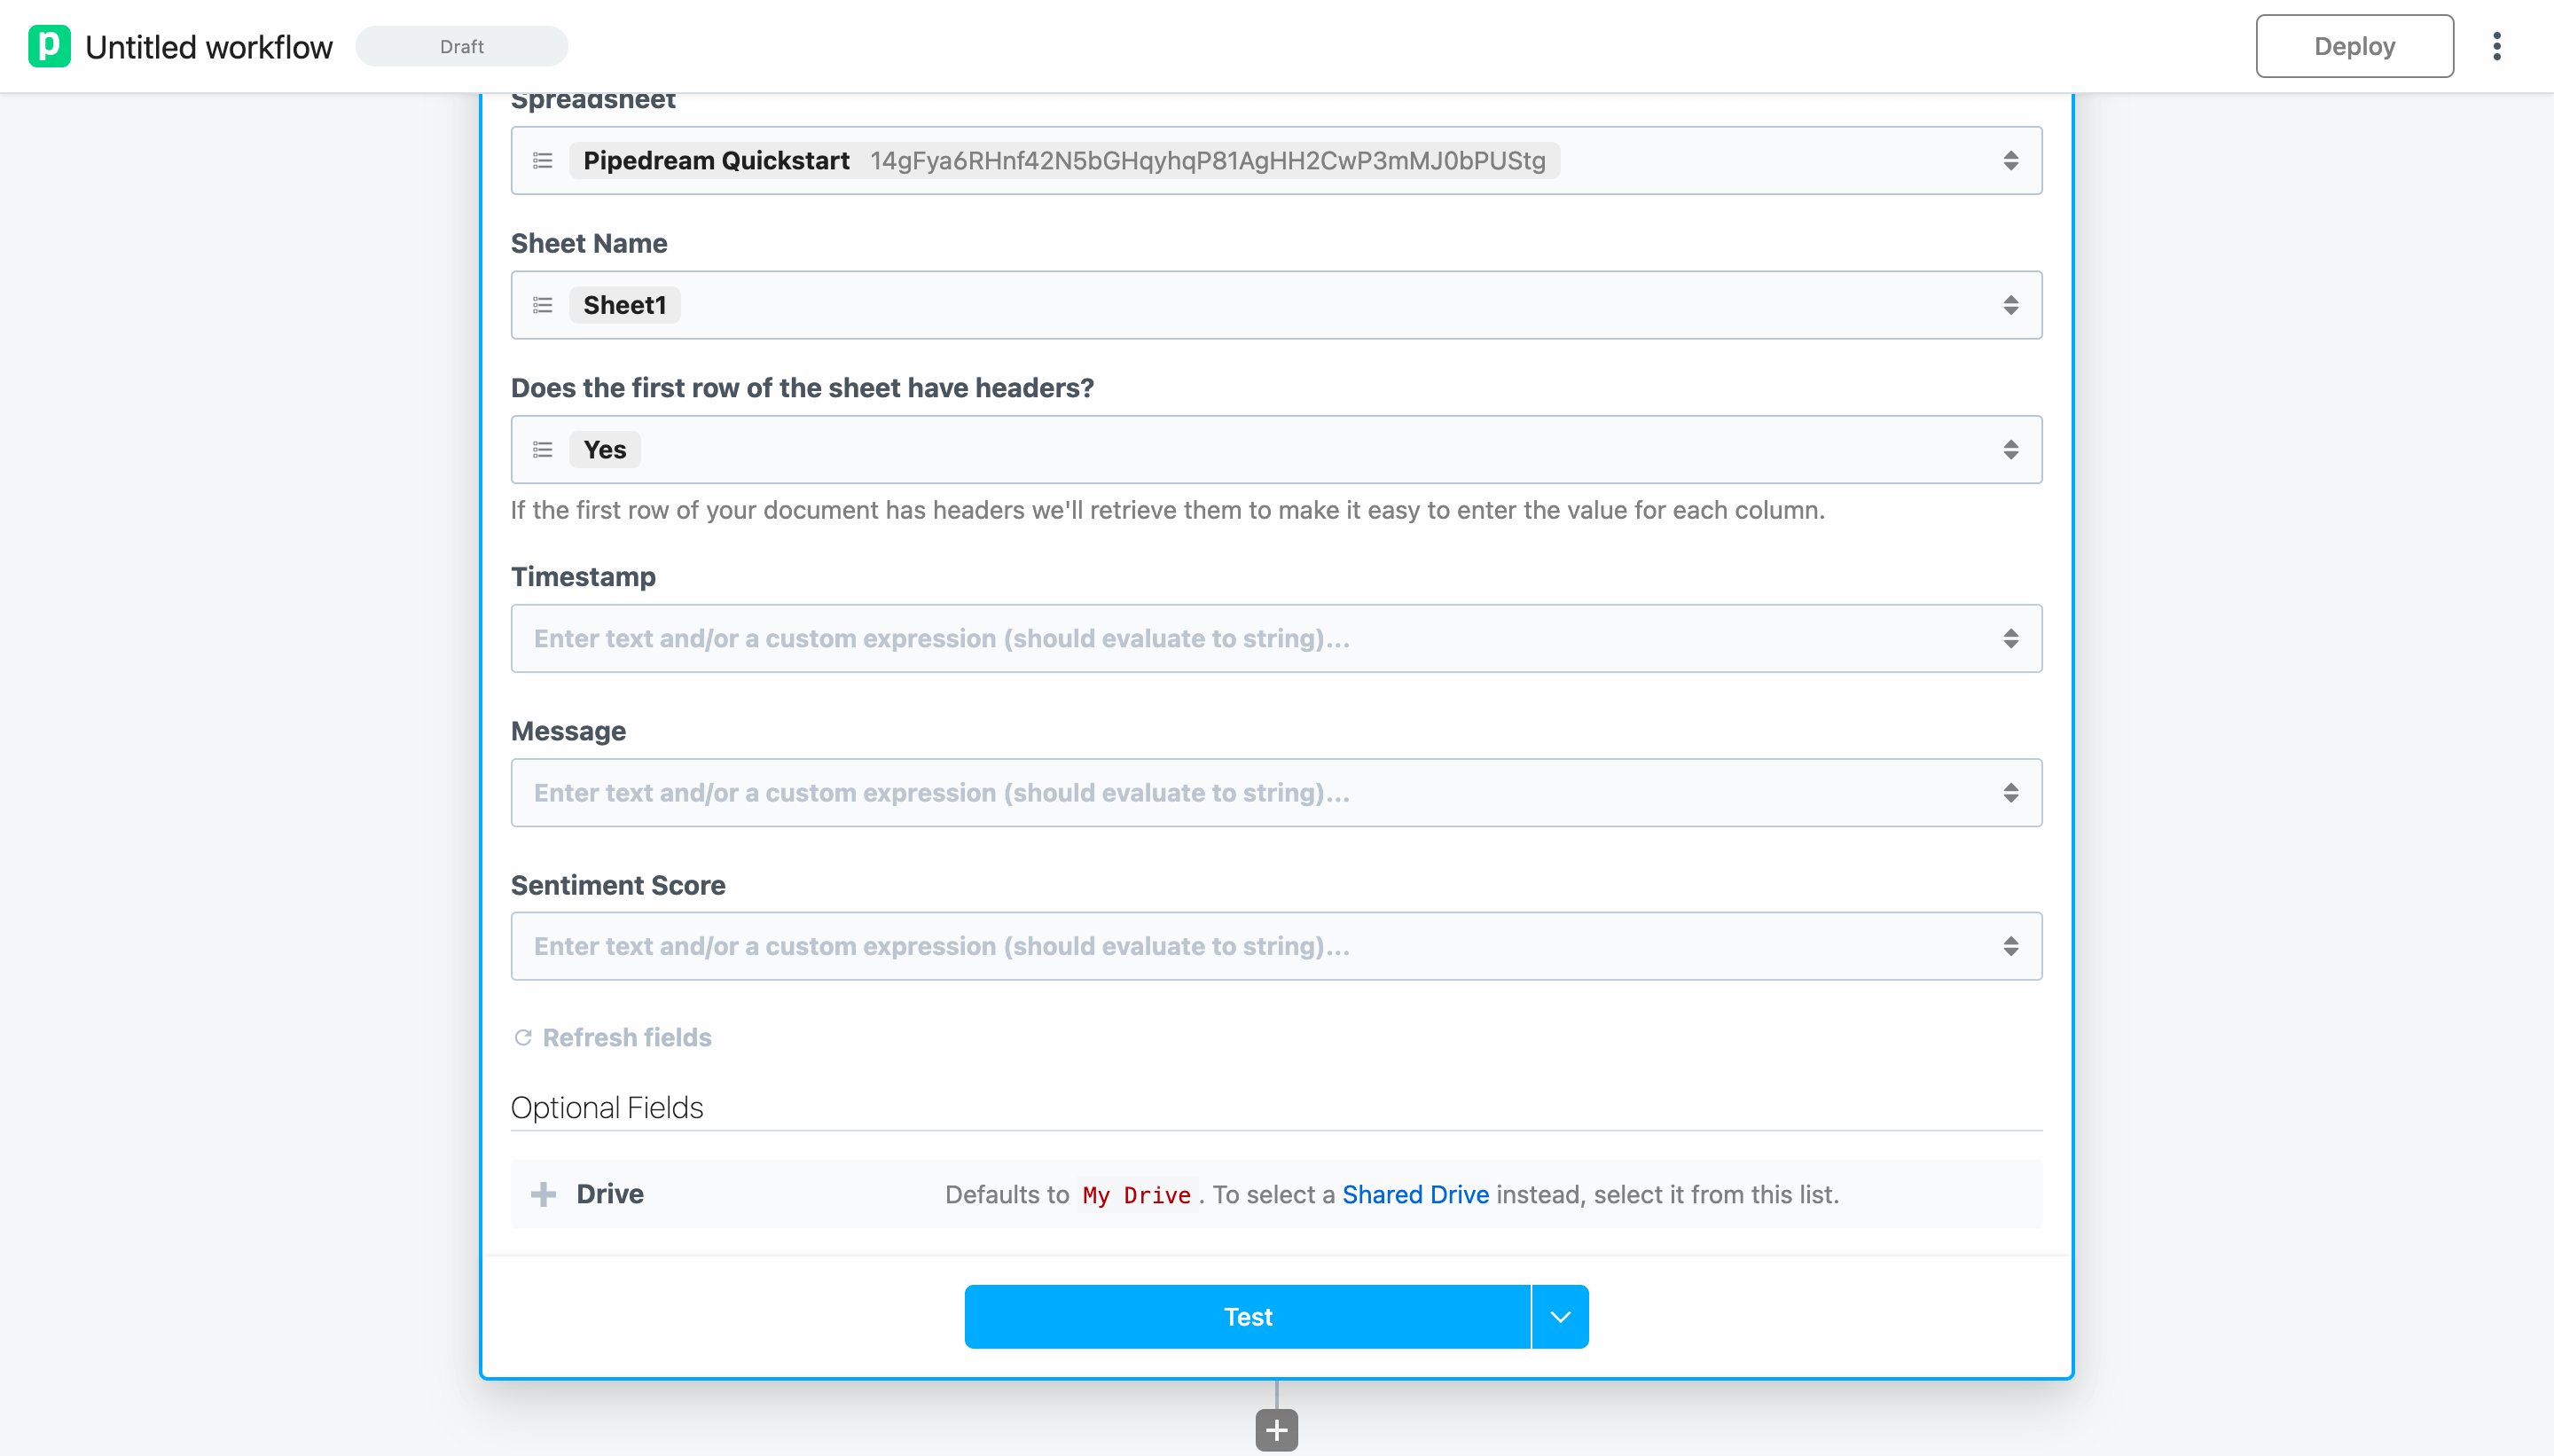
Next, select if the spreadsheet has headers in the first row. When a header row exists, Pipedream will automatically retrieve the header labels to make it easy to enter data (if not, you can manually construct an array of values). Since the sheet for this example contains headers, select Yes.

Pipedream will retrieve the headers and generate a form to enter data in your sheet:
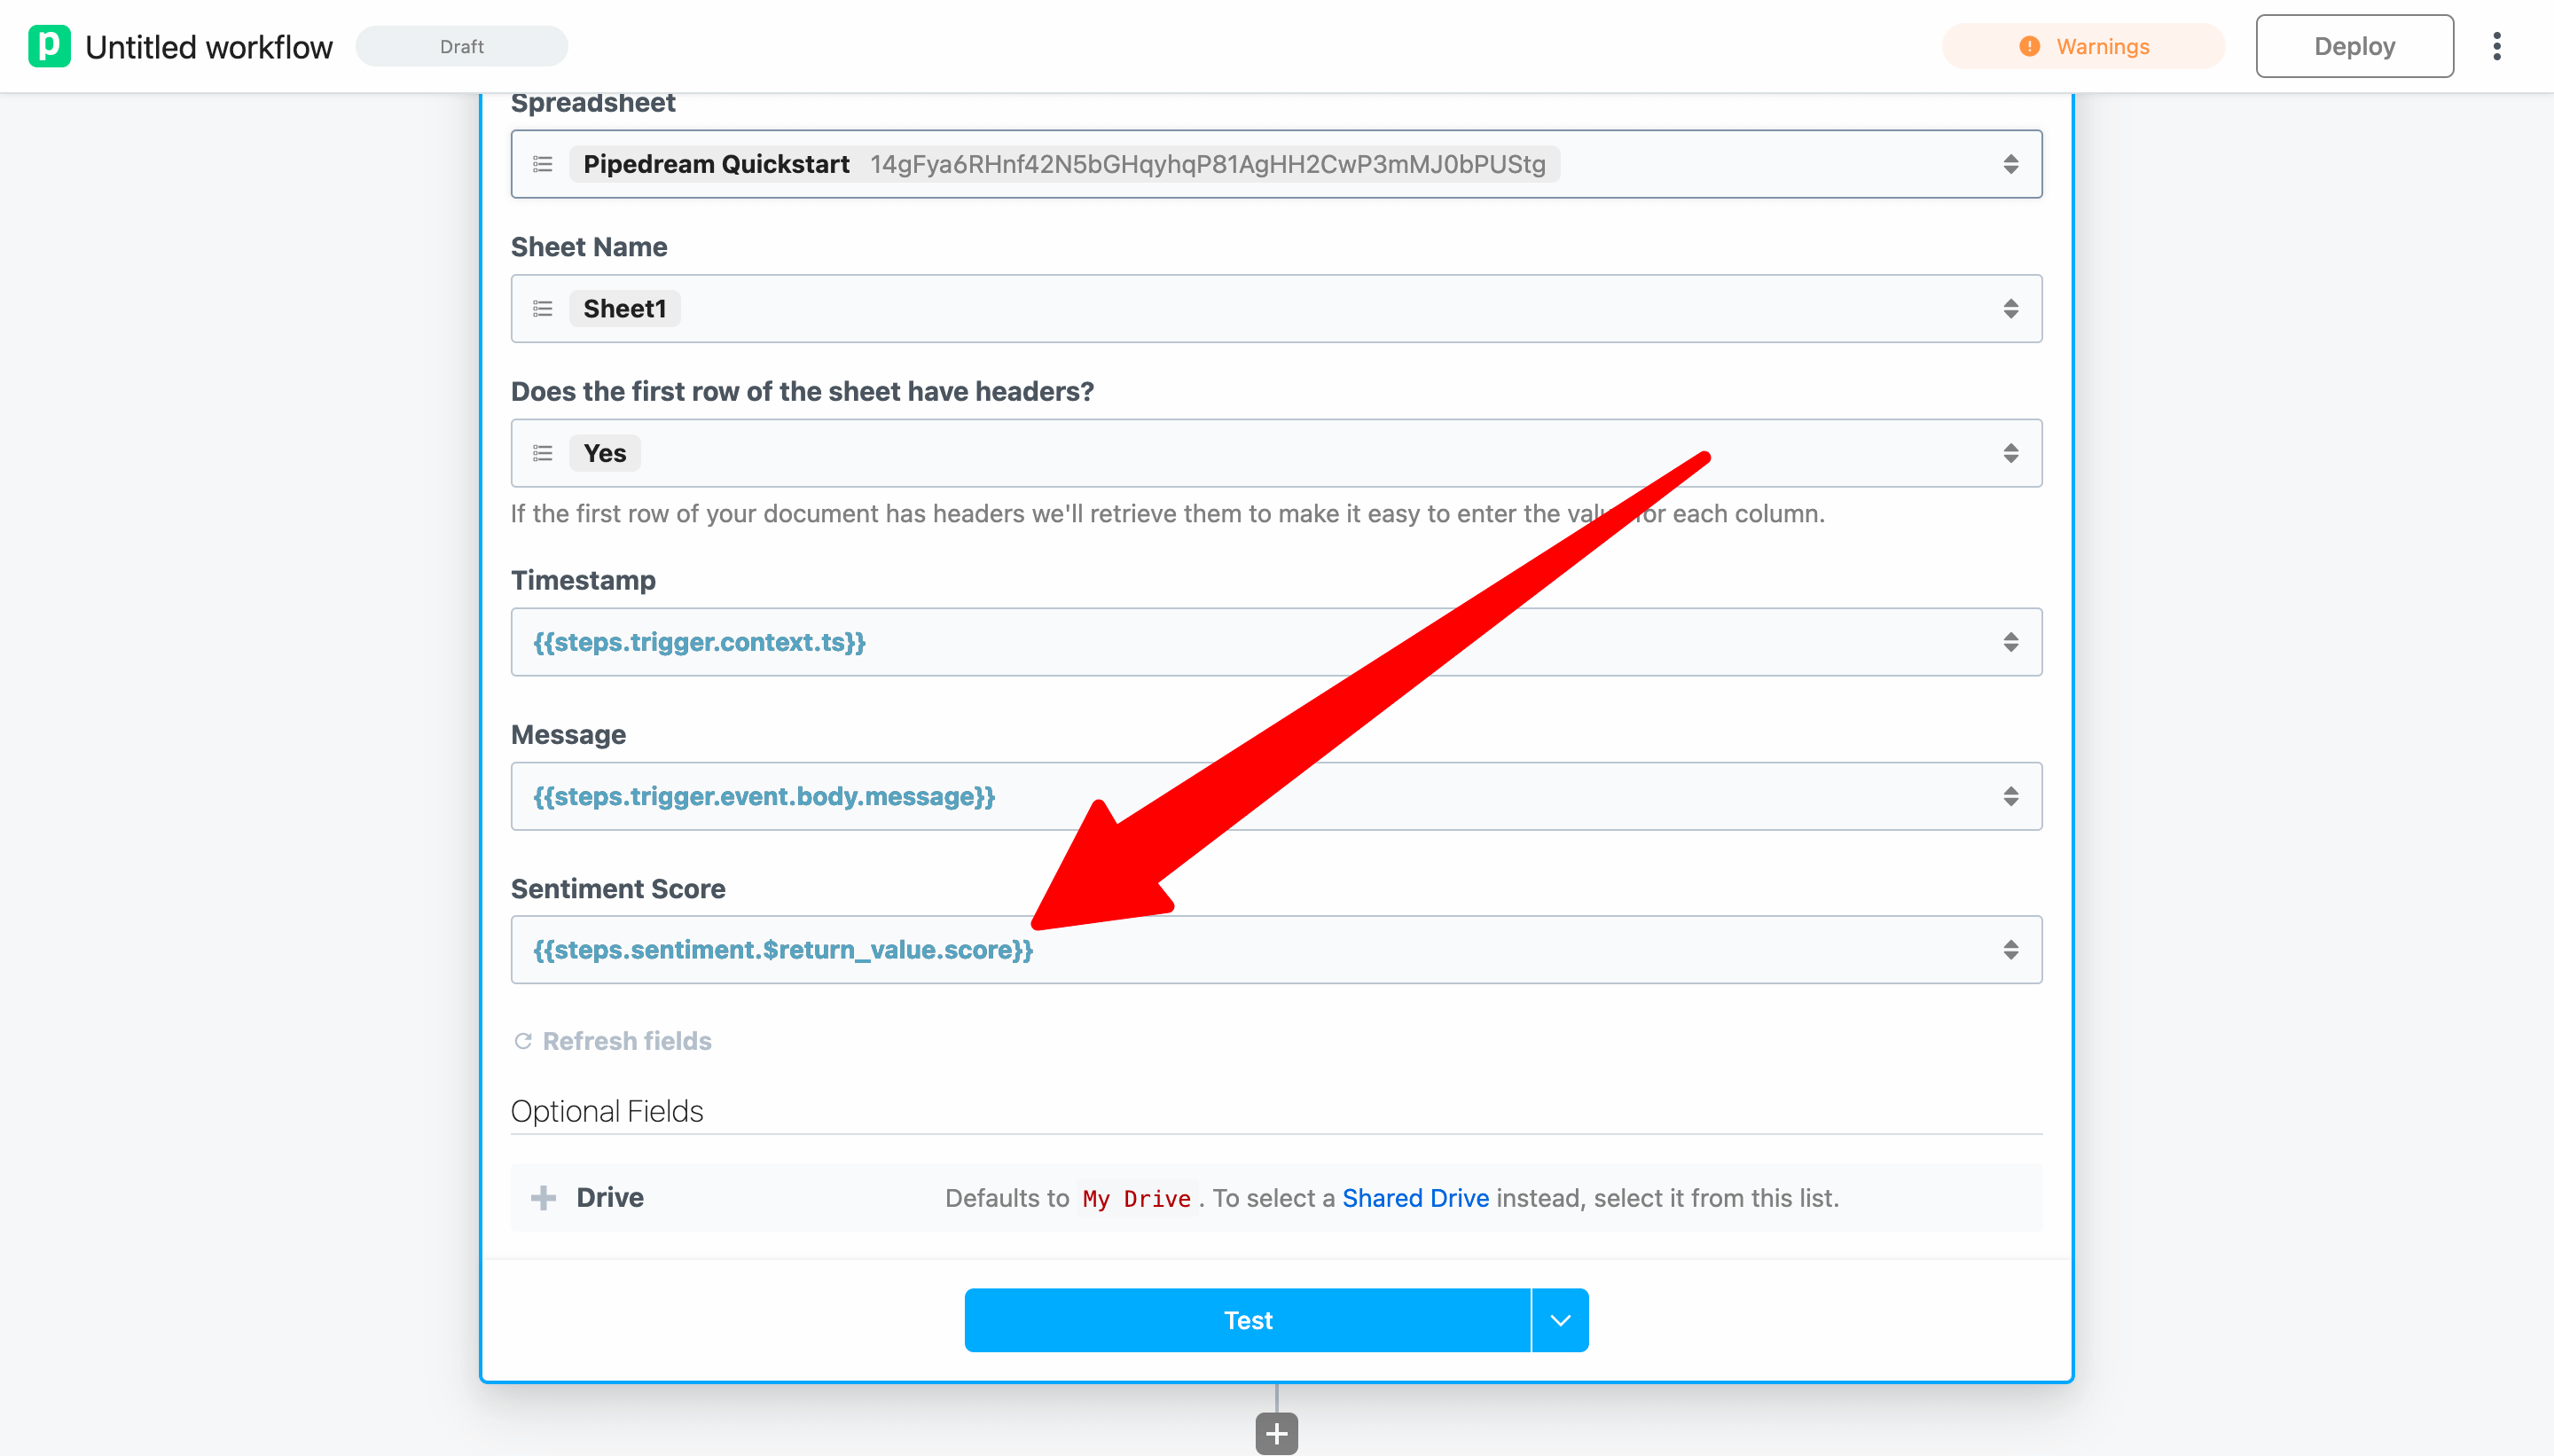
First, let's use the object explorer to pass the timestamp for the workflow event as the value for the first column. This data can be found in the context object on the trigger.
When you click into the Timestamp field, Pipedream will display an object explorer to make it easy to find data. Scroll or search to find the ts key under steps.trigger.context and click select path. That will insert the reference {{steps.trigger.context.ts}}:

Next, let's use autocomplete to enter a value for the Message column. First, add double braces {{ — Pipedream will automatically add the closing braces }}.
Then, type steps.trigger.event.body.message between the pairs of braces. Pipedream will provide autocomplete suggestions as you type. Press Tab to use a suggestion and then click . to get suggestions for the next key. The final value in the Message field should be {{steps.trigger.event.body.message}}.

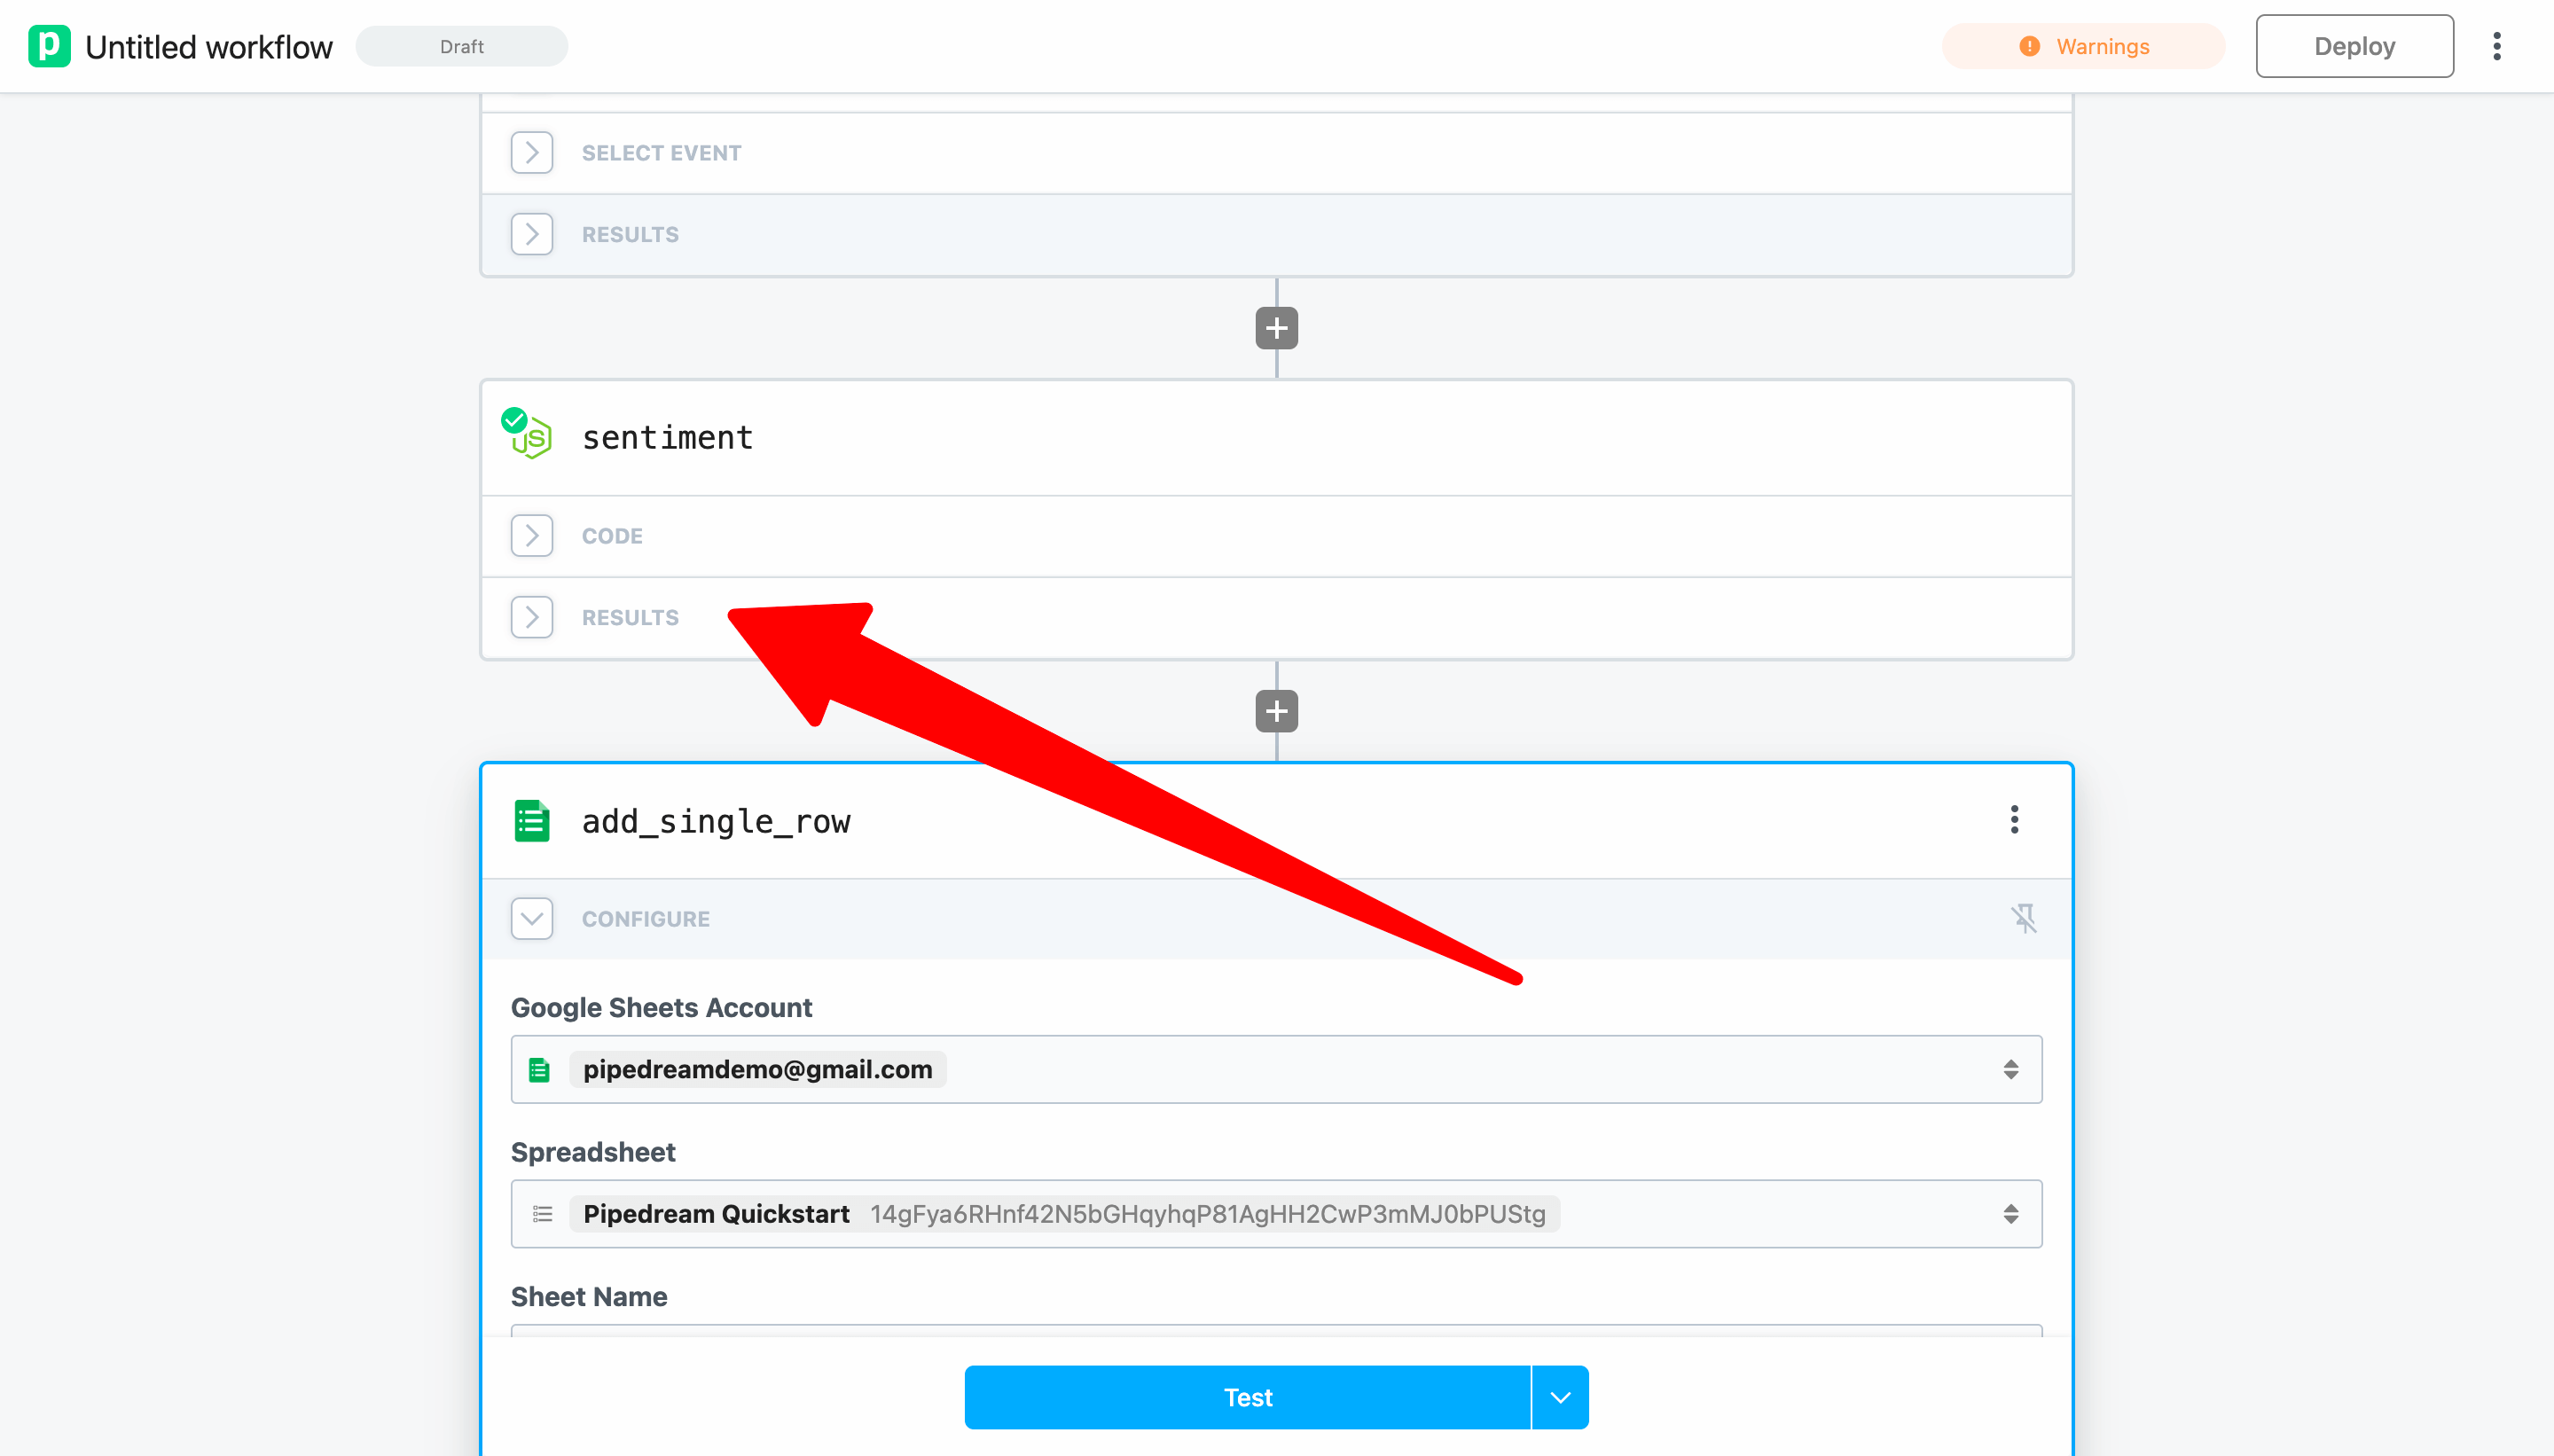
Finally, let's copy a reference from a previous step. Scroll up to the sentiment step and expand the results:
Next, click the Copy Path link next to the score.

Paste the value into the Sentiment Score field — Pipedream will automatically wrap the reference in double braces {{ }}.
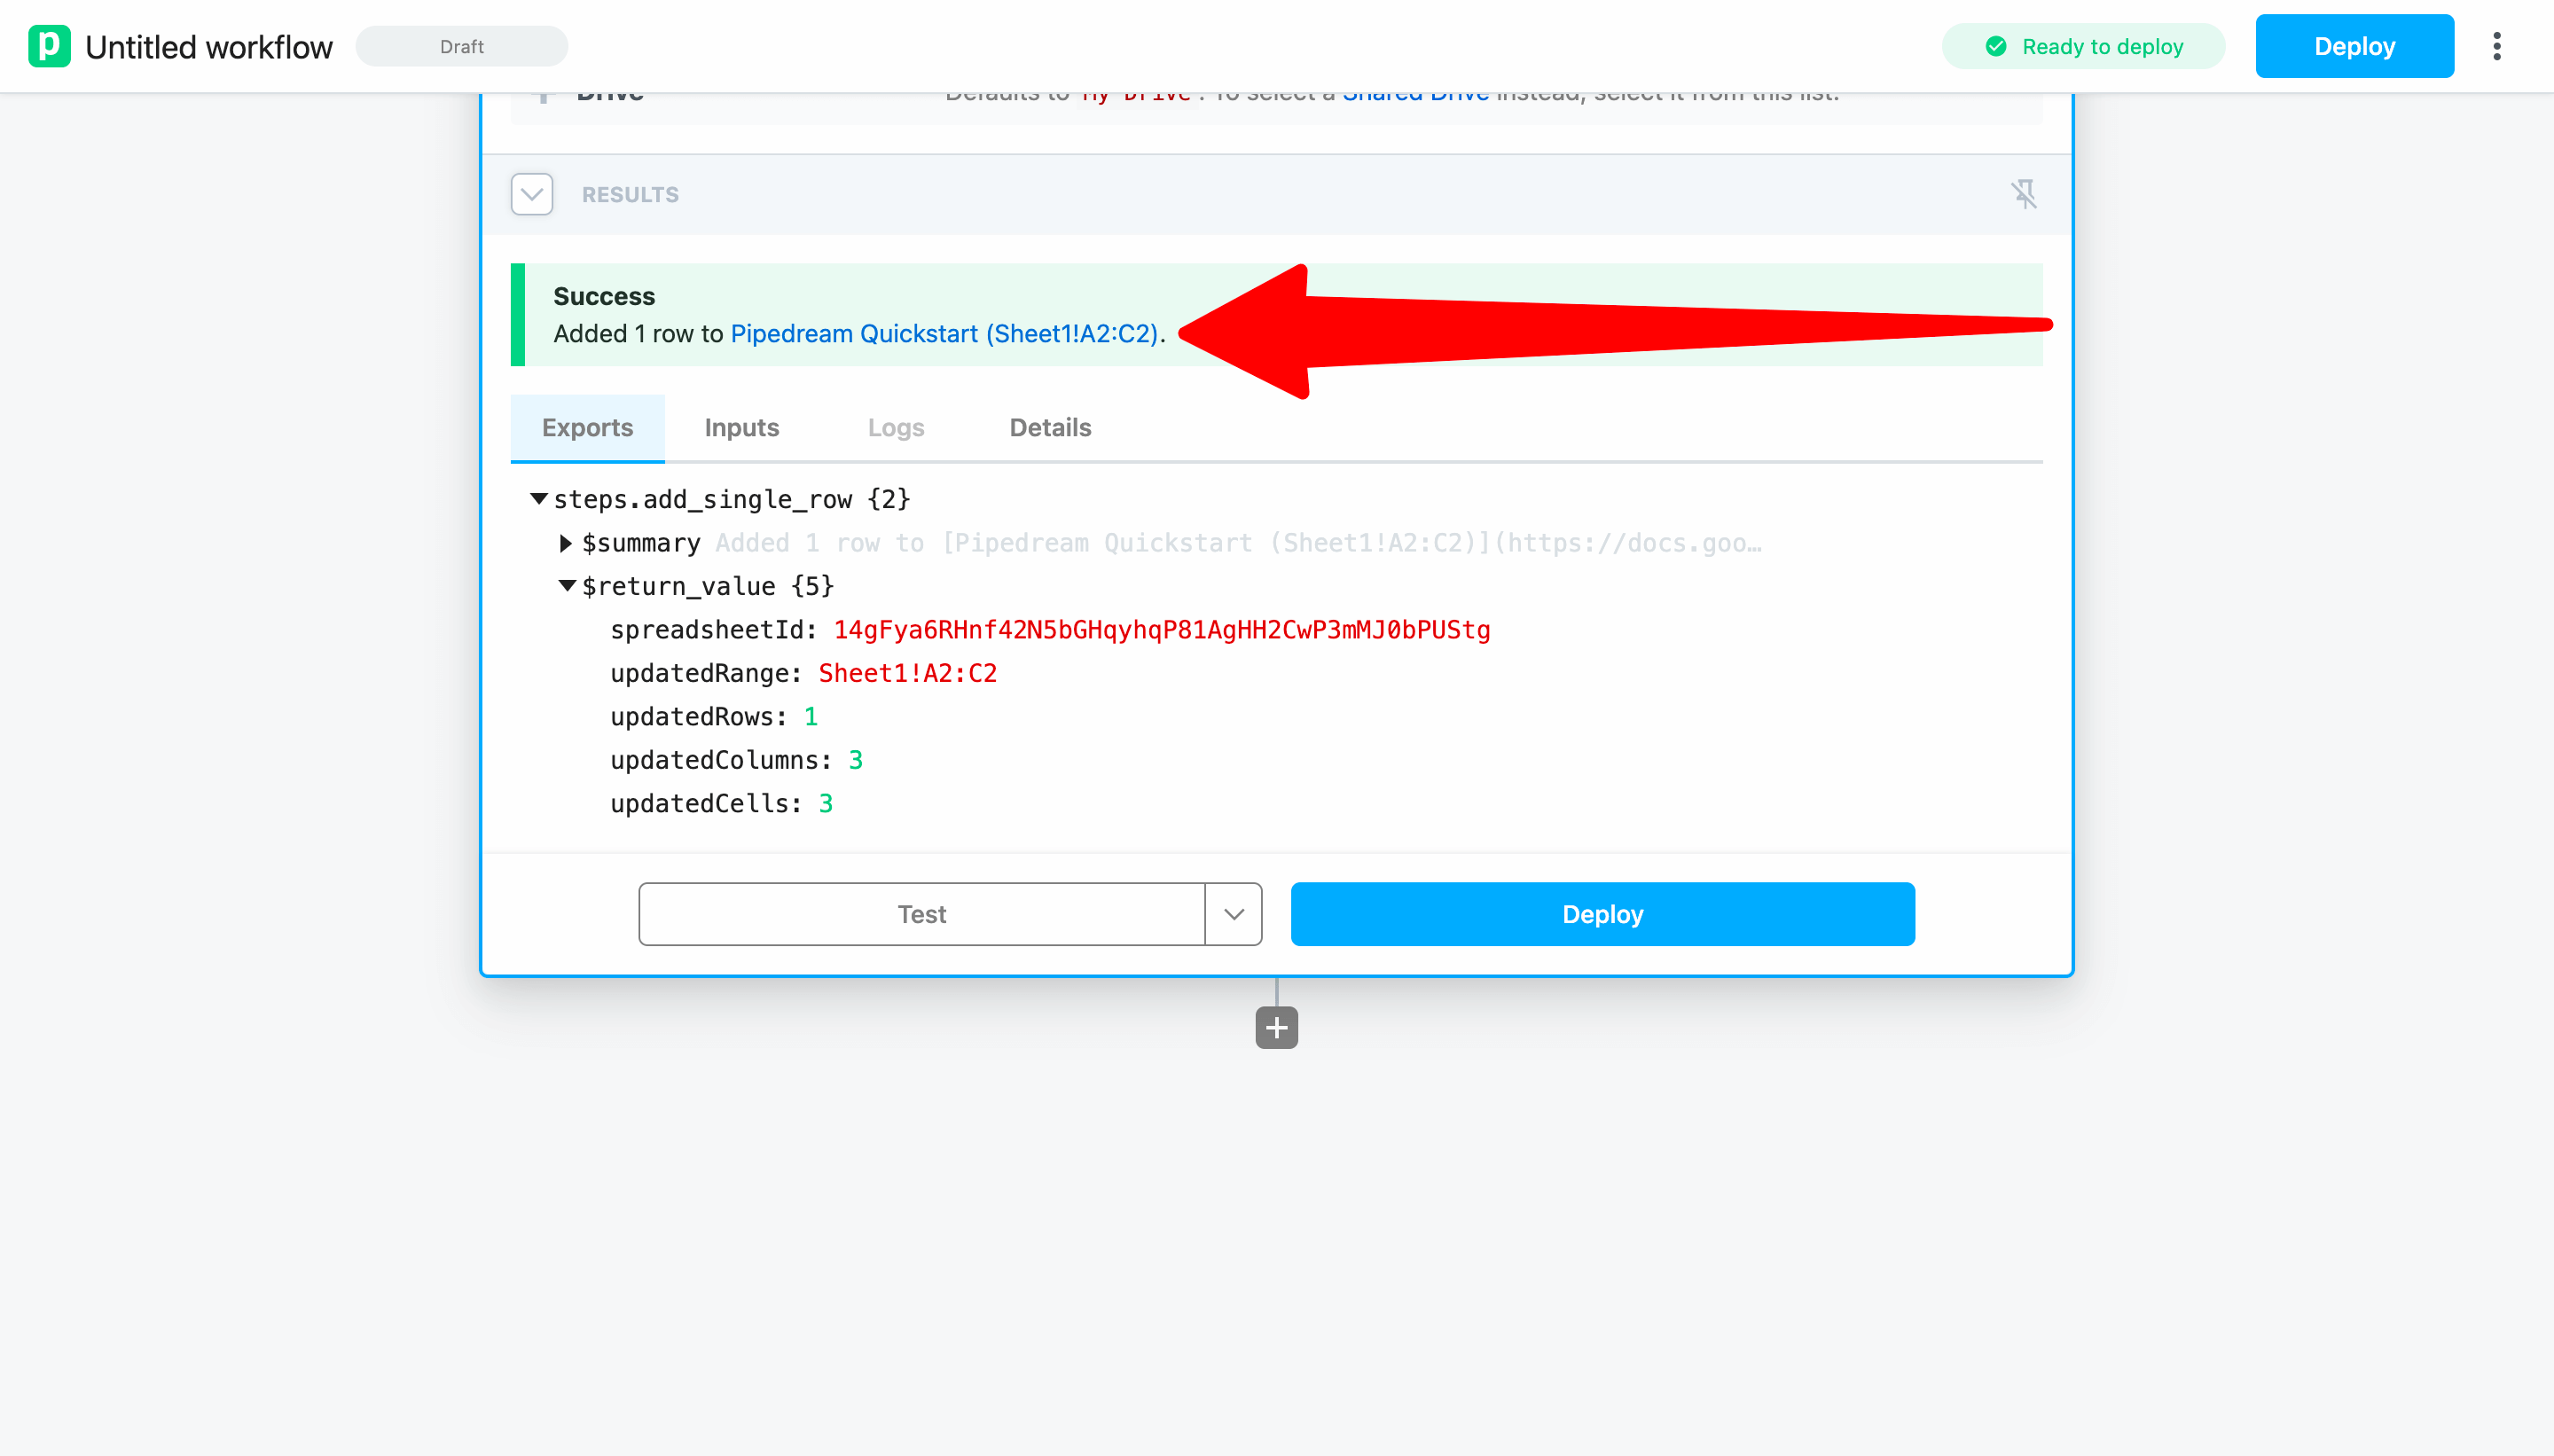
Now that the configuration is complete, click Test to validate the configuration for this step. When the test is complete, you will see a success message and a summary of the action performed:
If you load your spreadsheet, you should see the data Pipedream inserted.
Next, return to your workflow. Before you deploy, customize the name of your workflow:
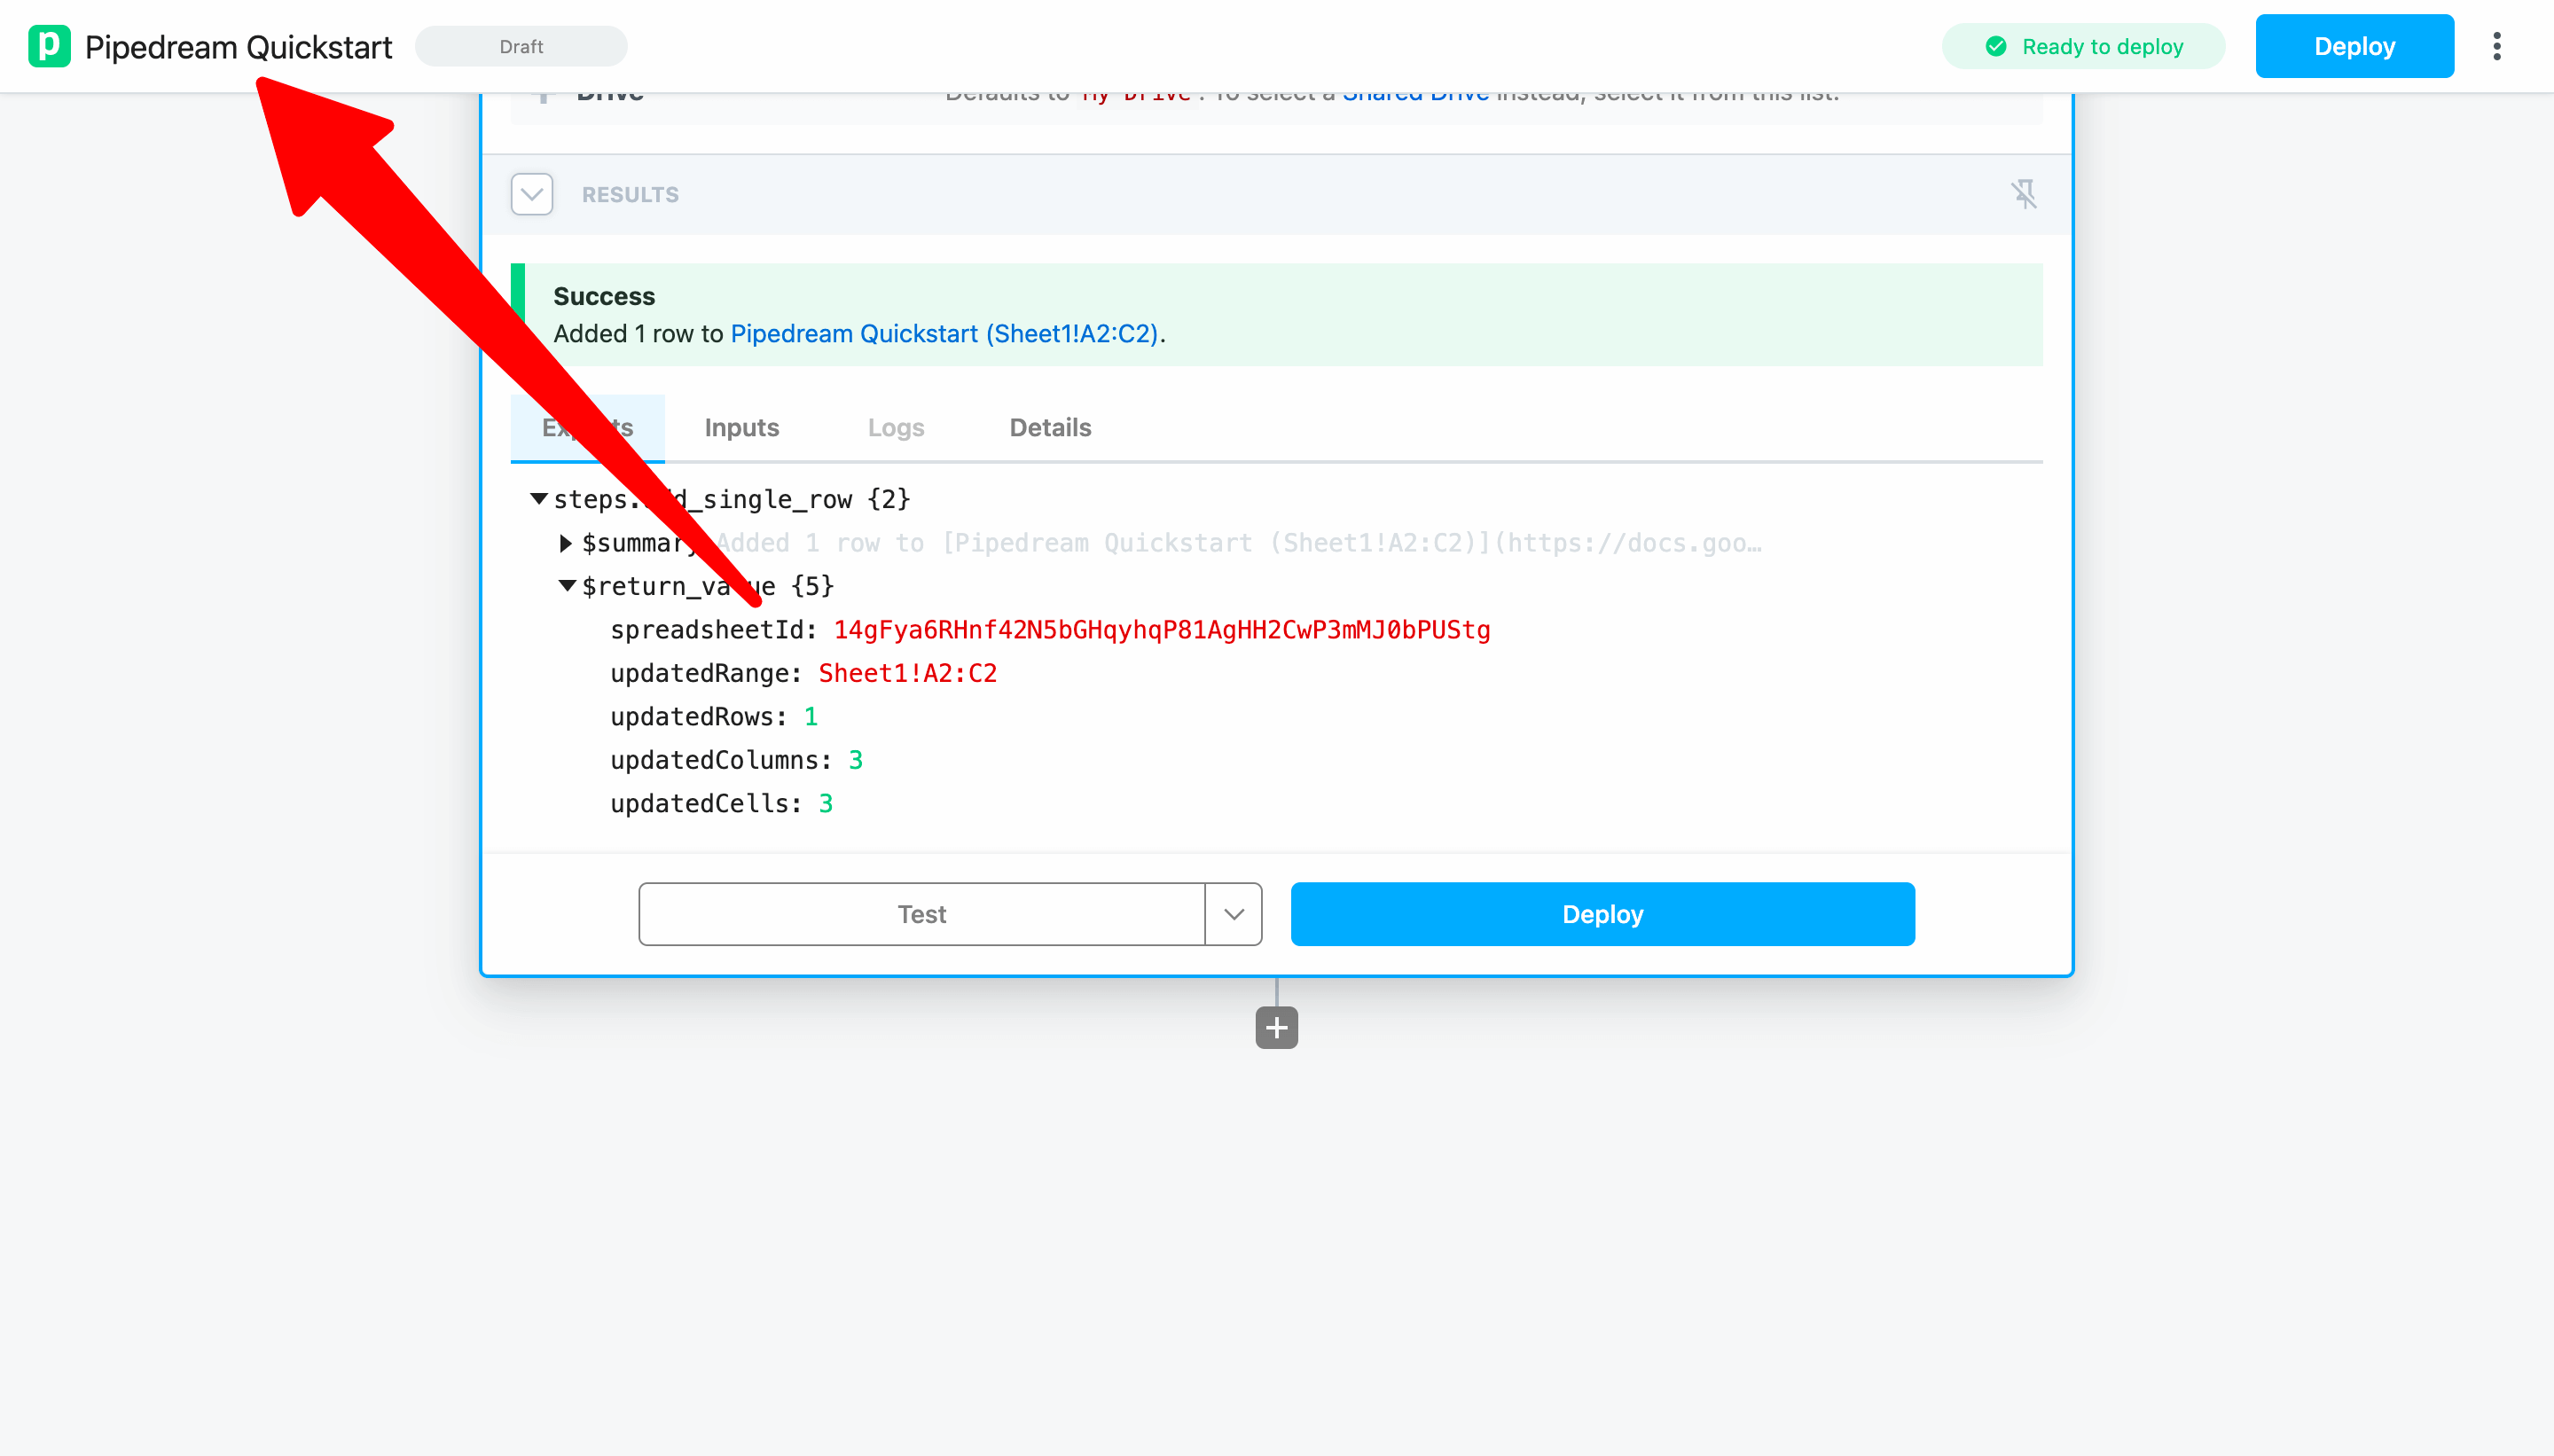
Then click Deploy to run your workflow on every trigger event.

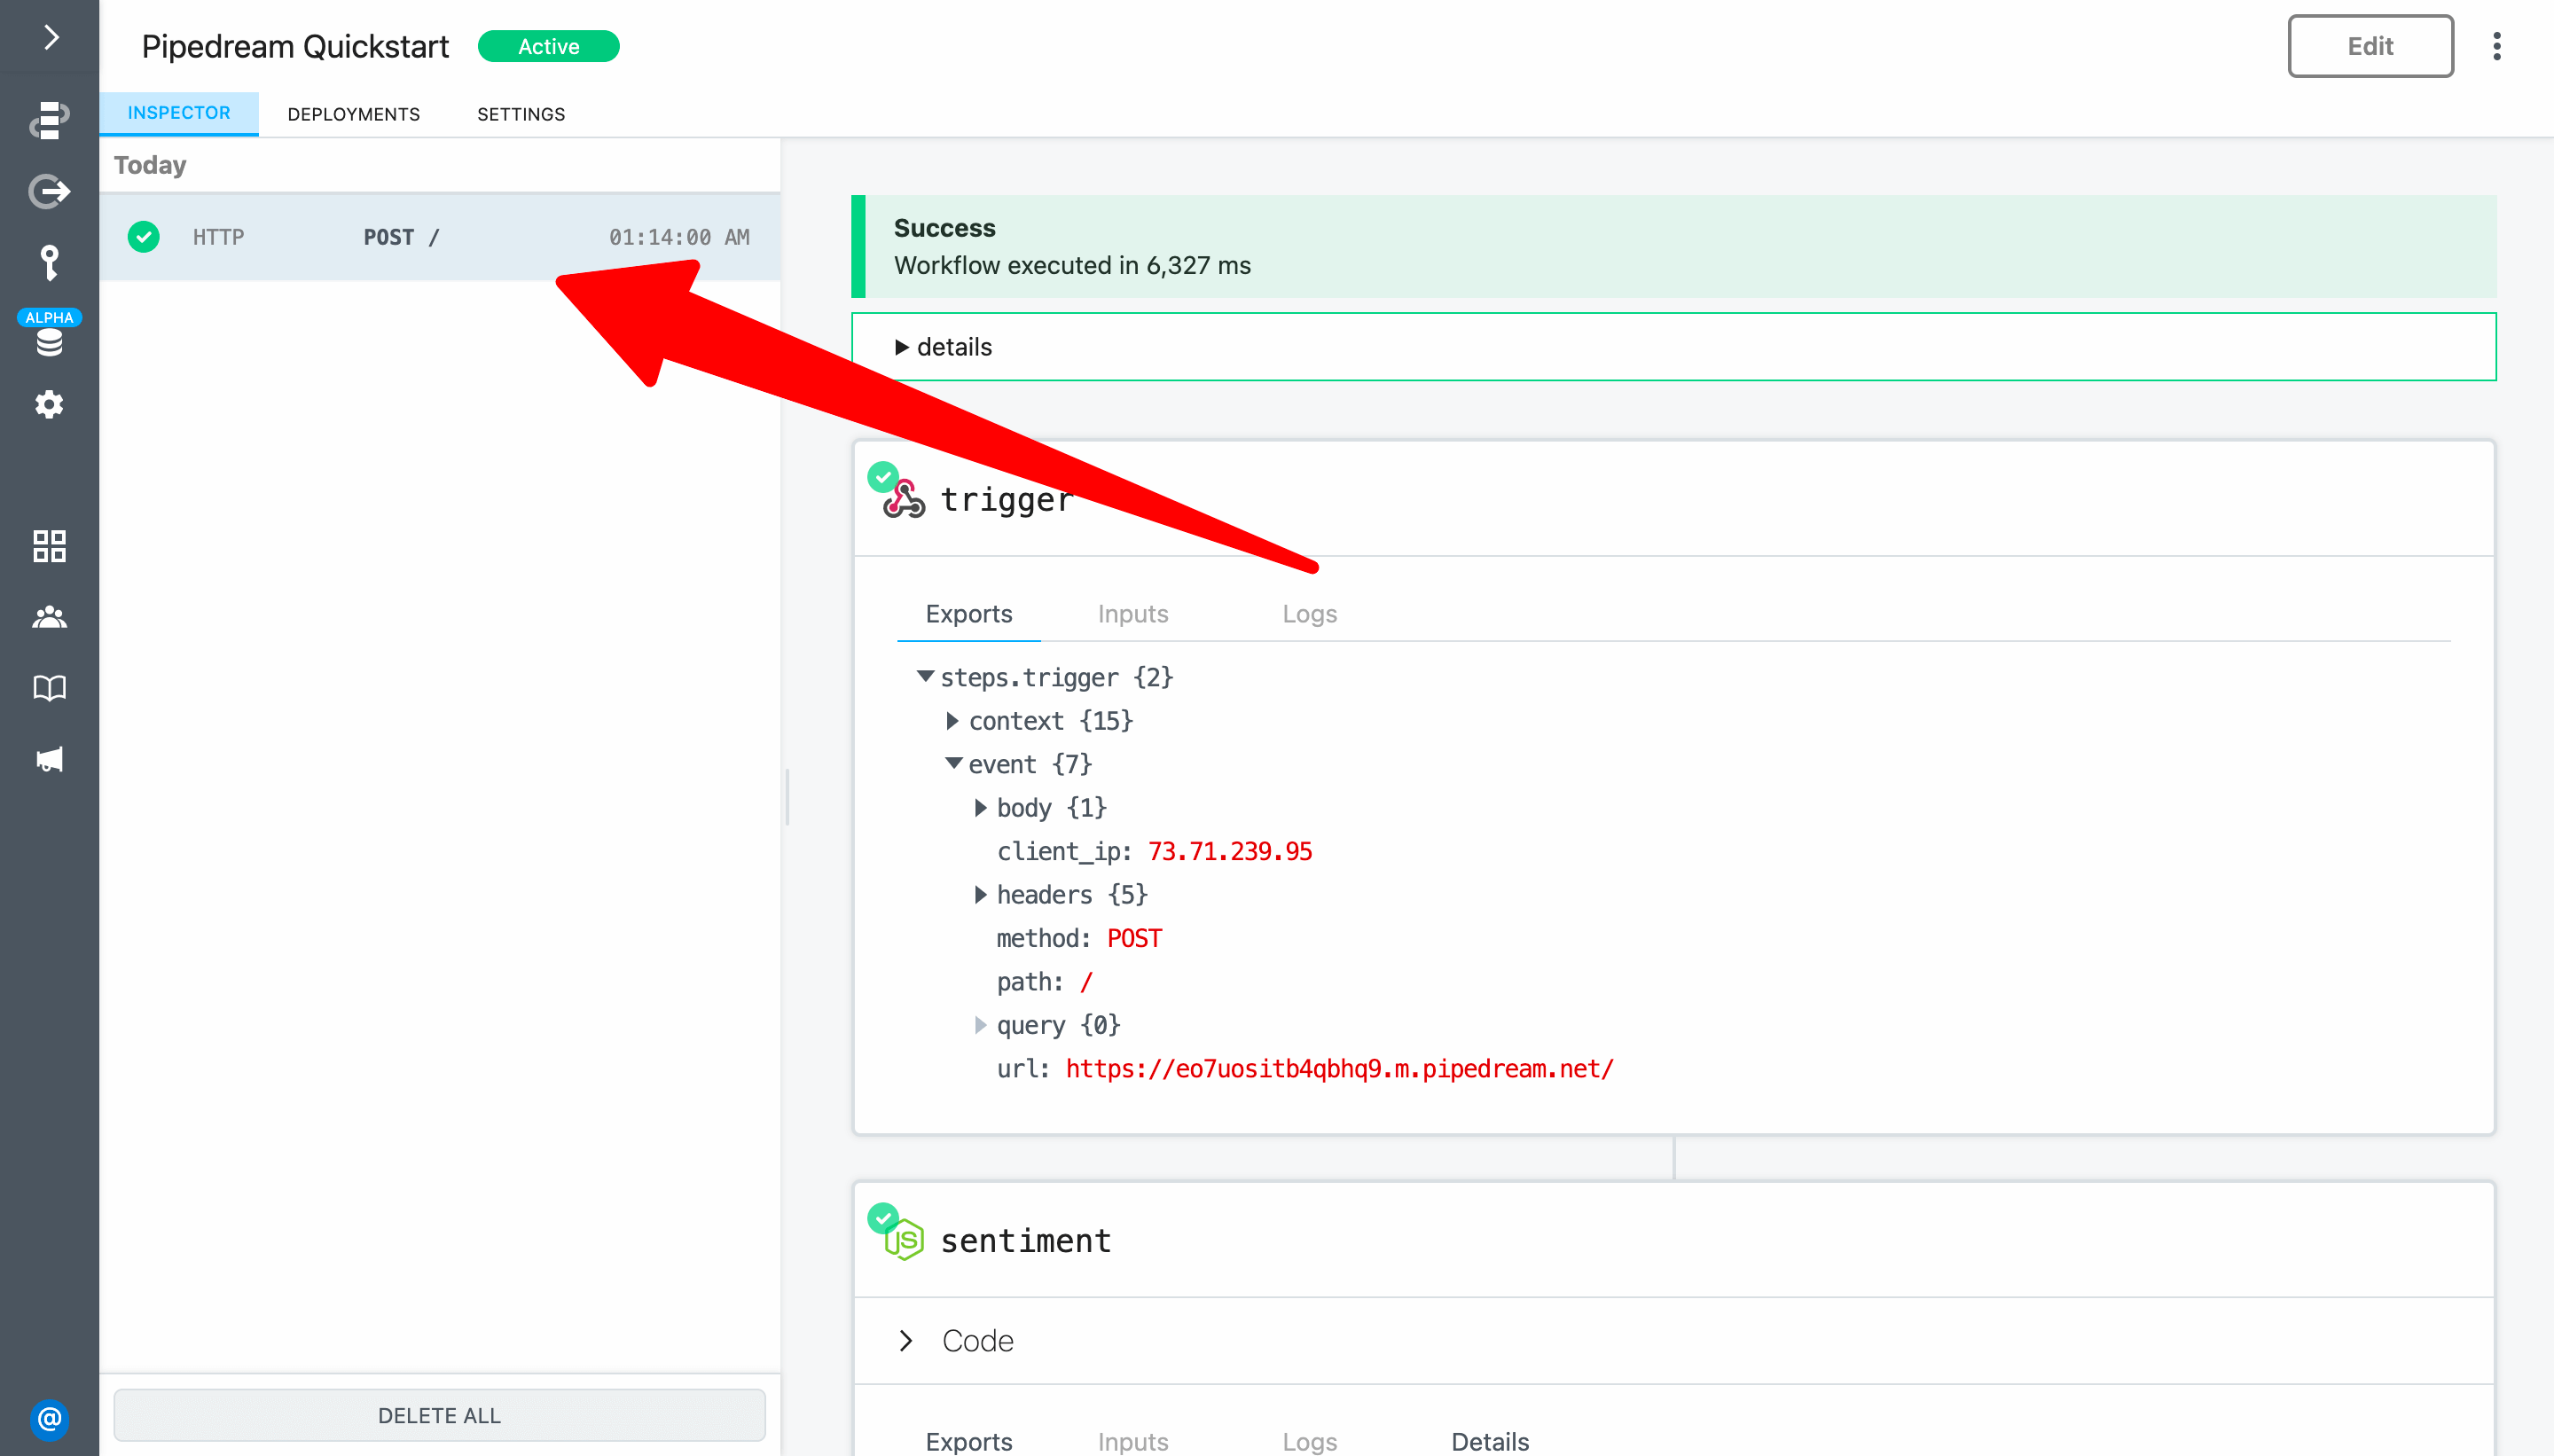
When your workflow deploys, you will be redirected to the Inspector. Your workflow is now live.
To validate your workflow is working as expected, send a new request to your workflow: You can edit and run the following cURL command:
curl -d '{
  "message": "Wow!!! Pipedream IS awesome and easy to use!!!"
}'   -H "Content-Type: application/json"   YOUR-TRIGGER-URL-GOES-HERE
The event will instantly appear in the event list. Select it to inspect the workflow execution.
Finally, you can return to Google Sheets to validate that the new data was automatically inserted.
# Next Steps
Congratulations! You completed the quickstart and should now understand the basic patterns for workflow development. Next, try creating your own workflows and check out the docs to learn more!